
The CoolerMaster QUBE 500 stands out with its unique, square shape that sets it apart from the typical e-sports design, offering a somewhat adorable look. This model comes in a special macaron edition with interchangeable panels in mint green, pink, and cream, in addition to the classic black and white versions. Its design incorporates flat-panel components to minimize packaging size, facilitating an enjoyable DIY assembly experience for users. This case also allows for various positioning options to suit different preferences.
Details:
- Model: Q500-DGNN-S00
- Available Colors: Black, White, Macaron (Mint Green, Pink, Cream)
- Materials: Steel, Plastic, Tempered Glass
- Dimensions: 380 x 231 x 381mm
- Compatible Motherboards: E-ATX (up to 273mm), ATX, M-ATX, ITX
- PCI-E Slots: 7
- Storage Options: 3 x 2.5” drives, 4 x 3.5” drives
- Maximum Graphics Card Length: 365mm
- CPU Cooler Height Limit: 164-172mm
- Power Supply Compatibility: ATX (max GPU distance 173mm in 1st slot, max space 216mm), SFX, SFX-L
- Fan Mounting Points:
- Top: 2 x 120mm or 2 x 140mm
- Side: 2 x 120mm or 2 x 140mm
- Bottom: 2 x 120mm or 2 x 140mm
- Rear: 1 x 120mm max
- Water Cooling Support:
- Top: 240/280mm (max thickness 53mm)
- Side: 240/280mm
- Bottom: 240/280mm
- Pre-installed Fan: 1 x 120mm (1800 RPM) SF ARGB White PWM
- Case I/O Ports: 2 x USB 3.0, 1 x USB-C 20Gbps, 1 x 3.5mm Audio Jack, Power and Reset Buttons
- Warranty: 2 Years
Tablet design components, fully modular design | CoolerMaster QUBE 500 unboxing
The CoolerMaster QUBE 500 distinguishes itself with its square shape and colorful panel options, offering a playful contrast to the typical e-sports aesthetic. A notable feature of this model is its dual-purpose “handles” which can be utilized as grips for carrying or as a base for vertical positioning. This innovative design also focuses on space efficiency and minimalism in packaging, requiring users to engage in a straightforward assembly process after purchase. The design allows for various installation configurations, enabling users to explore their creativity in setting up their systems.
The QUBE 500’s 380 x 231 x 381mm dimensions give it an almost square profile, offering versatility in how it’s oriented and internal components are arranged. Its compatibility extends to E-ATX motherboards with a width of up to 273mm. The power supply is mounted on the front panel in the standard setup, following a trendy layout. A power supply shorter than 173mm can accommodate graphics cards up to 365mm in length. It supports up to 280mm water cooling units at the front, top, and bottom. Additionally, if mesh side panels are employed, 280mm water cooling systems can be installed on the side, adding to its adaptability.
Free assembly, flexible space transformation | CoolerMaster QUBE 500 Assembly Instructions
CoolerMaster suggests a specific approach for setting up the QUBE 500: assemble the case before installing the components. It’s advised to plan ahead and decide on the preferred configuration mode since the setup for fans can vary based on the chosen layout.
The QUBE 500 employs a flat-panel design, with its packaging contents organized in layers. This efficient packing method reduces both the volume and the materials used by 45%. Each layer in the package aligns with a step in the assembly process, so avoiding hastily unpacking everything at once is recommended. Instead, users should first scan the provided QR code and follow the guided sequence for a more streamlined and less confusing assembly experience.


Assembling the CoolerMaster QUBE 500 is quite straightforward, mainly involving the joining of its six panels. The panels are connected using a mortise and tenon structure complemented by screws, ensuring a stable and secure assembly that doesn’t loosen over time.
The initial step in the assembly process is to fix the motherboard tray and rear panel in place. Once this is done, you can install the motherboard and the power supply. An exciting feature of the QUBE 500 is that it offers three levels of height adjustment for the power supply. This flexibility optimizes compatibility among the top cooling radiator, the power supply’s length, and the graphics card. More details on effectively utilizing this feature will be provided later in the guide.


After securing the motherboard tray and rear panel, the next step in assembling the CoolerMaster QUBE 500 involves installing the front and bottom panels. These panels also utilize the mortise and tenon structure for alignment and are further secured in place with screws. This method ensures that the panels are firmly attached, contributing to the overall stability and robustness of the case. Once these panels are in place, the case starts taking shape, preparing it for the subsequent installation of internal components and hardware.


Following installing the front and bottom panels on the CoolerMaster QUBE 500, the next step is to attach the top panel along with the front and top trim panels. After these are in place, the glass side panels and back panels are added. This completes the basic structure of the chassis, giving it its distinctive appearance.
For those opting to install water cooling, a convenient approach is to first attach the radiator to the top panel before mounting this panel onto the case. This method can simplify the installation process. However, the traditional method of installing the radiator after the case is fully assembled is also viable if preferred. This flexibility in the assembly process allows users to choose the method that best suits their needs and preferences. The QUBE 500’s design accommodates various installation styles, making it a versatile option for various PC builds.


The Art of Choice | CoolerMaster QUBE 500 Compatibility Introduction
The CoolerMaster QUBE 500, when measured without its handles and feet, has dimensions of 380 x 231 x 381mm. This size allows it to accommodate E-ATX motherboards that are up to 273mm in width. However, it’s important to note that installing an E-ATX motherboard of this size may obstruct the right-side cable management holes. As a result, for a more seamless fit and easier cable management, it is recommended to use an ATX-size motherboard.
Regarding graphics card compatibility, the QUBE 500 can house cards up to 365mm in length. There’s a crucial consideration regarding the power supply length: if it exceeds 173mm, it may interfere with the graphics card. This potential conflict depends on the specific dimensions of both the power supply and the graphics card. In cases where the graphics card is shorter, measuring 275mm in length, the case can accommodate a power supply up to 216mm in length. This flexibility in sizing allows for a range of hardware configurations, making the QUBE 500 a versatile option for various PC builds.


With a power supply length of 17cm (170mm) in the CoolerMaster QUBE 500, there will be approximately 2cm of clearance from the graphics card, assuming the graphics card is installed in the second PCIe slot. This clearance is typically sufficient to ensure that both components fit without interference, allowing for adequate airflow and cable management.
The design of the QUBE 500, with its adjustable power supply mount, provides flexibility in accommodating different sizes of power supplies and graphics cards. This 2cm gap is particularly beneficial for ensuring that larger, more powerful graphics cards have enough space, which is crucial for maintaining optimal operating temperatures and overall system performance. Considering these spatial relationships when planning a PC build is essential to ensure compatibility and efficient operation of all components.
The CoolerMaster QUBE 500 offers the option for an upright (vertical) installation of the graphics card. To utilize this feature, you must acquire an additional graphics card extension cable, often called a riser cable. This setup can provide a more visually appealing graphics card display, primarily through a glass side panel.
However, when opting for this vertical mounting, it’s essential to consider the length of the power supply, as it may conflict with the graphics card’s placement. In the provided example, a 17cm (170mm) power supply does not pose an issue. On the other hand, if you were to use a shorter power supply, such as one that is 14cm (140mm) in length, there should be no concerns regarding space conflict. This information is crucial for ensuring that all components fit properly without impeding each other, which is especially important in a case with multiple configuration options like the QUBE 500. Proper planning and consideration of component sizes are critical to a successful and efficient PC build.

Regarding cooling, the author suggests an air-cooled heatsink with a maximum height of 173mm, achievable without side brackets. This size accommodates most top-tier air-cooled heatsinks. For the radiator section at the top, it’s compatible with 280/240mm radiators. However, when using a 280mm radiator, the power supply must be adjusted to its lowest setting, and the total thickness should not exceed 53mm. Standard 280mm integrated water-cooling systems typically require a slimmer fan replacement. The front can accommodate up to a 280mm water-cooling system too, but it necessitates relocating the power supply to the bottom rear. The bottom section can also fit a 280mm water-cooling system.


The side of the unit features a cooling radiator bracket that can accommodate water cooling systems up to 280mm. To ensure adequate airflow, it’s essential to swap the glass side panel with a mesh panel. Alternatively, installing a fan adjacent to the graphics card can aid in heat dissipation. However, subsequent temperature tests indicate that there’s generally no need for additional measures to enhance the cooling of the graphics card.


The QUBE 500 has an integrated 120mm SF ARGB White PWM fan. This fan can reach a top speed of 1800 RPM and connects via standard PWM 4-pin and 5V 3-pin ARGB interfaces.

For the QUBE 500 with a front-mounted power supply, there’s space to install a single 120mm fan at the front. However, when set to the highest gear, the power supply’s length is restricted to a maximum of 173mm.

Regarding storage capacity, despite its compact dimensions, the QUBE 500 surprisingly accommodates up to four hard drives, compatible with both 3.5″ and 2.5″ sizes. It houses three 2.5″ hard drives on its back and one 3.5″ hard drive on the back panel. Additionally, one hard drive can be placed on each of the case’s top, bottom, and side. However, installing these drives may require sacrificing fans or radiators, so it’s a matter of personal preference and needs.


Despite its relatively small size, the QUBE 500 offers approximately 30mm of space at the back for cable management. It has several holes designed for securing straps and assisting with cable routing. This layout significantly simplifies the wiring process, making it quite user-friendly. The top cover of the QUBE 500 is removable, ensuring easy access to all areas and eliminating any issues with hard-to-reach places during assembly or maintenance.


The QUBE 500 allows for the power supply installation beneath the graphics card, with grooves at the bottom of the case for secure placement. However, actual testing has revealed a slight conflict with the motherboard’s bottom socket when configured this way. Additionally, this setup can obstruct the air inlet for the graphics card, making it more suitable for using an external SFX/SFX-L power supply. One of the significant benefits of this arrangement is the ability to install a front 280mm water cooling system, which significantly enhances CPU cooling. This setup also offers more flexibility for custom water cooling solutions.


Mint green, pink, cream | QUBE 500 Macaron Limited Edition QUBE 500 Macaron Limited
The Edition of the case provides options for three-panel colors: mint green, pink, and cream. Each panel has integrated dust filters, including the top, front, bottom, and back. These additions ensure that the case maintains its aesthetic appeal, texture, and functionality, even with DIY assembly. For connectivity and controls, the case’s IO panel includes two standard USB-A ports, one USB-C port capable of 20Gbps, a 3.5mm headphone jack, and a power button.


The accessory set includes two handles, one in gray and the other in green, which can also serve as bases for the case. However, it’s noted that the green handle doesn’t aesthetically complement the cream and pink panels. The most visually appealing option might be to install only the gray handle at the rear of the case. Fitting the carrying handle at the front could hinder the usability of some USB devices, so it’s something to consider when customizing the setup.


If using the handle as a foot pad isn’t preferred, the QUBE 500 also comes with four-foot pads that can be installed on five sides of the case. This means that installation holes are available on every side except the side with the glass panel. This flexibility allows for various configurations depending on personal preference or spatial requirements.


The QUBE 500 additionally offers a test platform mode, which essentially comprises a motherboard tray, foot pads, and a power bracket. This mode simplifies the structure, focusing on the core components for testing or showcasing purposes. The chassis’s IO can be detached and reinstalled on the tray, providing flexibility and ease of access for various configurations or testing scenarios. This feature makes the QUBE 500 versatile, catering to both regular use and specialized setups like test benches.


CoolerMaster brings two small accessories for the QUBE 500-hole panel, which can be used to hang headphones or auxiliary cable routing. It even provides 3D graphics files for players to 3D print or design the pendants they want.


CoolerMaster QUBE 500 heat dissipation test
The QUBE 500, with its integrated 120mm rear fan, underwent a heat dissipation test using a 240mm water cooling system mounted on the top for exhaust, without any additional fans. The test focused on the Intel Core i9-14900K, a processor known for its high power consumption, hence the suggestion to use power consumption wattage as a benchmark for heat dissipation.
Test Setup Details:
- Processor: Intel Core i9-14900K
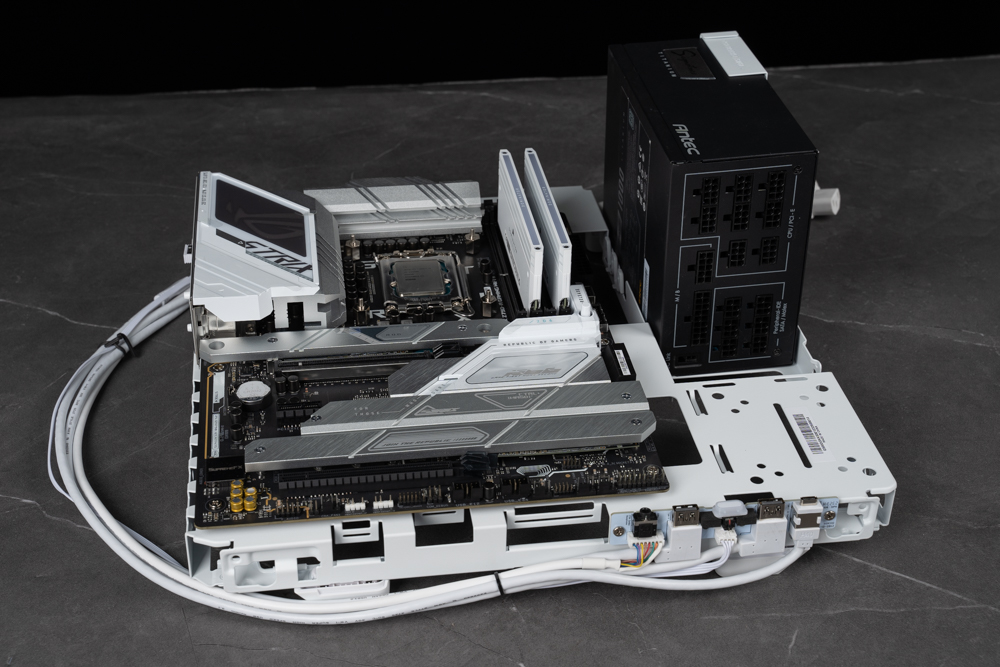
- Motherboard: ASUS ROG Strix Z790-A GAMING WIFI II
- Graphics Card: ASRock Radeon RX 7800 XT Steel Legend
- Memory: CORSAIR DOMINATOR TITANUM DDR5 7200MT/s, 24GBx2
- Operating System: Windows 11 PRO 23H2
- Radiator: CoolerMaster MasterLiquid 240L Core ARGB
- Power Supply: CoolerMaster V1100 SFX
During the test, the i9-14900K reached a temperature of 93 degrees Celsius under a 250W power consumption in the AIDA64 CPU, which exceeded expectations for a 240mm water cooling system. Without additional fans for the water cooling, the graphics card maintained a temperature of around 60 degrees Celsius.
The QUBE 500 offers various cooling options. The author recommends an air-cooled radiator, as the top-mounted water cooling is significantly affected by the graphics card’s heat. A 280mm water cooling system on the side or front is advised for optimal CPU cooling, as it intakes air externally and isn’t influenced by the graphics card’s heat. For less demanding CPU cooling requirements, top-water cooling is a viable option.
Summarize

The actual assembly of the QUBE 500 is notably straightforward and not troublesome. Following the official instructional video, components can be installed while assembling the case, leading to an almost seamless building process. One of the key highlights is the absence of unnecessary space or obstructions, contributing to a smoother assembly experience. This ease of DIY assembly is a major advantage of the QUBE 500, allowing enthusiasts to enjoy the process without undue difficulty.
The QUBE 500 utilizes a front-mounted power supply configuration in its standard mode. This setup means that the top-mounted water cooling system, power supply, and graphics card must share the total height within the chassis. Consequently, if a longer power supply is installed, it could potentially reduce the available space for the cooling radiator and graphics card. However, in practice, if the length of the power supply is kept around 14cm, it generally does not interfere with the compatibility and wiring space between the radiator and the graphics card.
While some might view the inability to accommodate a 360mm radiator as a drawback, given the case’s size, the unique near-square shape of the QUBE 500 makes it distinctive. This design may not appeal to everyone, but those who appreciate its form factor will likely find it highly satisfying.
If this article is helpful for you, please share this article with your friends on social media. Thank you!
This article is based on the personality of the reviews. You are responsible for fact-checking if the contents are not facts or accurate.
Title: Modular Chic Meets Functionality: Exploring the CoolerMaster QUBE 500