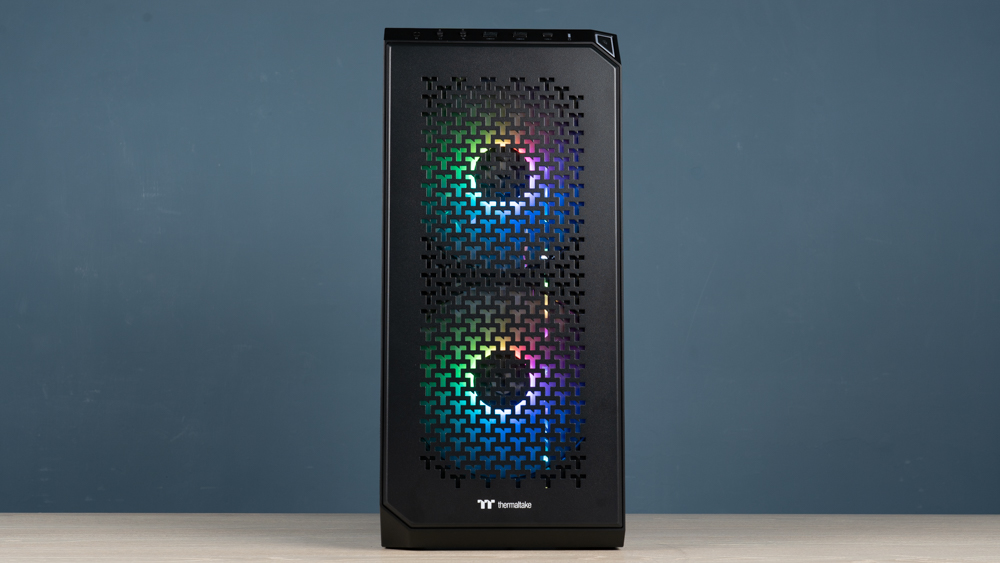
When choosing a case, when it comes to the choice of aesthetics or heat dissipation, is it always impossible to make a clear decision? But don’t worry, the View 300 MX is attached to two front panels with different orientations at one time, players can meet the needs of different orientations at one time.
As a new model of the popular series “View”, the View 300 MX has many customizable modular designs. During the installation process, adjustments and changes can be made according to the different needs of consumers to make the case the most optimal. The type that meets your needs, there is a patented design of the display card mounting bracket at the rear, and there is a modular concept in another direction in the installation mode of the display card.
Thermaltake View 300 MX Specifications:
Dimensions: 506 (L) x 230 (W) x 505 (H) mm
Colour: Black
Material: Steel, Tempered Glass, Resin
Motherboard: E-ATX, ATX, M-ATX, Mini ITX
CPU Air Cooling: Up to 175mm
Graphics Card: 400mm (280mm left after side water cooling installation)
Power Supply: ATX 200mm
Pre-installed Fans (Front + Rear): 200mm 2+0, 120mm 0+1
Fan Installation (Front +top+rear+side): 200mm 2+1+0+0 pcs, 140mm 3+2+0+0 pcs, 120mm 3+3+1+3 pcs
Water cooling row Support: Front and top 360/280mm, side 360mm, rear 120mm
Top I/O ports: USB 3.0 x2, USB3.2 Gen2 Type-C x1, HD AUDIO, ARGB lighting control keys
Hard disk and storage slots: four 2.5″, and two 3.5″ (2.5″ compatible)
Thermaltake View 300 MX Unboxing
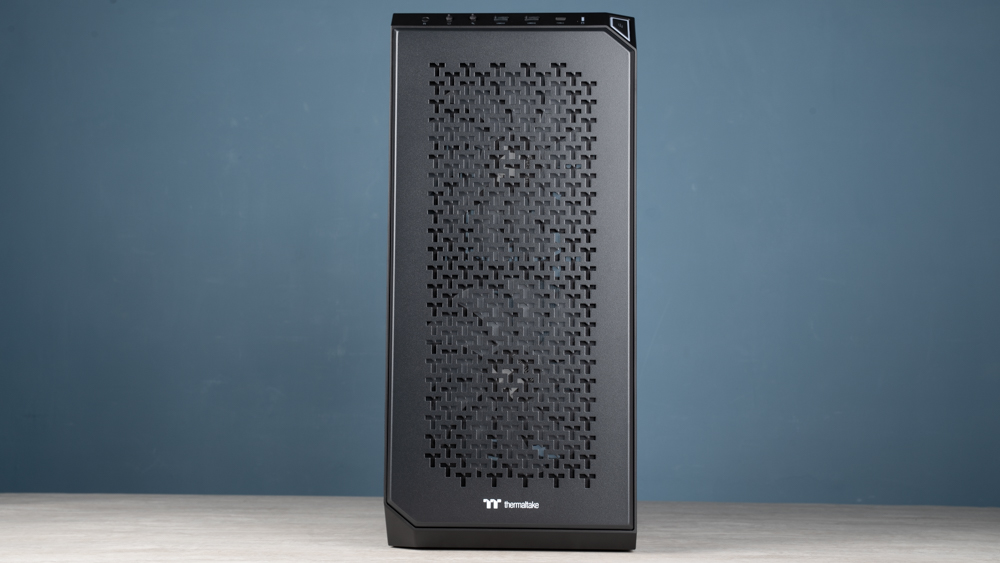
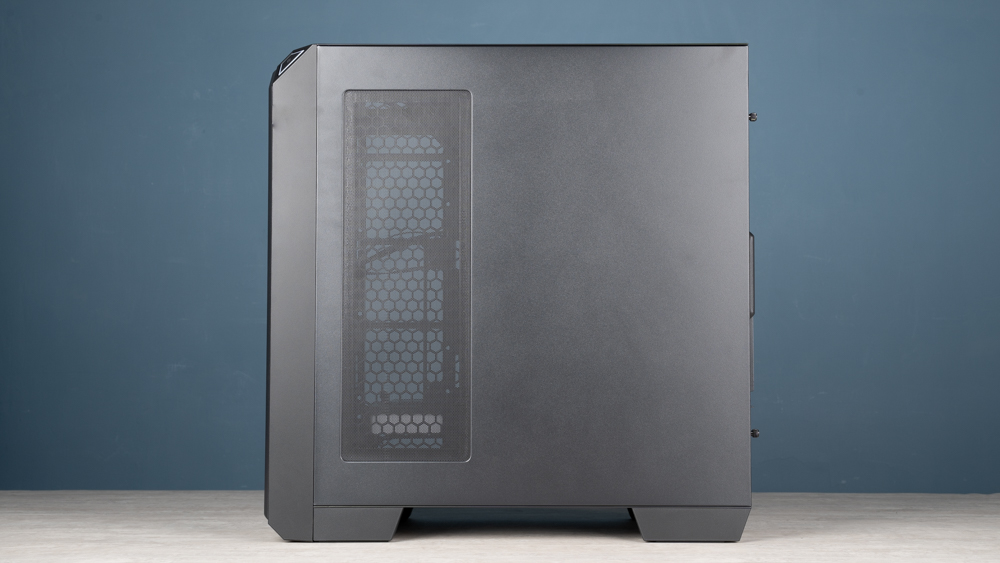
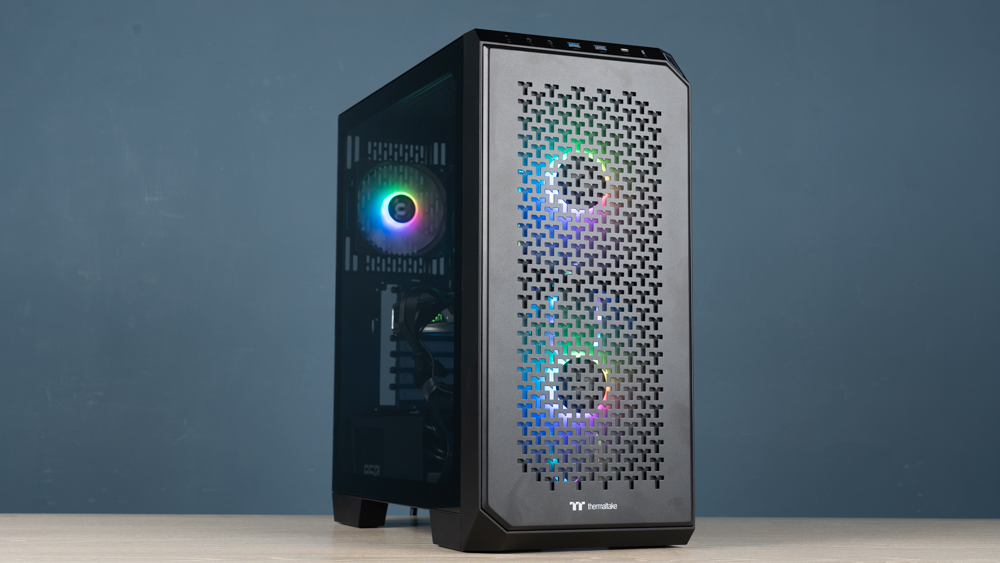
View 300 MX is available in black and white this time. The dimensions of the case itself are 50.6 x 23 x 50.5 cm. The size is classified as a mid-tower size vertical case on the official website. The entire case can be installed at most There are ten 12cm fans, and there are four-direction fans and water-cooling row installation positions, and the heat dissipation performance points are quite sufficient.
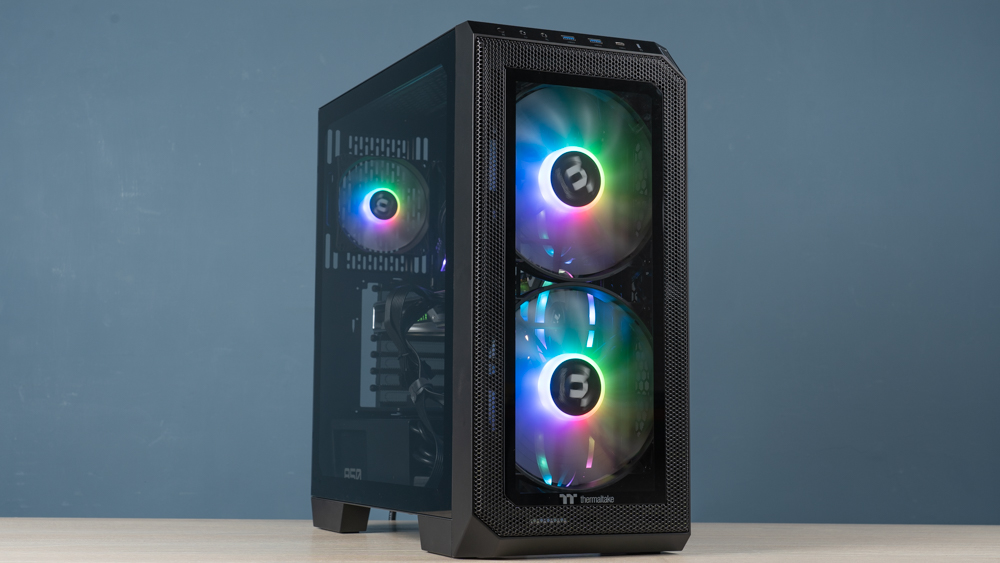
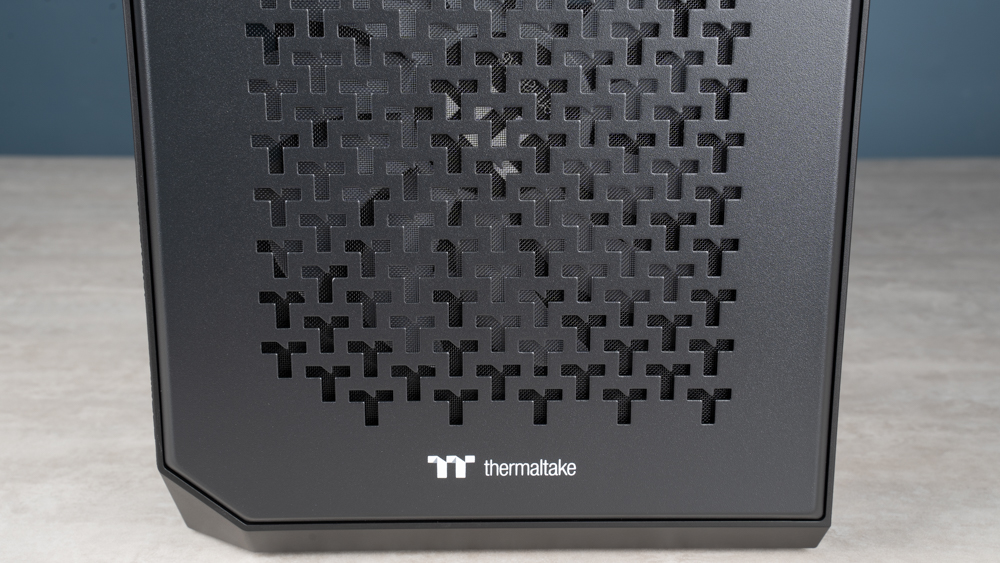
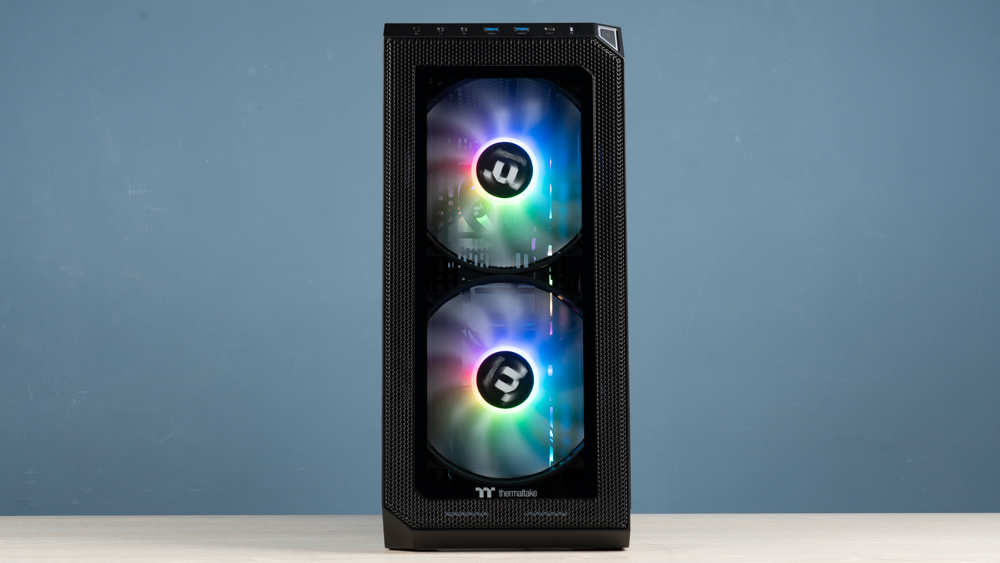
Thermaltake is pre-installed with a tempered glass front panel before leaving the factory, and the appearance of the fan is very high. If players want the front panel of the case to have a brighter display, this mode will definitely satisfy most of the exterior users. Although the panel is mostly made of tempered glass, there are still mesh holes on the four sides of the glass panel to ensure that the front fan has enough air intake space, and the external cold air is drawn into the interior of the case to complete the flow of the entire cooling air duct.
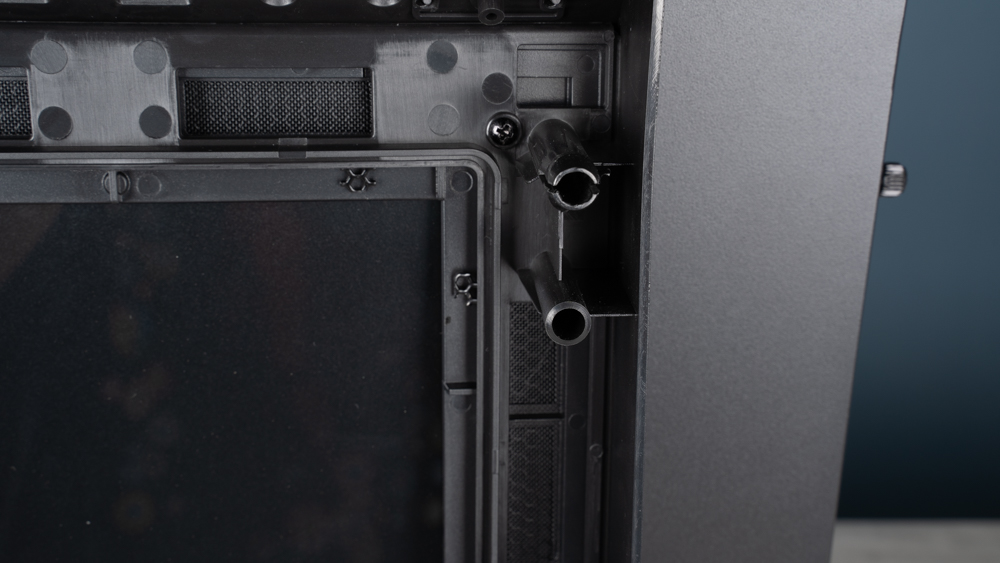
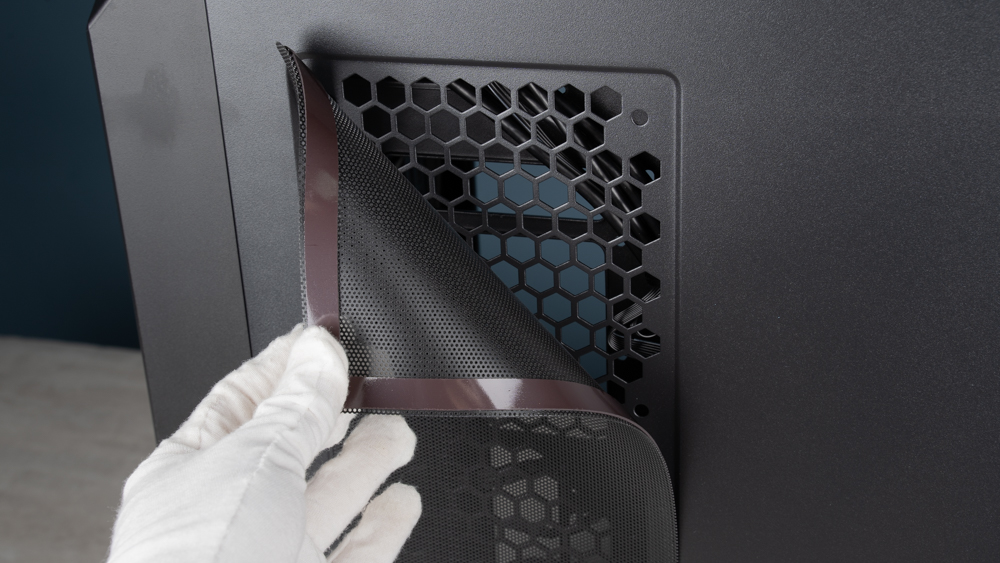
The front panel is fixed with a tenon at the bottom of the front and there is a handle for easy opening. As mentioned earlier, there are air intake meshes around the tempered glass. It is a pity that although there is a dust filter inside, it cannot be disassembled and cleaned separately. For cleaning, it is recommended to use a rag or toilet paper to wipe it.
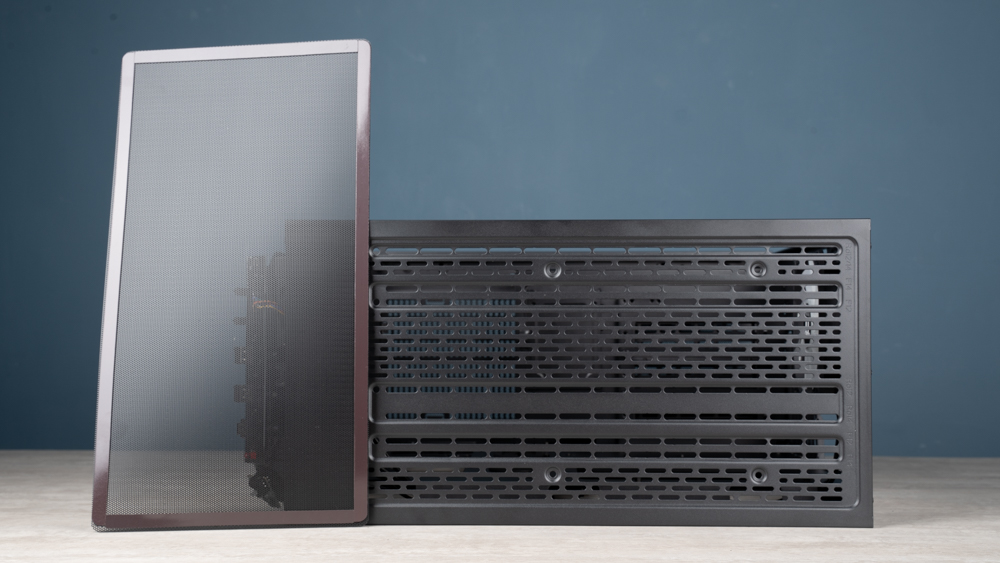
View 300 MX has dual front panels that can be replaced according to your own needs. The way to replace the front panel is a bit special. After removing the front panel, there are a total of four screws on the left and right sides of the inner side of the panel. After removing the screws, replace the, In addition, players need to pay attention to the different types of screws required for the two panels. Please read the instructions in the manual before replacing it.
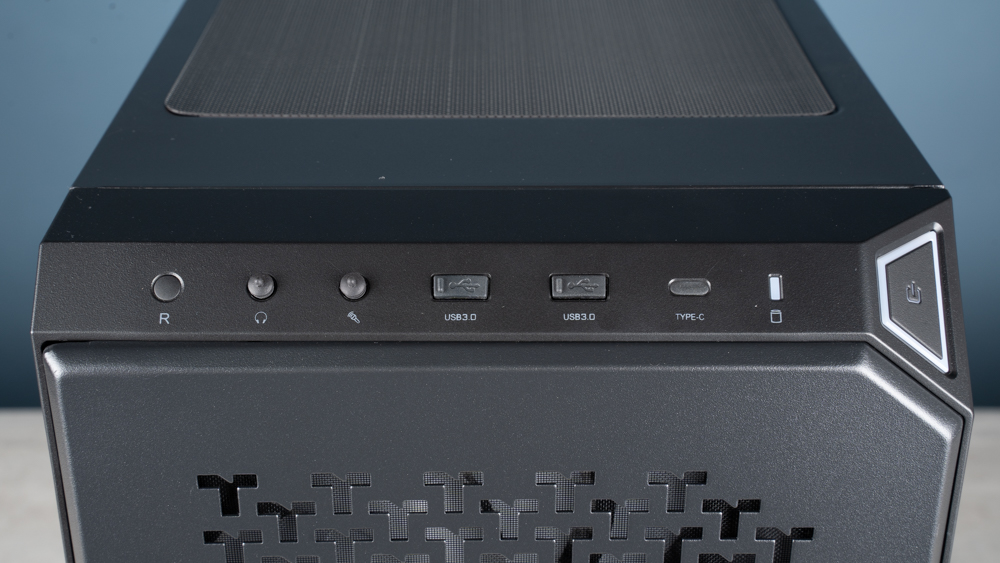
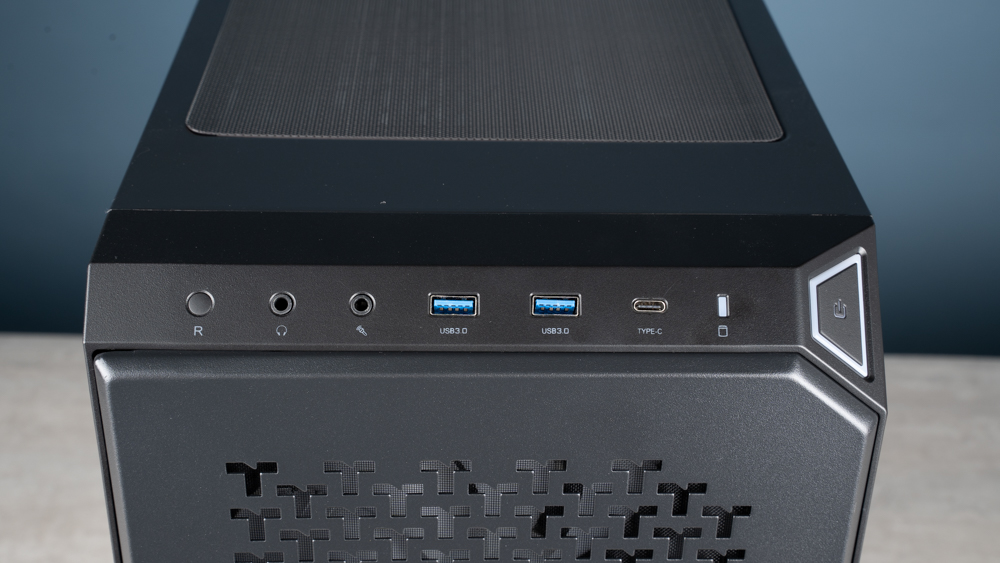
The I/O port of the View 300 MX is located at the connection between the top cover of the case and the front panel. All data transmission ports are provided with rubber dust plugs when leaving the factory to prevent dust in the air from entering the port and avoid poor contact. This small detail is very caring.
The upper I/O ports from left to right are ARGB control keys, headphones, a microphone, two sets of USB 3.0, and one set of USB 3.2 Gen 2 Type-C. The overall interface is sufficiently expandable. The factory comes standard with USB Type-C, no additional In the add-on purchase, the ARGB control key is connected to the included hub, and players can set the lighting effect inside the case more quickly.
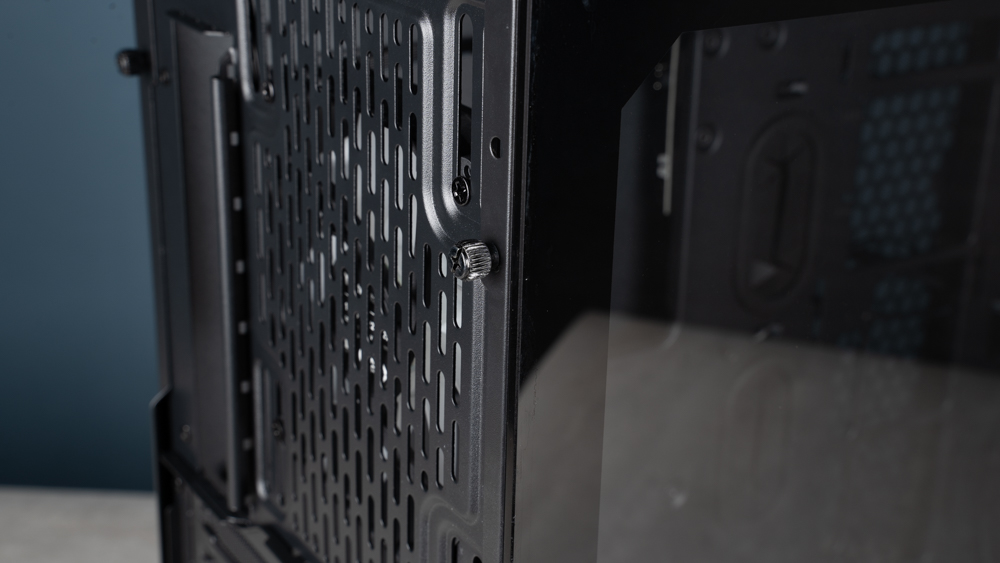
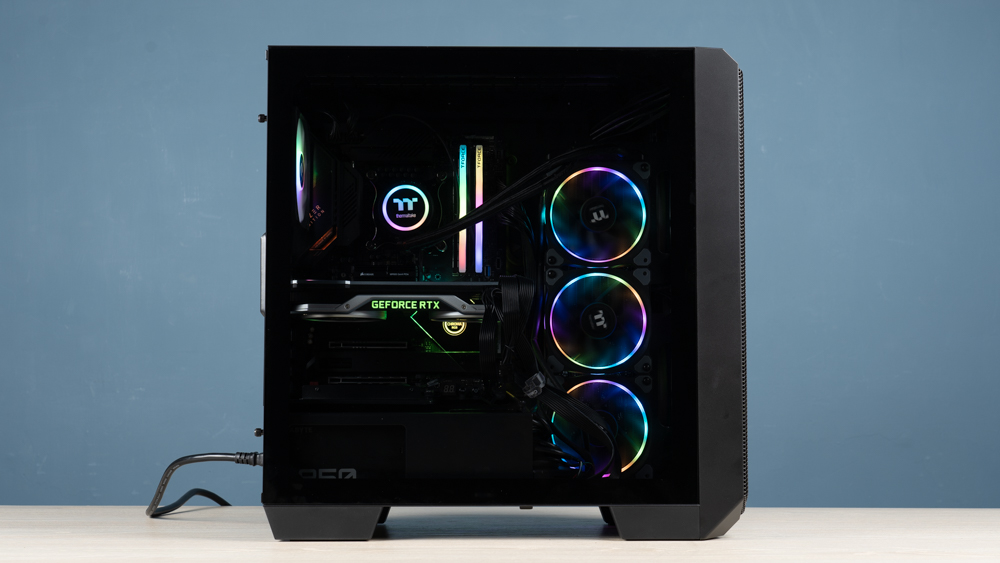
Tempered glass side panels are used on the sides to decorate the appearance of the chassis. The 4mm thick fog black tempered glass side panels can reduce the glare caused by the internal lighting effects, which is very suitable for users who want to display RGB lighting effects but do not want to be too bright. It is fixed by two hand-turned screws at the back of the case. The fixing method is matched with the tenon and fixing groove inside the structure. The side plate is removed by using the rear-drawing track. Although there is a support place at the bottom to prevent falling, it is recommended that players should hold both hands during the process, so as to avoid any accidents in the process of disassembly and installation.
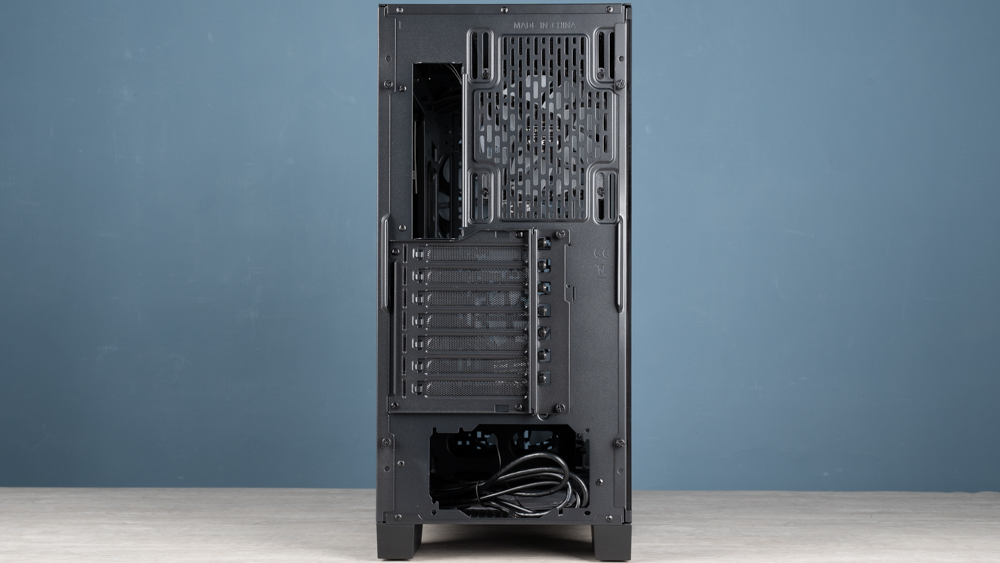
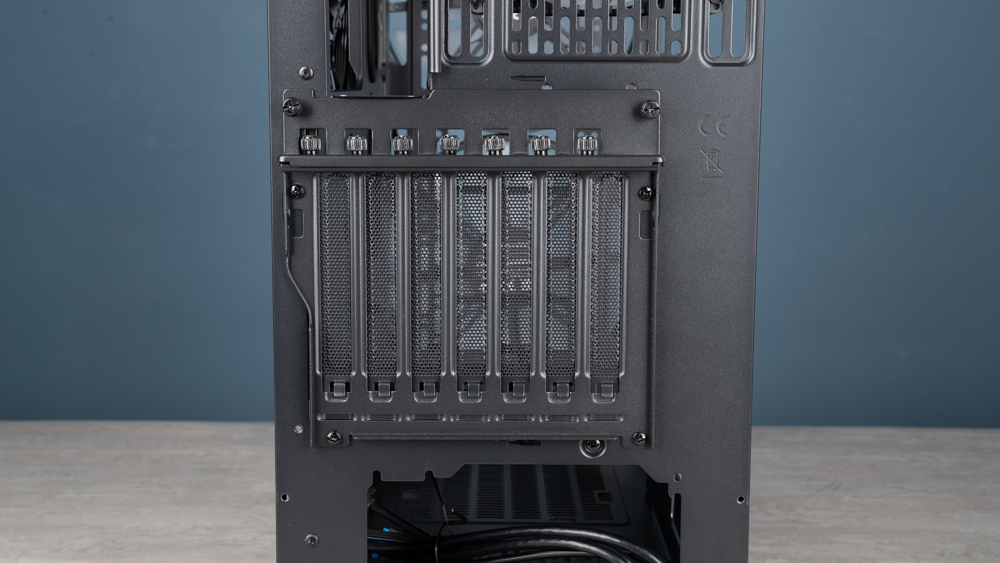
The View 300 MX adopts the current mainstream lower power compartment structure, and a 12/14cm fan can be installed at the rear. The PCI-E device installation position provides a seven-slot device installation with reusable baffles. Overall, the expansion is quite satisfactory! This case is not the only case, one of the features of the View 300 MX is the modular and detachable design of the PCI-E mounting position.
After removing the two hand-turned screws on the fixing plate and the four screws of the modular block, the entire modular block can be directly converted into the display card vertical mode. If players want to display the display card vertically You no longer need to purchase an additional vertical adapter, you only need to purchase a 180-degree display card extension cable and fix the extension cable on the support chassis on the power supply compartment. The cost of the display card vertical can reduce some budget.
The steel plate side cover located on the left side of the chassis is equipped with a magnetic dust filter on the outside, which is suitable for the installation position of the fan on the side of the motherboard and the water cooling row. The external magnetic dust filter can greatly reduce fan operation. The internal dust intake can also be faster during cleaning operations.
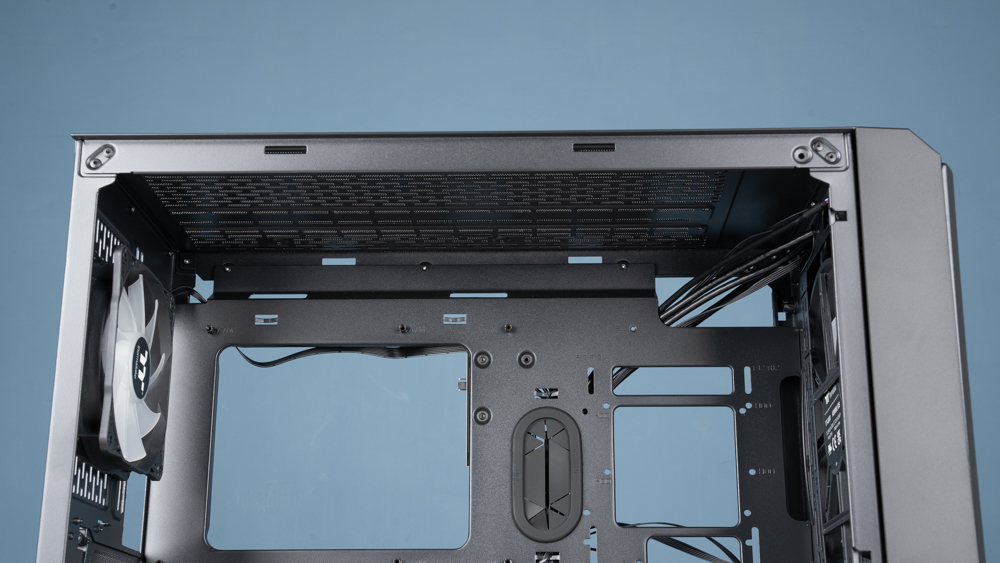
The top cover of the chassis is also equipped with a magnetic dust filter when it leaves the factory to prevent natural dust or small foreign objects from entering the interior of the chassis. After removing the magnetic filter, you can see the upper fan keyhole. View One 20cm, two 14cm, and three 12cm fans can be installed on the top of the 300 MX, and the maximum support for 360/280mm size water cooling installation is quite sufficient.
Thermaltake View 300 MX Installation Space Showcase
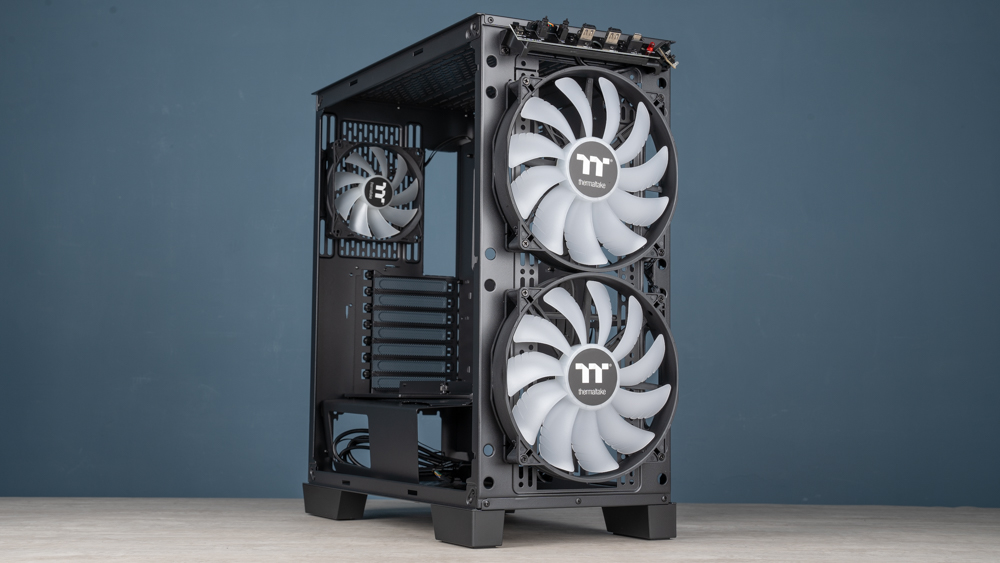
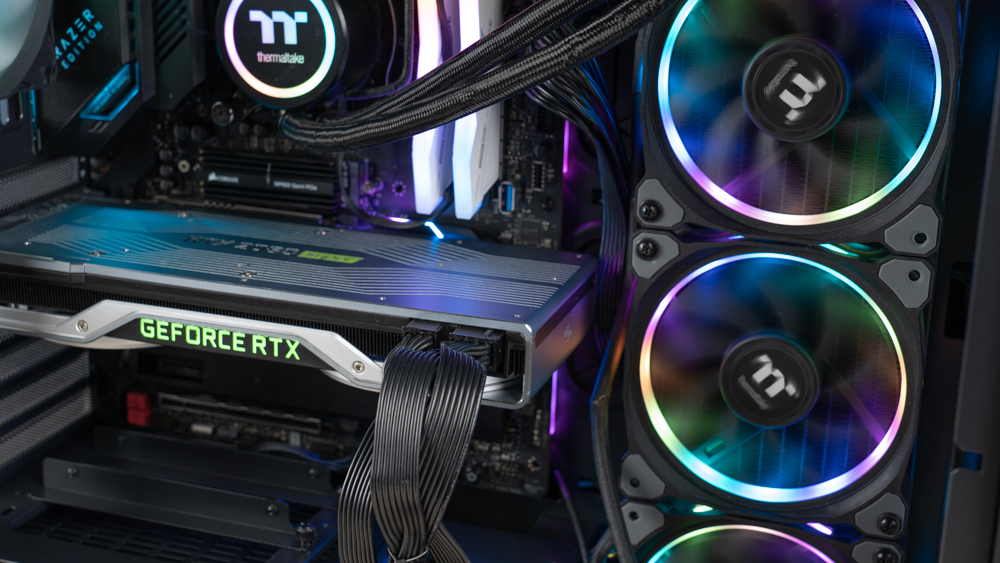
View 300 MX is pre-installed with two 20cm ARGB fans at the front and one 12cm ARGB fan at the rear, forming a cooling airflow plan with front intake and rear heat exhaust. The two 20cm fans on the strong side are not only more eye-catching in visual effect, but also due to the larger blade area The 20cm fan can use a lower speed to bring better air intake. Compared with small-sized fans, the noise during operation can also be reduced.
The upper I/O port is fixed to the structure of the chassis, and the wires will not be disconnected when the front panel is removed. When replacing the front panel, there is no need to worry about the wires being pulled. However, during the installation process, it is recommended to Remove the rubber dust plug of the I/O port, otherwise, it will be difficult to remove the dust plug after the front panel cover is pressed down.
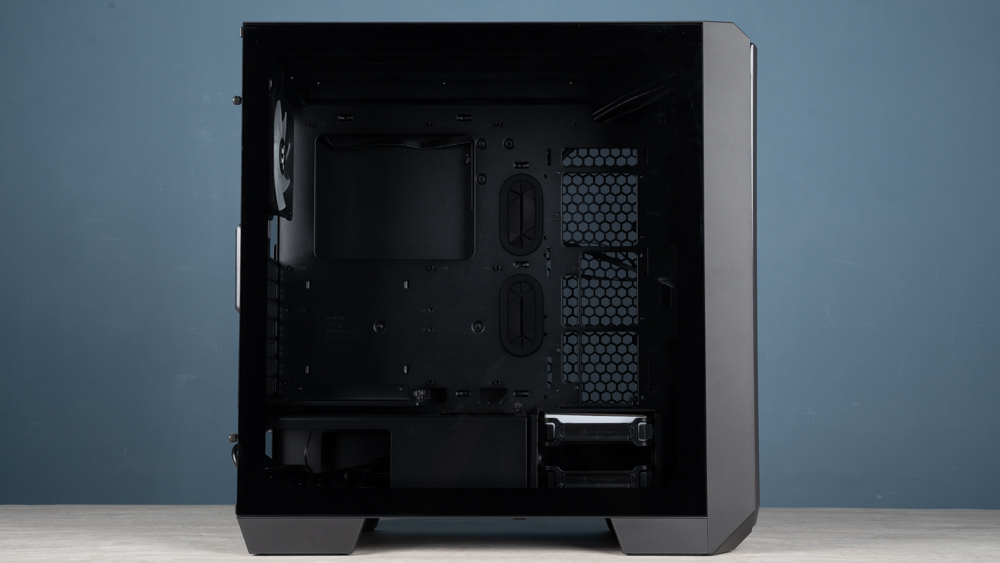
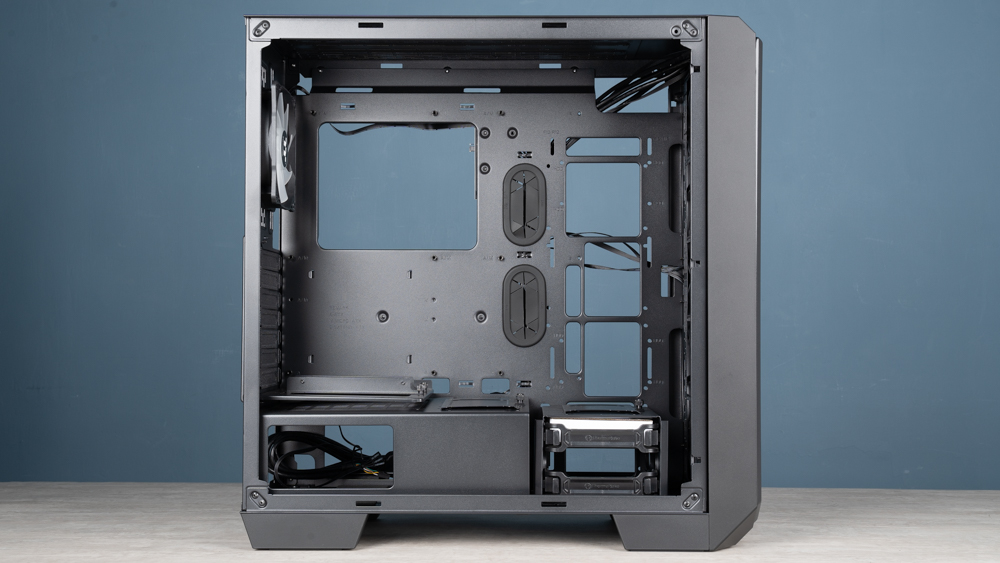
The internal core hardware installation space is very expandable and can support the installation of E-ATX, ATX, M-ATX, Mini ITX size motherboards, 175mm high air-cooled towers and up to 400mm of display card installation space, on the right side of the motherboard Maximum 360mm size water cooling and fan installation, but need to remove the lower composite hard drive cage.
The View 300 MX adopts the structure design of the under-mounted power compartment, but the compartment is different from the mainstream architecture in the semi-open-air shape, which allows the composite hard disk rack to be exposed and look directly at the right side of the case. The advantage of this is that the hard disk can enjoy better performance. Cooling space, the temperature performance will be better for high-speed HDD hard drives.
In addition to the ceiling height setting for water cooling installation, the top of the case is also widened to the outside in order to support 20cm fan installation, so that the upper fan and water cooling installation space is very abundant, which can perfectly avoid the installation of the motherboard and memory cooling armour. Conflicts, the widened space can have more room for accommodation on the entire line such as fans and power supply wires.
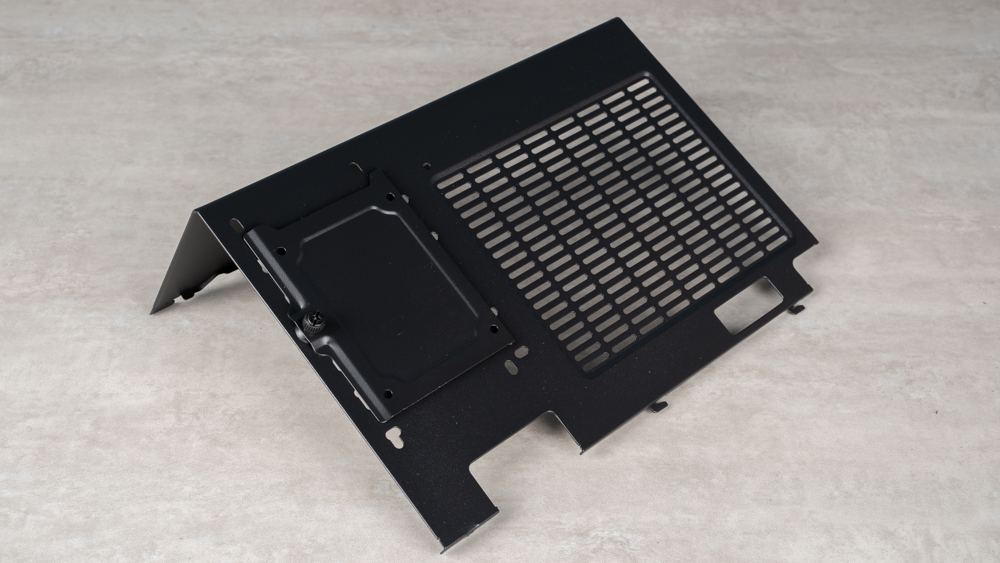
In addition to the above-mentioned patented display card elastic placement design, the internal power compartment and hard disk rack can also be disassembled separately. After the power supply compartment is removed, you can see that there are two holes for wiring near the motherboard block. Players can install the I/O or fan, RGB and other wires under the motherboard to be more convenient for wiring.
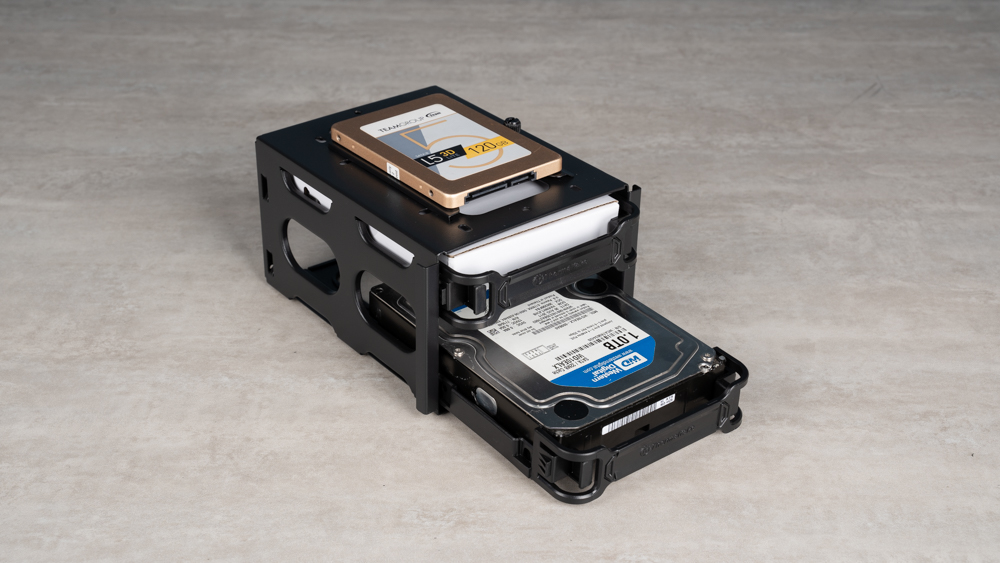
There is a 2.5-inch hard disk mounting bracket above the power supply compartment, which is more convenient and fast to fix and disassemble with hand-turned screws. The composite hard disk rack next to it can install a total of three hard disks, and the bottom two layers are The tray-type extraction design can install two 2.5/3.5-inch hard drives, and there is a screw-free tenon fixing structure for the side of the 3.5-inch hard drive, which can be more efficient in the experience of disassembly and assembly. At the same time, the accessories come with the case The box is also hidden here, and the top is fixed with a keyhole to cover the hard disk. A 2.5-inch hard disk can be installed on the top of the hard disk rack, but a 3.5-inch hard disk cannot be installed on the top.
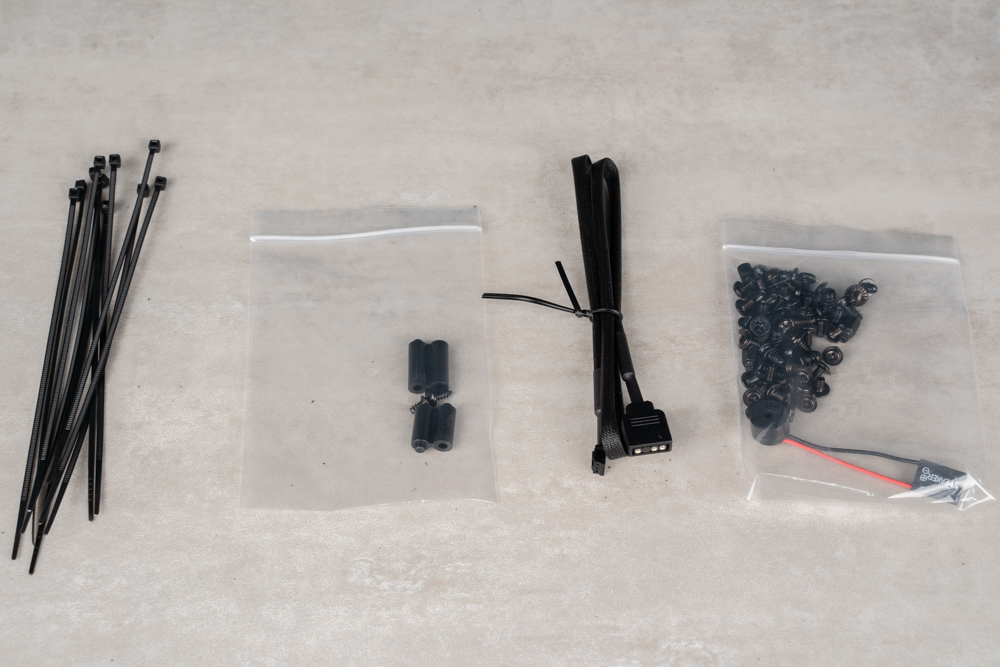
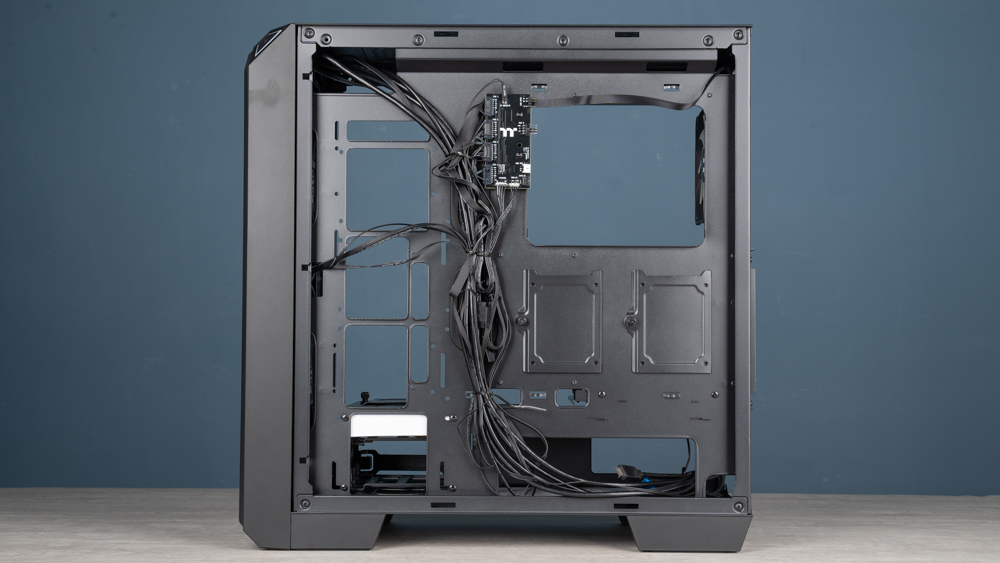
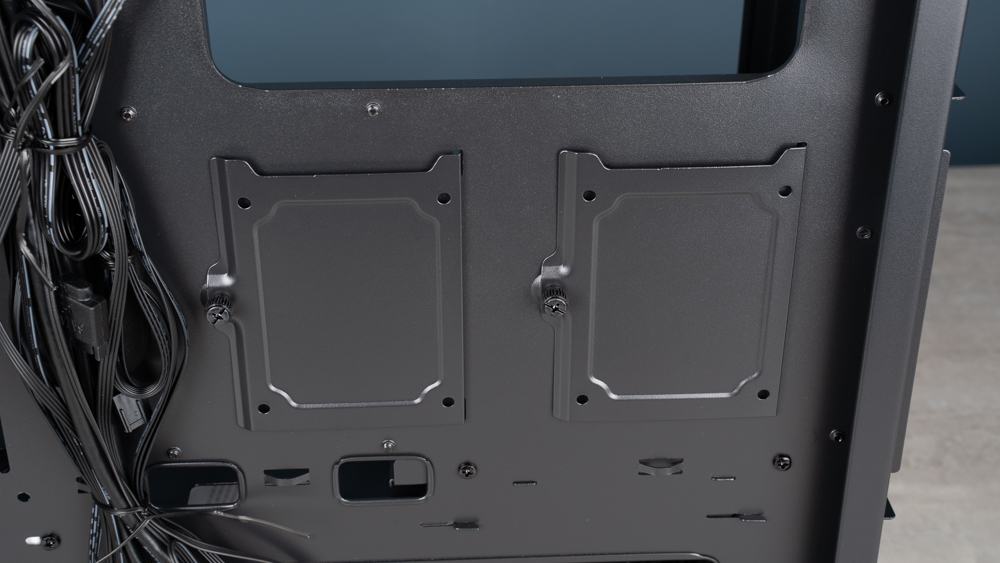
View 300 MX rear cable space at a glance, there are multiple rubber-coated iron wires to help tie the cables, the I/O cables and fan cables above are roughly routed and bundled in advance, and there are two wall-mounted 2.5-inch hard drives on the back of the motherboard The mounting brackets are also held in place by hand screws.
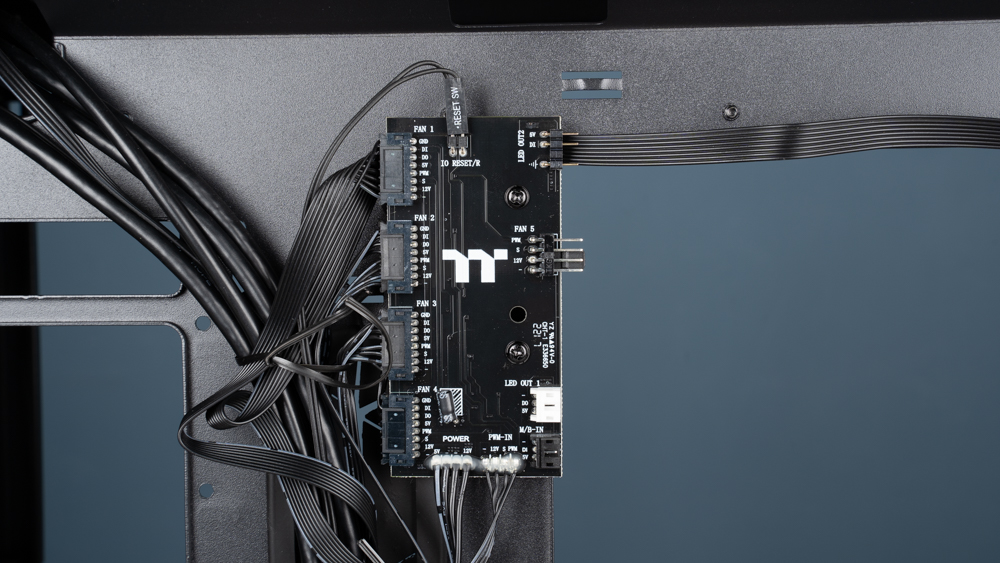
The power supply and ARGB cable of the included fan has been pre-installed on the control hub. The control hub has a set of PWM and 5V ARGB slots. In addition, the controller also has an LED OUT 1 slot, which can be connected in series with other TT’s ARGB controller completing the lighting synchronization setting of the whole machine.
The ARGB motherboard transmission cable in the accessory can be connected to the M/B-IN slot on the controller, and the lighting effect can be controlled by software through the motherboard. To connect so many devices, the controller needs an external SATA power supply.
Thermaltake View 300 MX actual installation demonstration
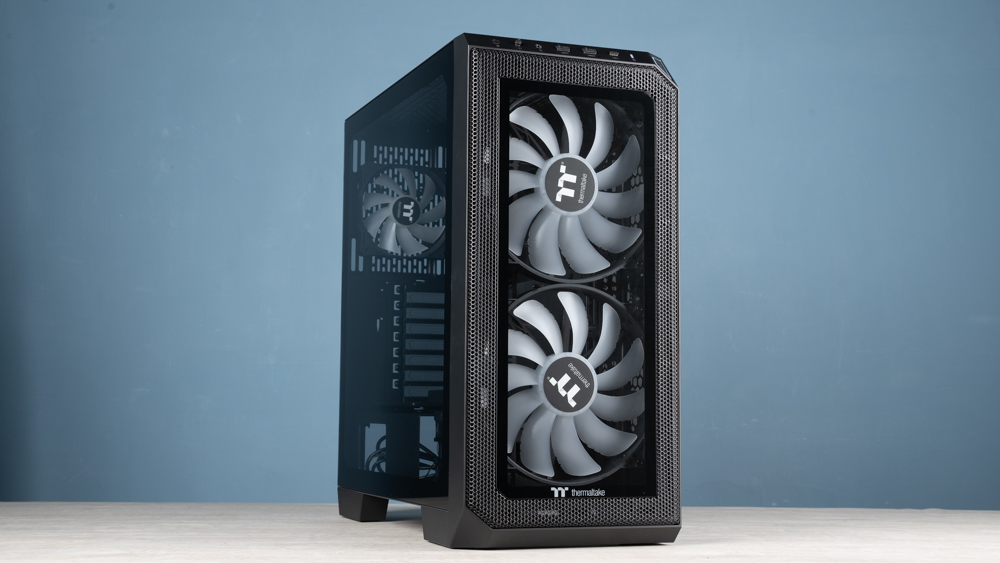
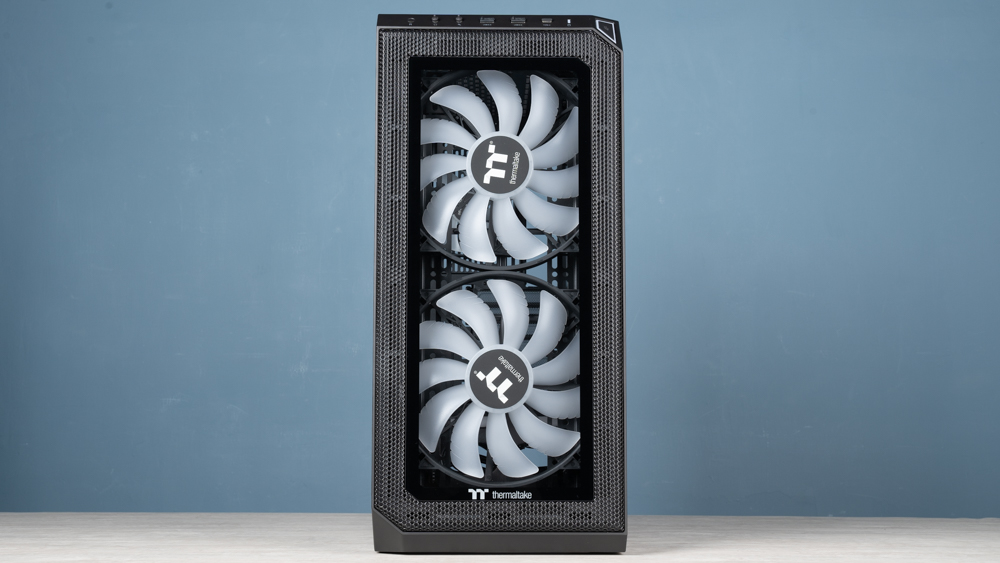
This installation demonstration will actually install the tempered glass front panel and the mesh front panel with the TT logo shape. What will the visual effect of the chassis itself and the installation effect be in two modes, let readers In different usage modes, there can be an actual visual effect for reference?
If you want to install a 360mm size water cooler on the right side of the motherboard, you need to remove the lower composite hard drive bay, so if you need a 3.5-inch hard drive mounting position, you can only install the 360mm water cooler on the top, and the power supply It is necessary to expose the front of the power supply compartment from the lower part, push it into the power supply compartment to lock it, or choose to remove the entire power supply compartment and then install it.

Summarize
Two 20cm large fans are pre-installed in front of View 300 MX to provide enough cool air intake, and at the same time have a strong visual effect, with dual front panel modular design, and flexible display card mounting brackets, these can be based on The idea of changing the installation configuration for your own needs really makes the View 300 MX stand out from the crowd.
There are four fan installation positions in the front, side, top and rear. Fan installation positions in more directions can bring better heat dissipation performance and reduce the mutual influence of waste heat between the graphics card and the processor. And the support of water cooling is also quite sufficient! The whole case has three 360 mm water cooling installation positions, and the hardware expandability inside the case is also compatible with the current mainstream consumer platform hardware installation.
However, it is a pity that after the side-mounted 360mm water-cooled installation, the lower composite hard disk rack needs to be removed, and the installation space of the display card in-line mode will be limited to less than 280mm. The latter can also be solved by the display card upright. The former may need to be avoided by replacing the hard drive with a 2.5-inch hard drive or M.2 SSD.
If this article is helpful for you, please share this article with your friends on social media. Thank you!!
This article is based on the personality of the reviews. You are responsible for fact-checking if the contents are not facts or accurate.
Title: Thermaltake View 300 MX Case Unpacking / Dual Mode Front Panel Free Switching, Flexible Graphics Card Holder