In the previous year, InWin introduced two DIY cases named “AIRFORCE” and “EXPLORER” for gamers. These cases featured a unique assembly design that provided a lot of entertainment for players who enjoy building with blocks. The building block element of these cases was particularly enjoyable. As a result, one year later, InWin is now offering players two additional cases in their “Case Monster” series.
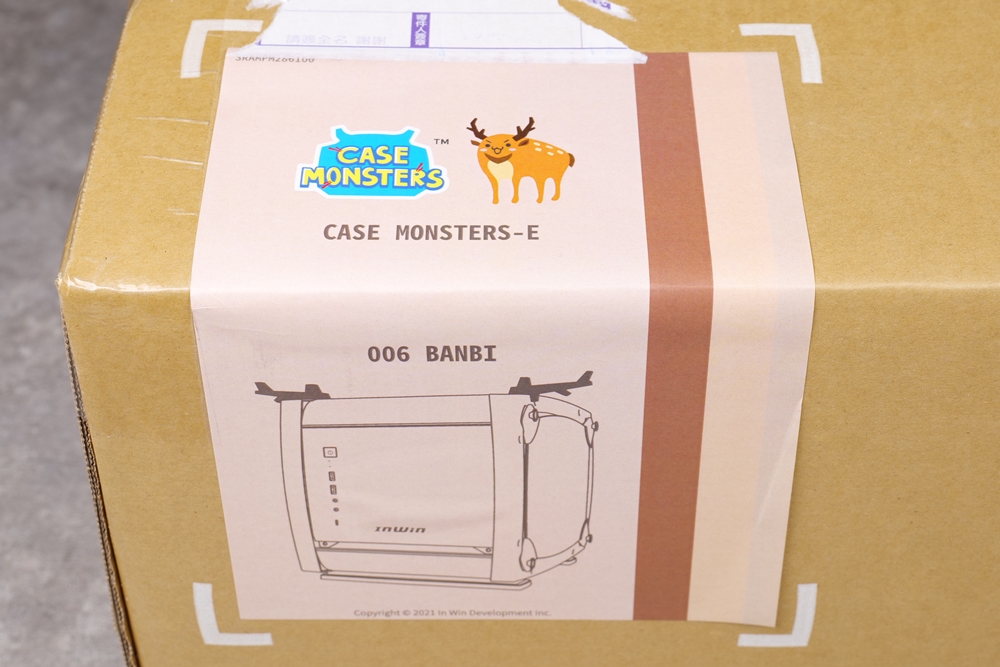
The latest addition to InWin’s “Case Monster” series is the “Chassis Monster-E,” which shares the same shape as the “EXPLORER” case. This new series features four models, including the adorable “Lufa” devil, the “Finney” fawn, the “Sanhua” kitten, and the “Finney” gazelle, all boasting various cute and playful shapes. With this diverse range of styles, players are sure to find a model they like.
Here’s a version of the specifications in a more structured format:
- Case type: Mini case
- Materials: Tempered glass, SECC galvanized steel sheet, ABS
- Motherboard support: Mini-ITX
- Expansion slots: 3 (for interface cards)
- Max. graphics card length: 330 mm
- Max. CPU radiator height: 160 mm
- Front panel ports: Type-C x1 (supports USB 3.2 Gen2x2), Type-A x2 (USB 3.2 Gen1), HD Audio
- Storage support: 2.5″ x2, 3.5″ x1
- Fan installation positions: Top: 120 mm x2 or 140 mm x2, Rear: 120 mm x1 or 140 mm x1
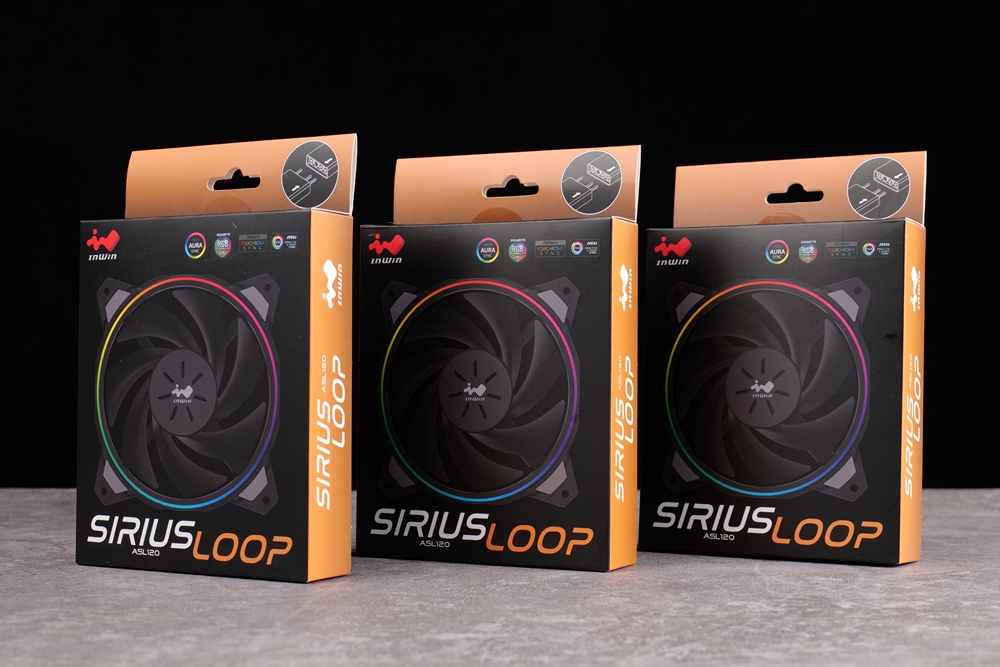
- Pre-installed fans: InWin ASL120 x3
- Water cooling radiator support: Up to 240 mm
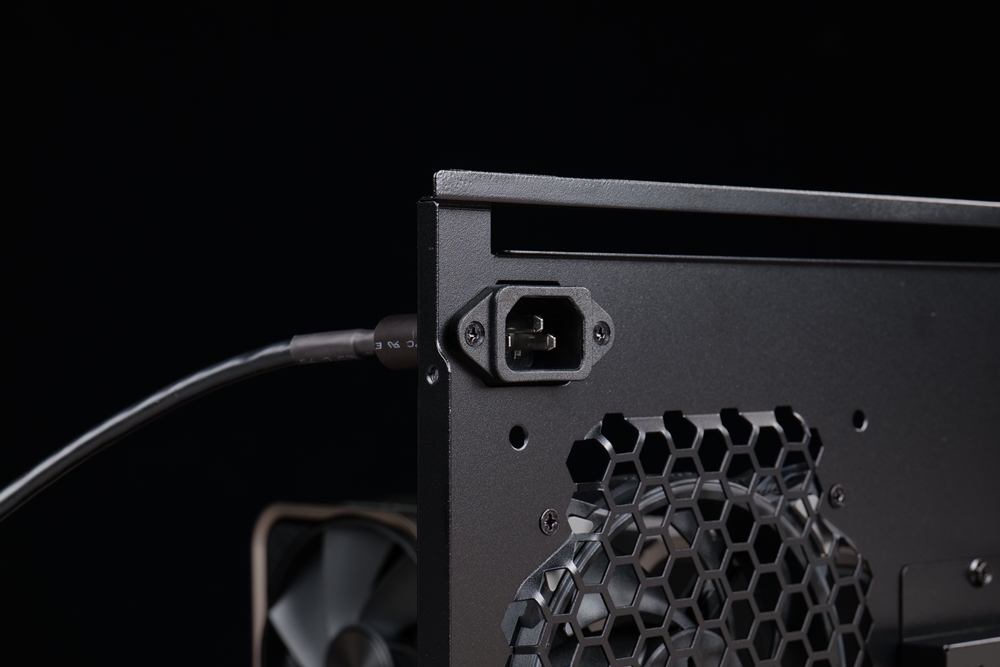
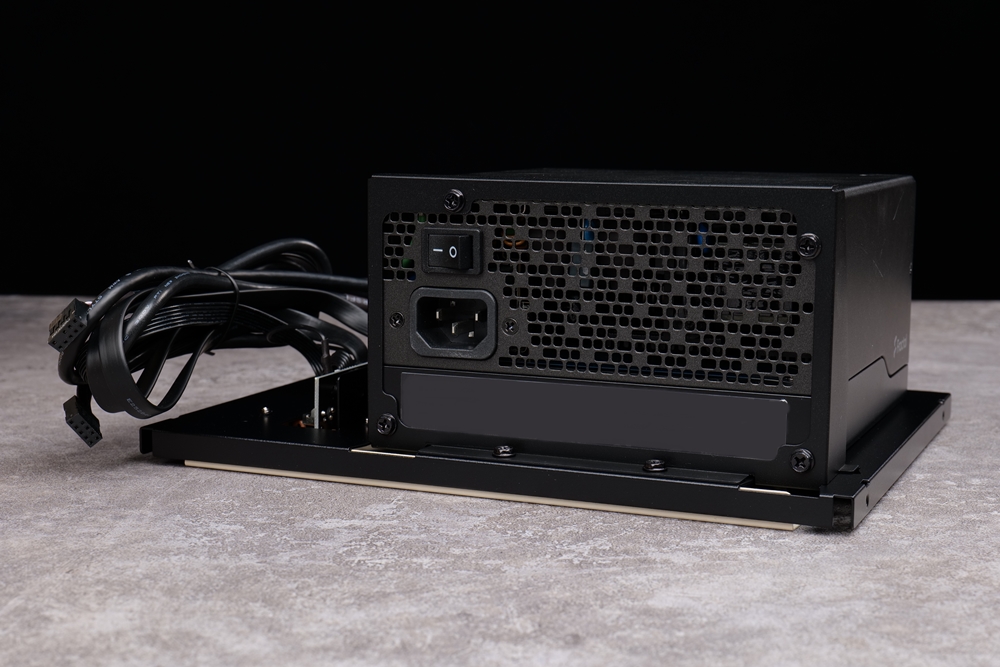
- Power supply support: ATX, up to 160 mm in length
- Dimensions (LxWxH): 390 x 272 x 310 mm
- Net weight: 3.75 kg
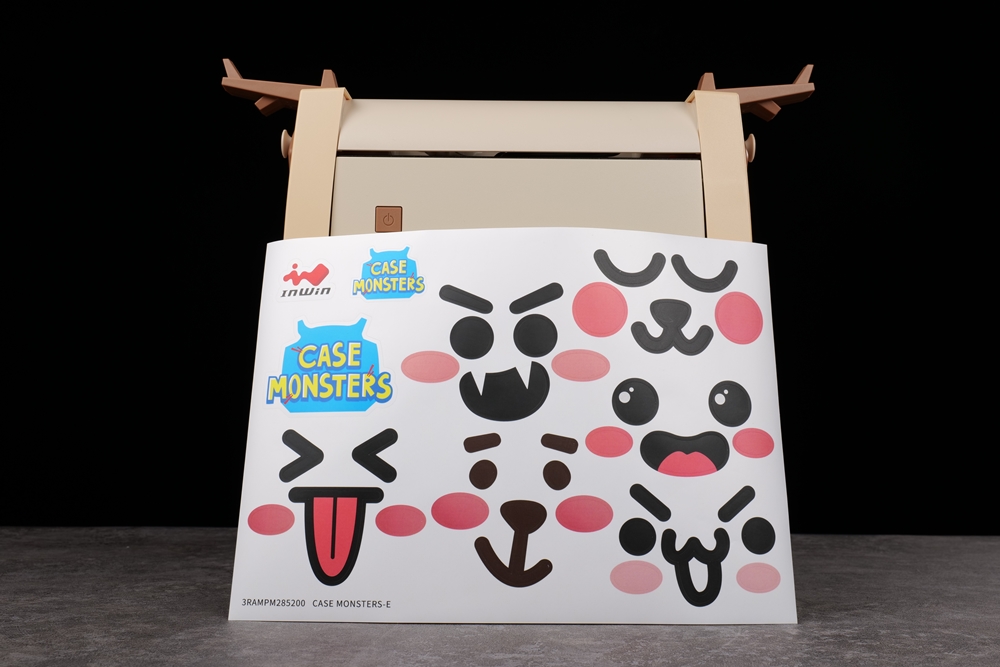
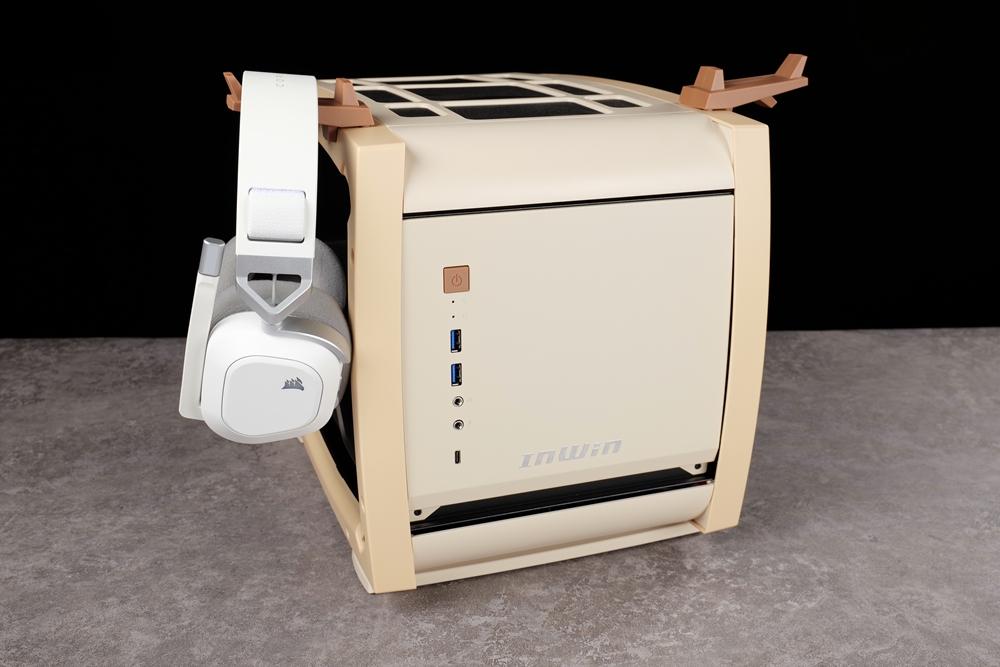
EXPLORER machine Shell Monster – E: Scabbers Unboxing
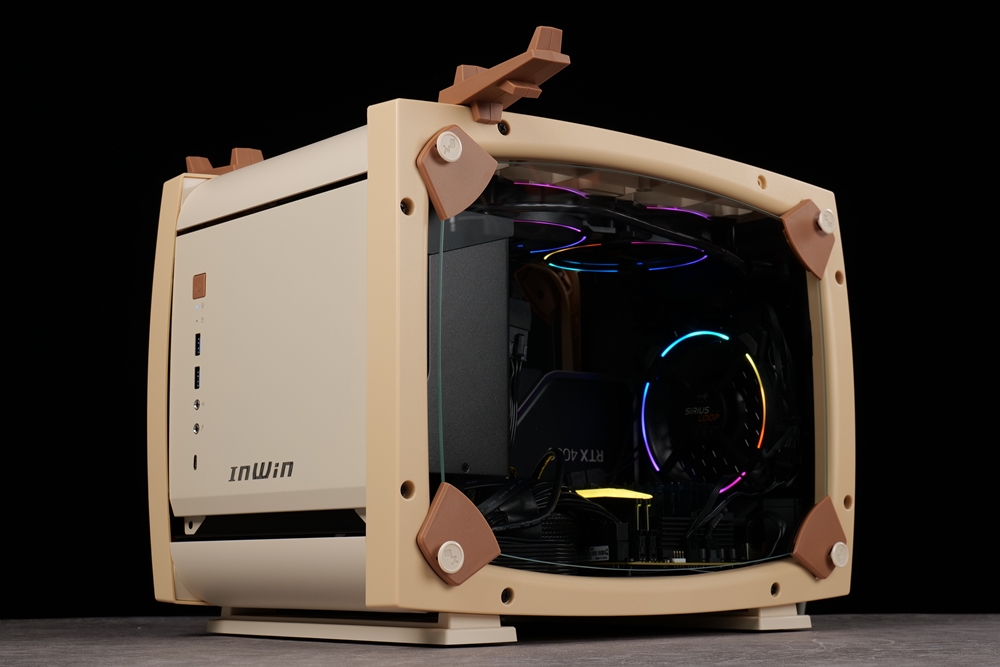
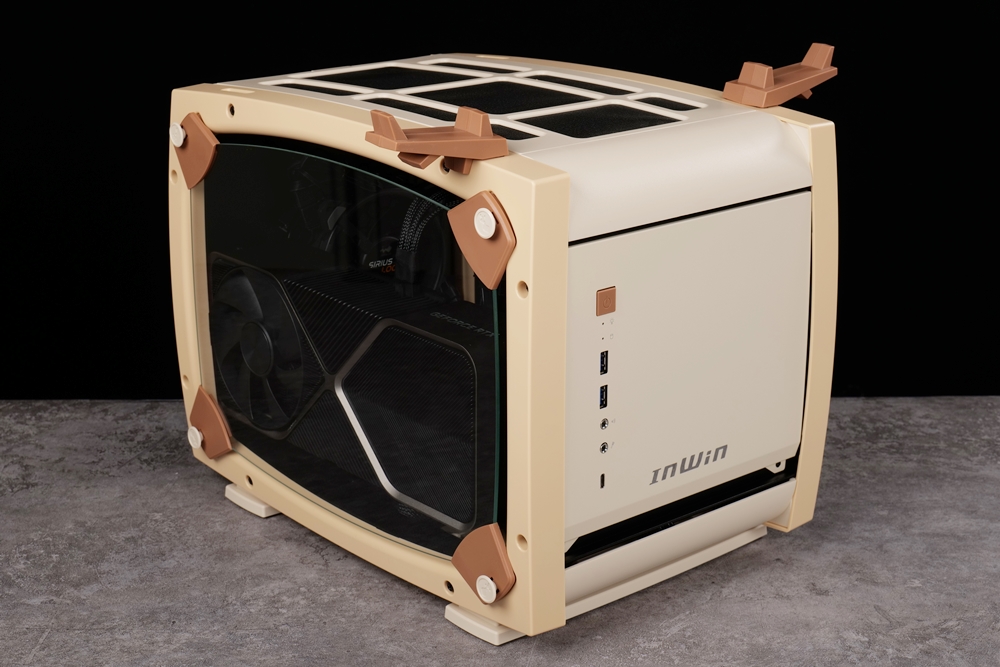
This time, the “Case Monster-E” series introduces a new model called the “Banban” version, which features the same shell as the original “EXPLORER” case. However, players can customize the case by attaching cute eye and mouth stickers to give it a unique and playful look that matches their preferences.
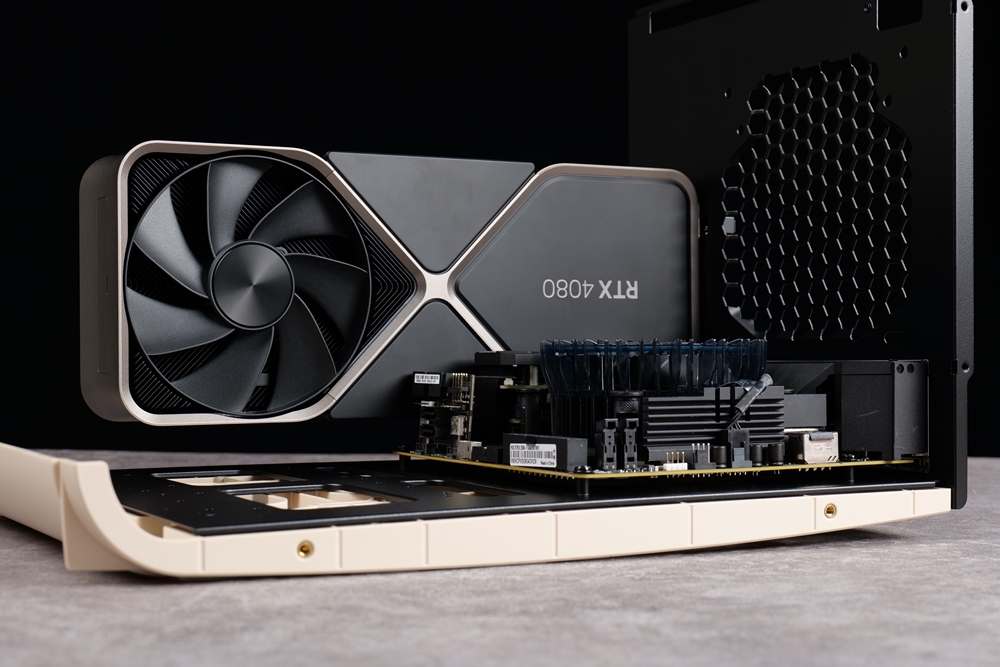
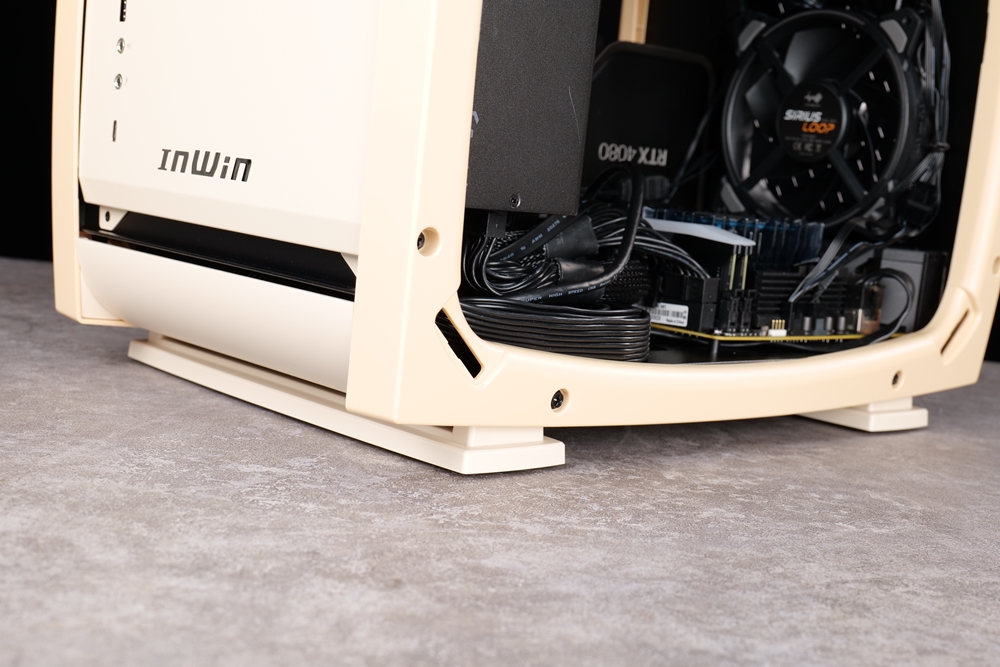
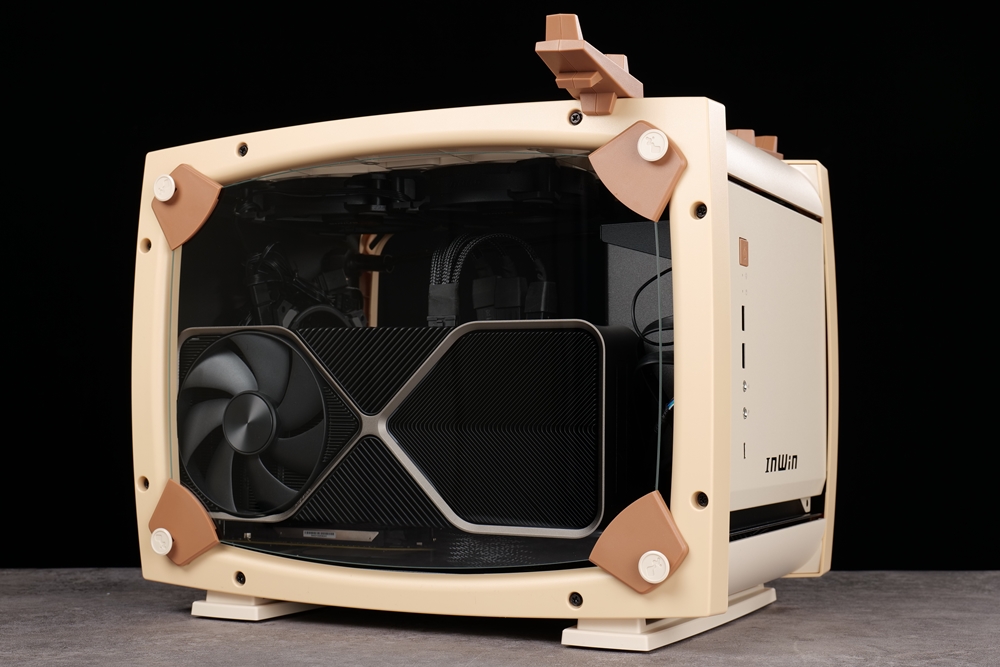
The EXPLORER case has a unique configuration suitable for ITX builds. It features a front-mounted power supply and a motherboard installed at the bottom, allowing for the graphics card to be installed vertically without any adapters. Despite this layout, the power supply is designed in a way that is compatible with the graphics card’s installation position, making it possible to install a large 330mm three-slot card without any issues.
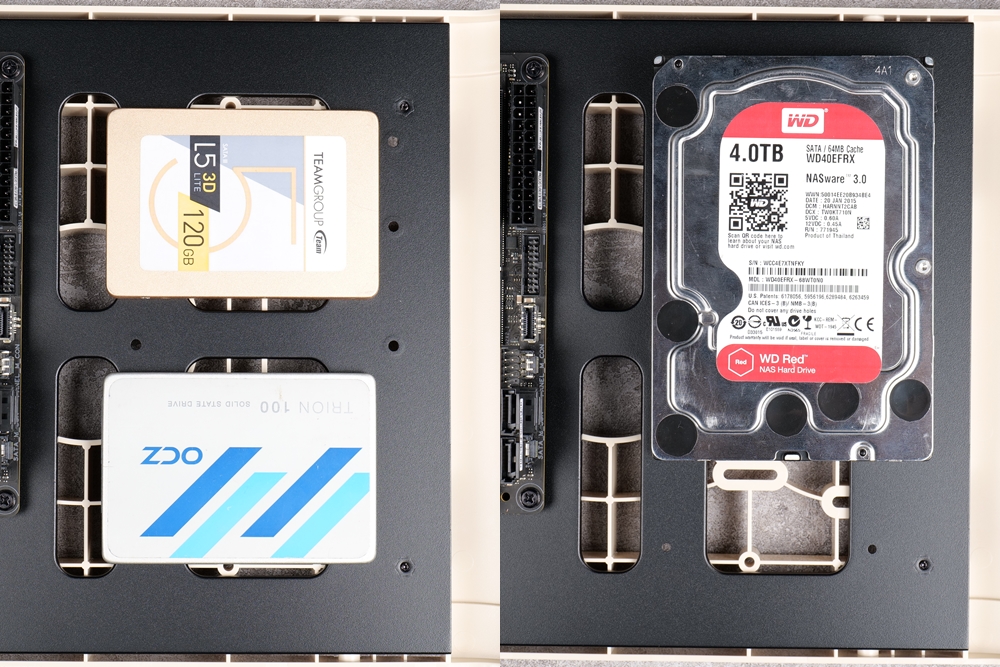
Naturally, as an ITX case, there are some trade-offs when it comes to size. For example, there are only two fan installation positions on the top and one at the rear. The hard disk part only supports installation of either two 2.5-inch or one 3.5-inch hard drives. However, given that many ITX motherboards now have more than one M.2 slot, storage space shouldn’t be a problem for most players.


Install your own casing yourself!
Since the EXPLORER case is a compact ITX case that requires assembly, it’s best to install components during the assembly process. While assembling the case, InWin provides comprehensive case assembly instructions for players to follow, so you can rest assured that you won’t go wrong if you follow the steps in the manual.
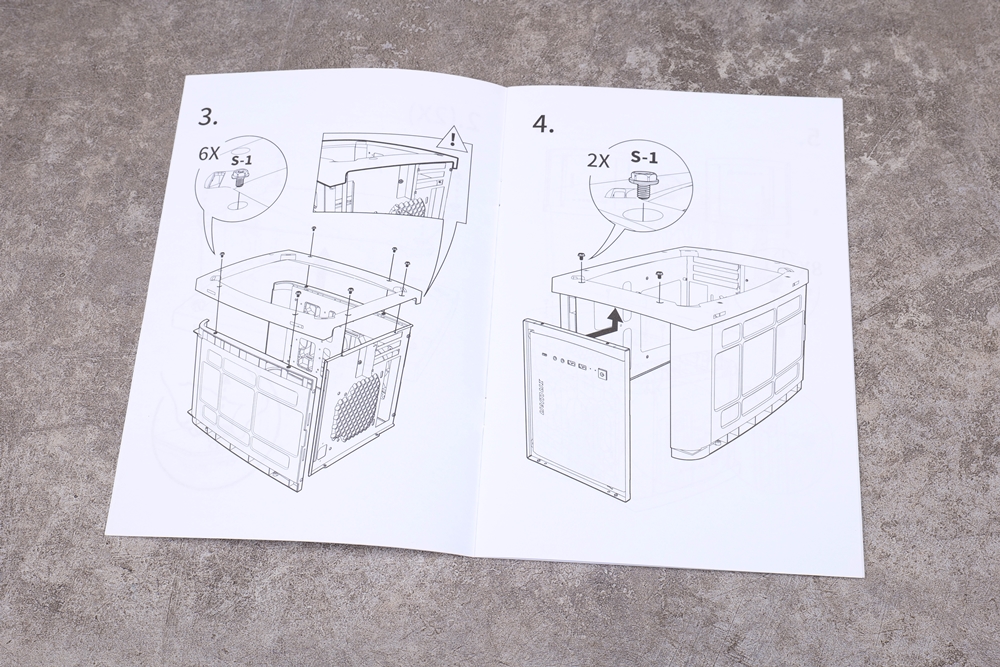
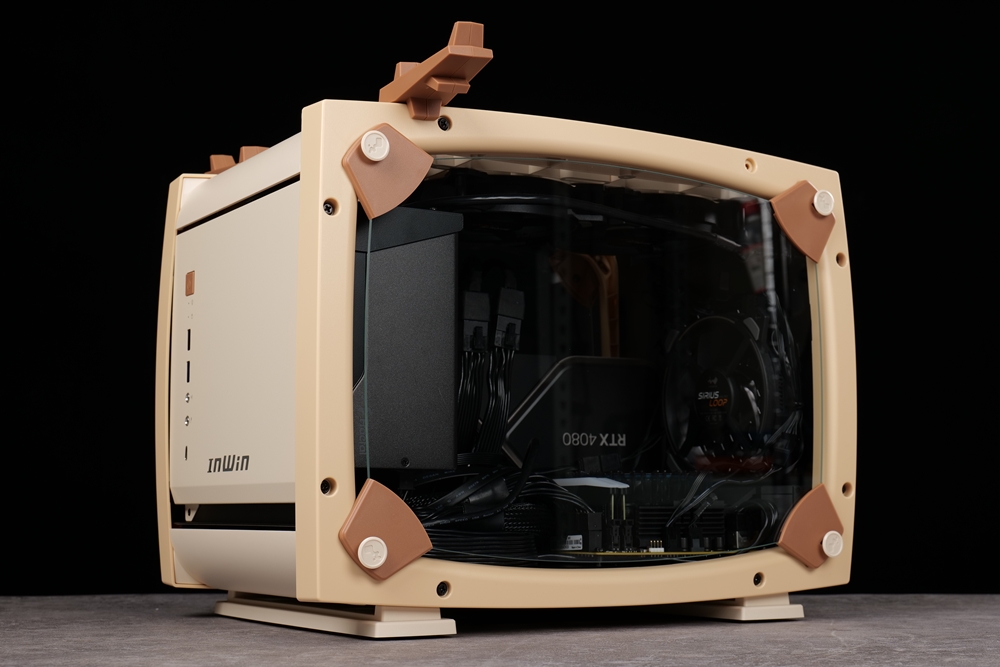
To start the assembly process, first, lock and fix the bottom plate and rear back panel of the case. This will allow you to install the primary hardware components inside the case. The front side of the bottom plate is reserved for the storage device installation position, which can accommodate two 2.5-inch or one 3.5-inch storage devices. At the rear of the case is the motherboard installation position, which can only support ITX motherboard installation. If the CPU requires a tower fan, it can accommodate a model with a maximum height of up to 140mm. The case is capable of accommodating small to medium-sized tower fans and down-blowing radiators.
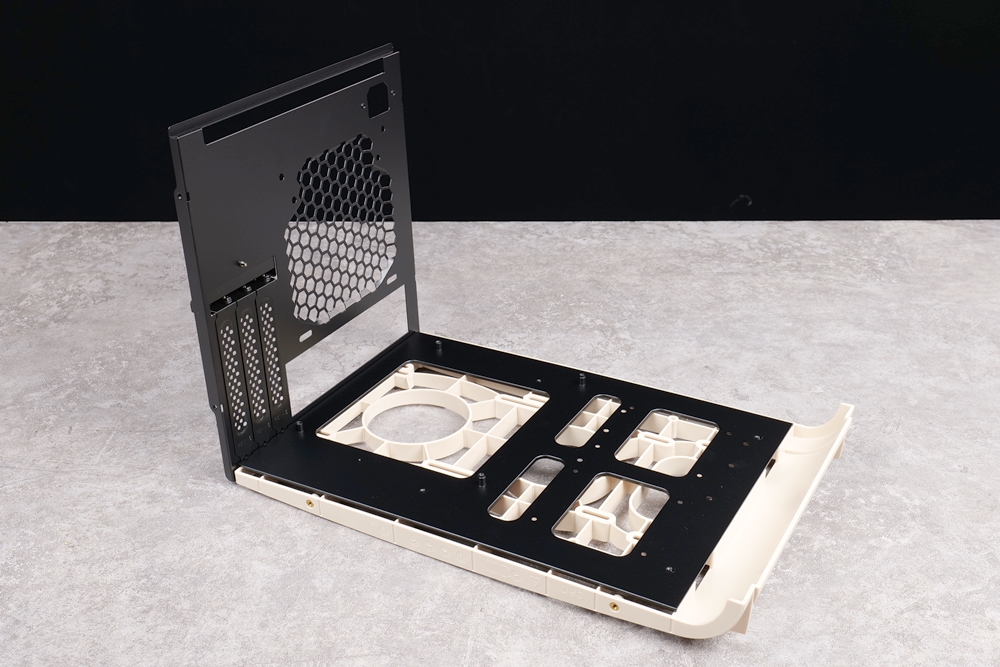
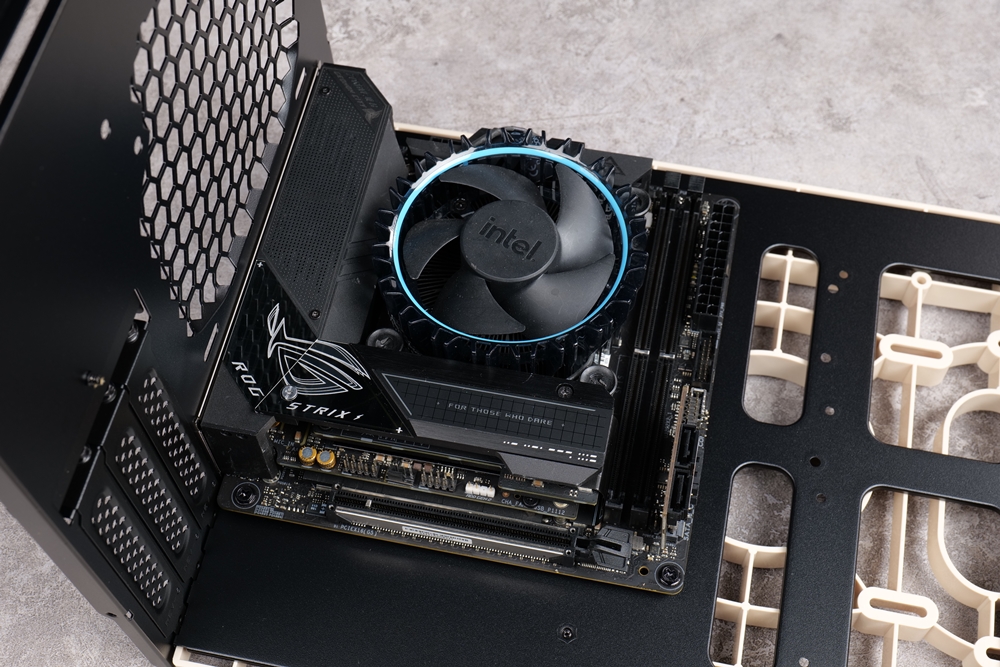
Next, examine the left side of the back panel. The expansion slot is placed in slot 3, allowing for graphics cards with a maximum length of 330mm to be installed. This means that installing an RTX 40 series three-fan large card should be no problem. However, it’s important to ensure that the RTX 40 series graphics card fits within the case’s size limits.
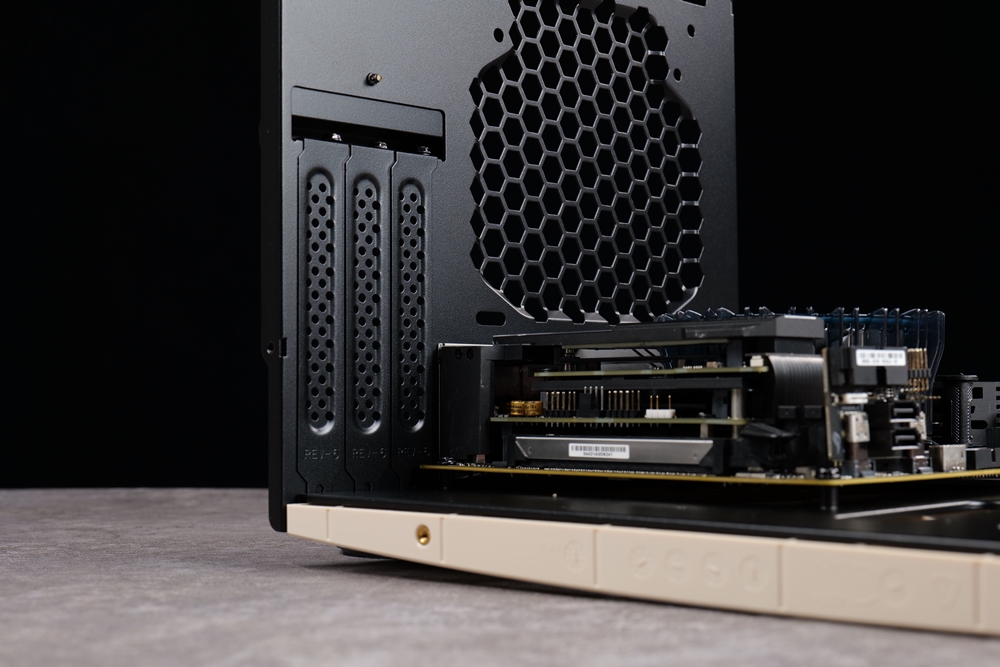

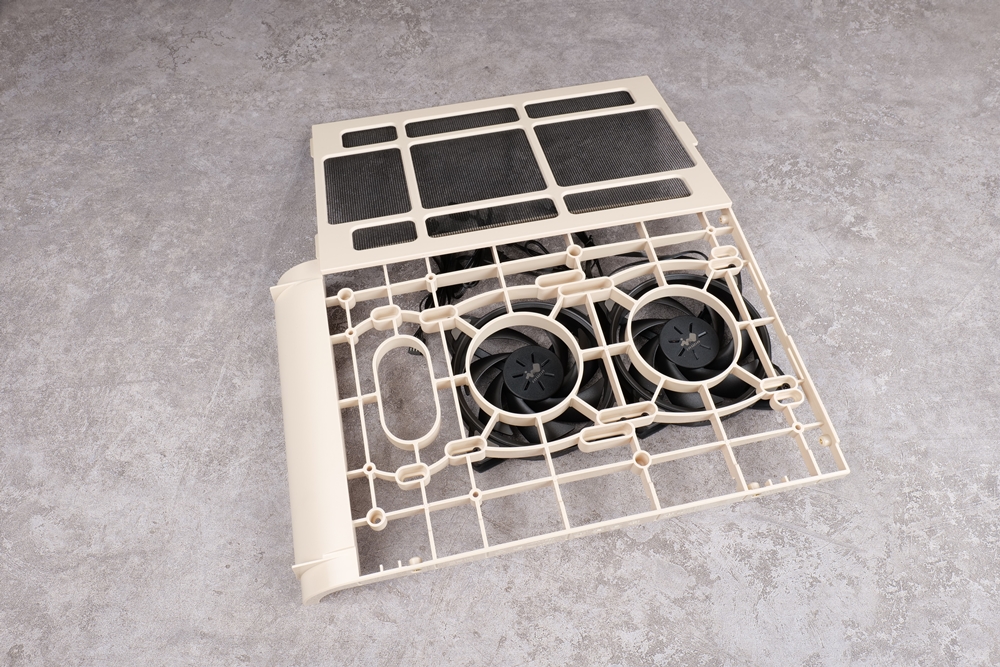
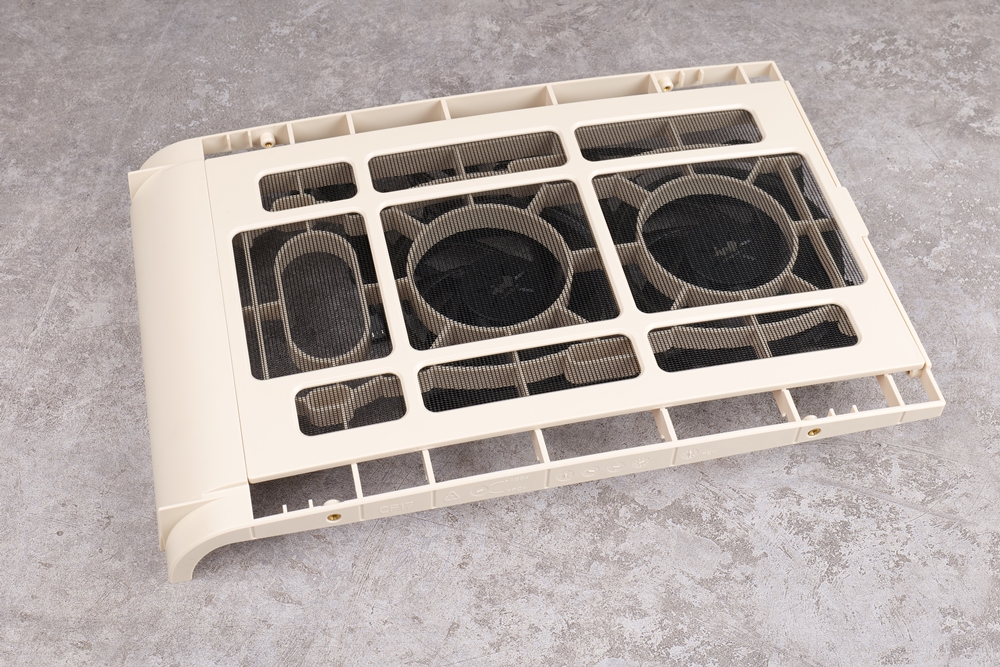
On the right side of the back panel, you’ll find a fan installation position that can accommodate 120mm/140mm fans. If you don’t purchase additional fans, you can install the 3 InWin Sirius Loop ASL120 fans that come with the case directly. These fans feature double-sided ARGB apertures and can provide a maximum airflow of 50 CFM and wind pressure of 1.67mm-H2O, with a maximum noise level of just 27dB per fan. This makes them suitable for mid-range processors and graphics cards as they can meet the heat dissipation requirements.
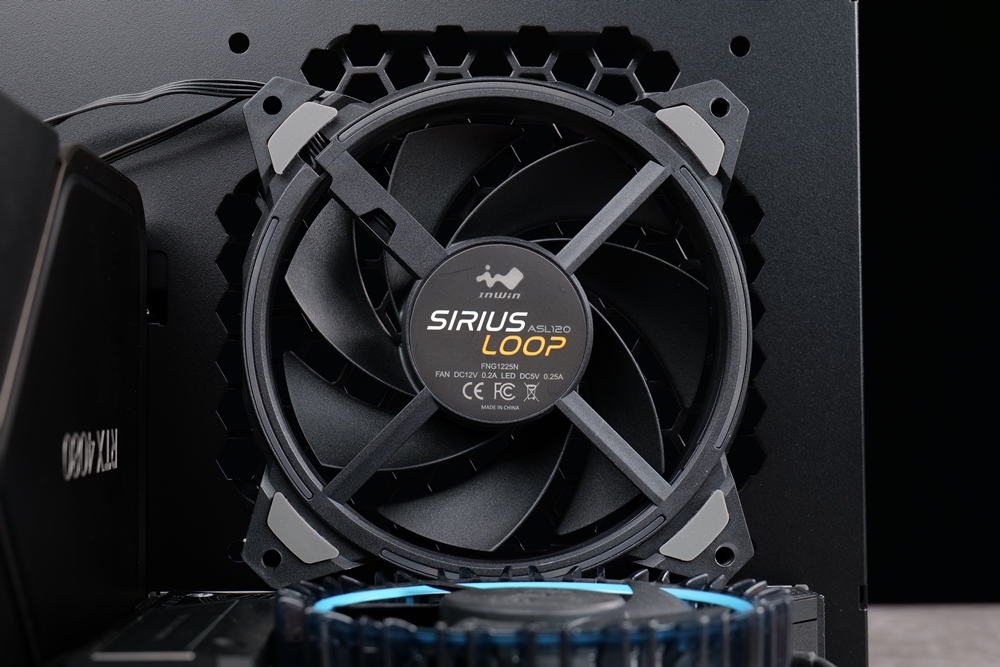
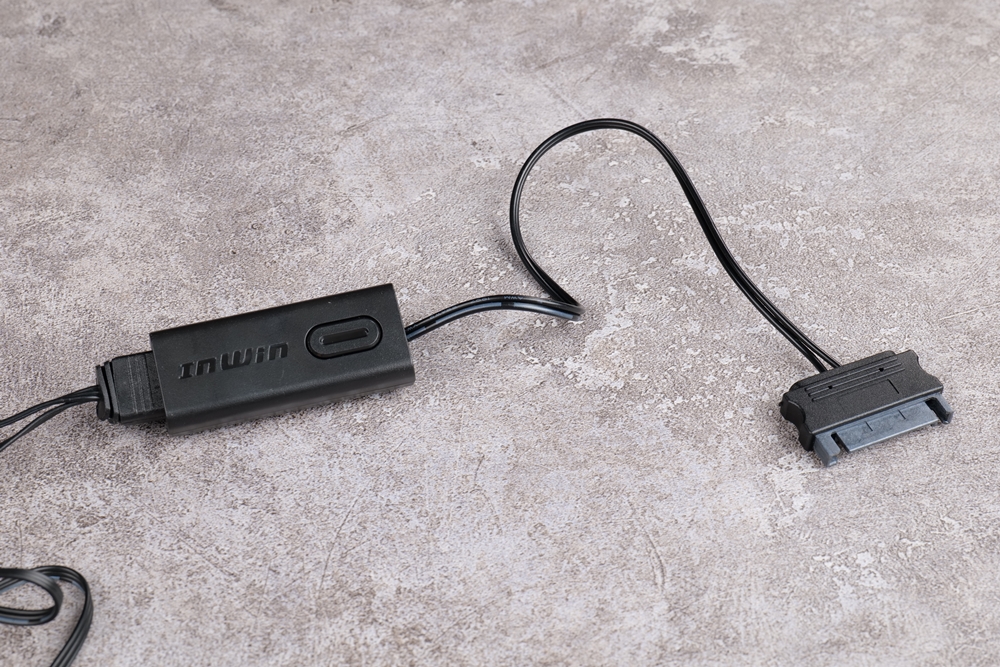
The other two InWin ASL120 fans can be installed directly on the top cover of the case. However, due to the compact internal space of the case and the large gap between the glass side panel and the frame, it’s recommended to install all three fans as intakes. This will allow cold air to be continuously drawn into the interior of the case, while hot air can be exhausted from both sides and the gaps in the case. The fan part comes with a SATA-powered light controller that can be used to set the fan lighting effects if the player’s motherboard does not support ARGB lighting effects.
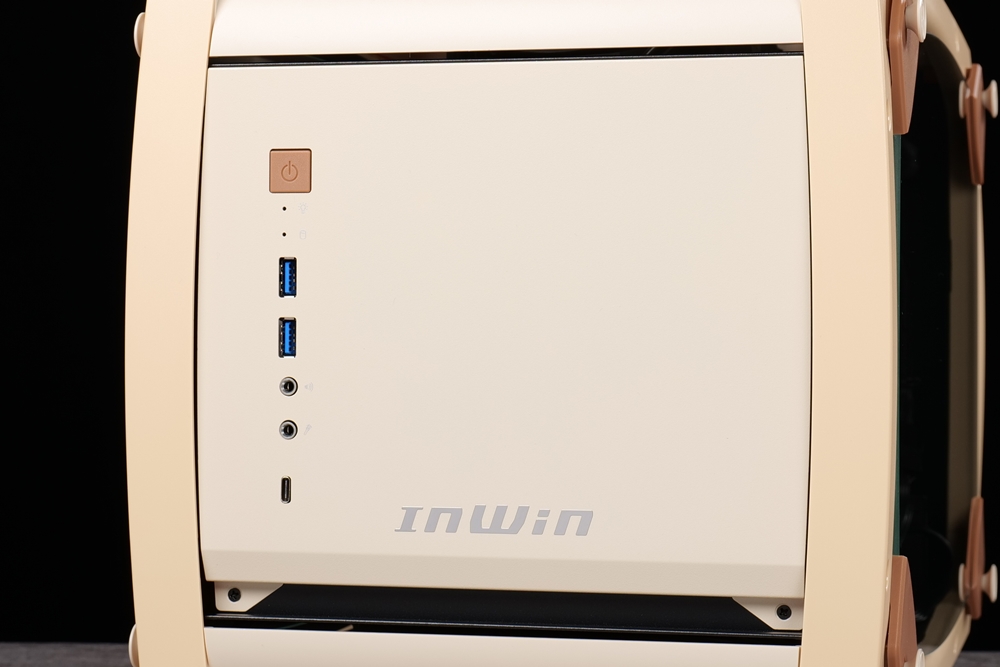
Finally, the front panel features 2 USB 3.2 Gen1 Type-A ports, 1 USB 3.2 Gen2x2 Type-C port, a power button, a 3.5mm headphone jack, and a 3.5mm microphone jack. At the back of the panel is the installation position for the power supply, which only supports ATX-sized power supplies with a maximum length of 160mm. While this may be somewhat limiting, players who don’t want the interior space of the case to feel overcrowded can still install an SFX-sized power supply by purchasing an adapter version separately.
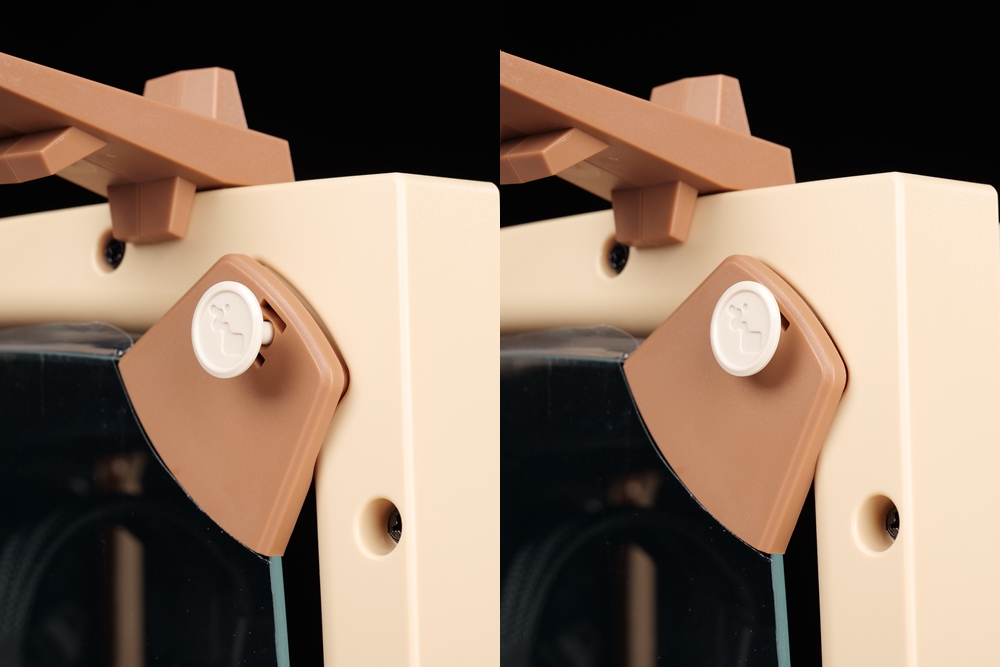
Once all four sides are ready and the wires are connected, you can proceed to install the side panels and lock them in place using screws. Then, install the front and rear bases at the bottom and snap in the side panels on both sides without the need for screws. Finally, the dust filter, mesh top cover, and earphone stand are also installed without screws, making the assembly process very convenient.

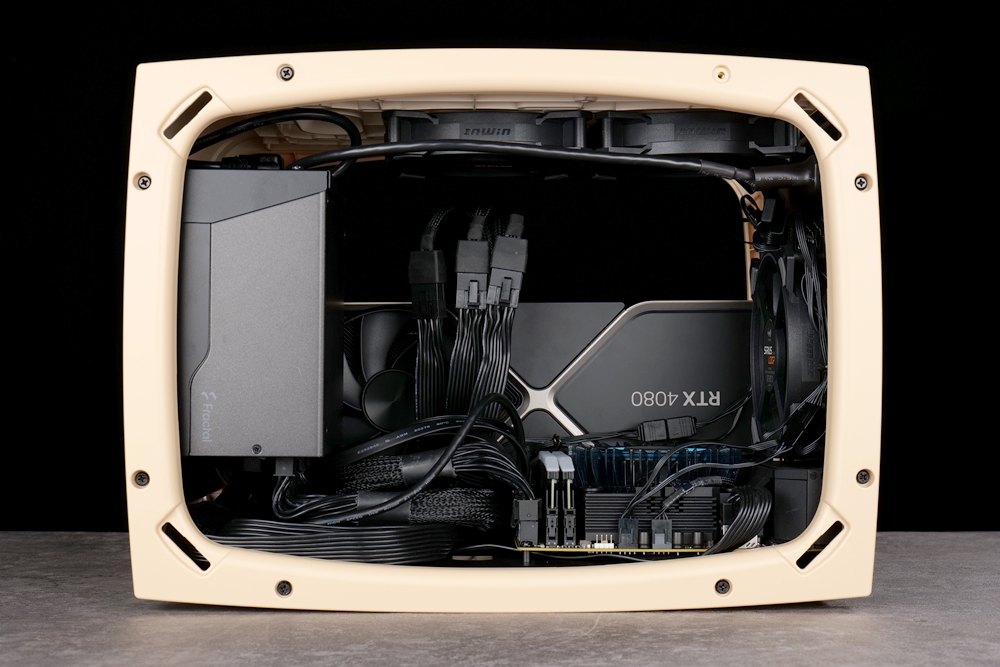
The final step is to install the glass panels on both sides of the case. The glass panels are designed with buckles on the sides, and can be easily removed by pulling them out. The panel on the right side of the case displays the motherboard and radiator, while the panel on the left side of the case displays the graphics card.
EXPLORER Shell Monster – E: Ban Ban sums up
In conclusion, the new “Case Monster” series features an animal-inspired, cute design, making it stand out from other more conventional-looking cases. With its unique and creative appearance, it’s an innovative and imaginative approach to case design. In my opinion, it looks better on a desk than the original EXPLORER shell.
Although the case’s assembly process can take some time, it’s worth it for the unique and playful design. However, the case’s support for ATX-sized power supplies may lead to a crowded internal space, and cable management may require some effort. If the case had an SFX-sized power supply bracket, I believe it would make the assembly process much easier for players.
If this article is helpful for you, please share this article with your friends on social media. Thank you!
This article is based on the personality of the reviews. You are responsible for fact-checking if the contents are not facts or accurate.
Title: The reason for the small size of the case is purely for aesthetic purposes and to add to the cute and charming appearance of the InWin Case Monsters, as seen with the E: Scabbers model