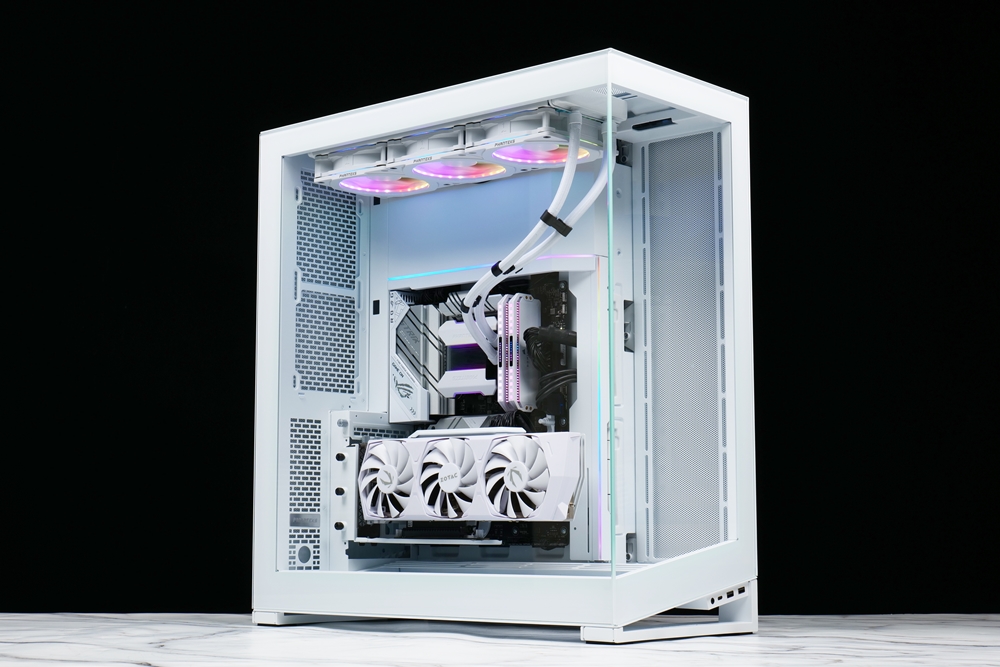
The highly awaited Phanteks NV7 enclosure has arrived at last. This unique panoramic case features an uncommon full-tower size design compared to today’s other panoramic cases. It offers ample internal space and an efficient heat dissipation system, making it highly expandable. Not only does it accommodate E-ATX large motherboards, but it also supports the installation of up to 12 fans and up to three 360mm radiators. Join us as we explore the distinctions between the NV7 and other panoramic cases on the market.
Specifications:
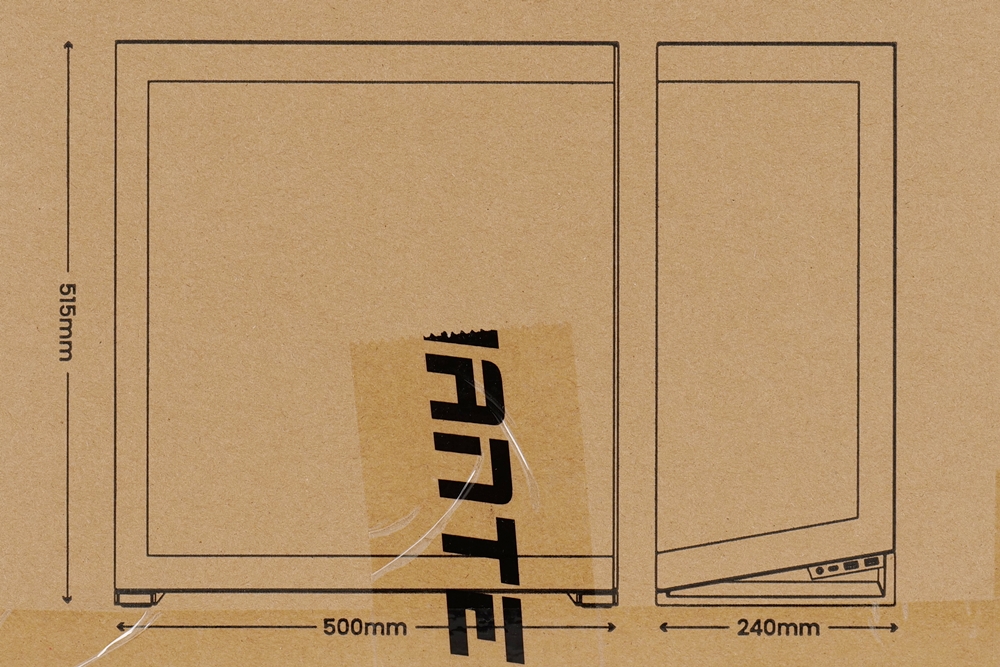
Size: Mid Tower
Material: Steel, Tempered Glass
Motherboard: mini-ITX, micro-ATX, ATX, E-ATX (up to 277 mm)
Graphics Card: Up to 450 mm
Power Supply: Up to 255 mm
Air Cooled Tower fan: up to 185 mm
Side fan: 120mm x 4
Top fan: 120mm x 3
Bottom fan: 120mm x 3 or 140mm x 3
Rear fan: 120mm x 2
Side radiator: up to 360mm
Top radiator: up to 360mm
bottom Row: up to 360mm or 280mm
Rear radiator: up to 240mm
PCIe slots: 8 (can support vertical kit installation)
2.5″ storage device installation slots: 6 (including 2 installation slots and 1 3.5″ common space)
3.5″ storage Device mounting positions: 2 (one mounting position and 2 common 2.5-inch spaces)
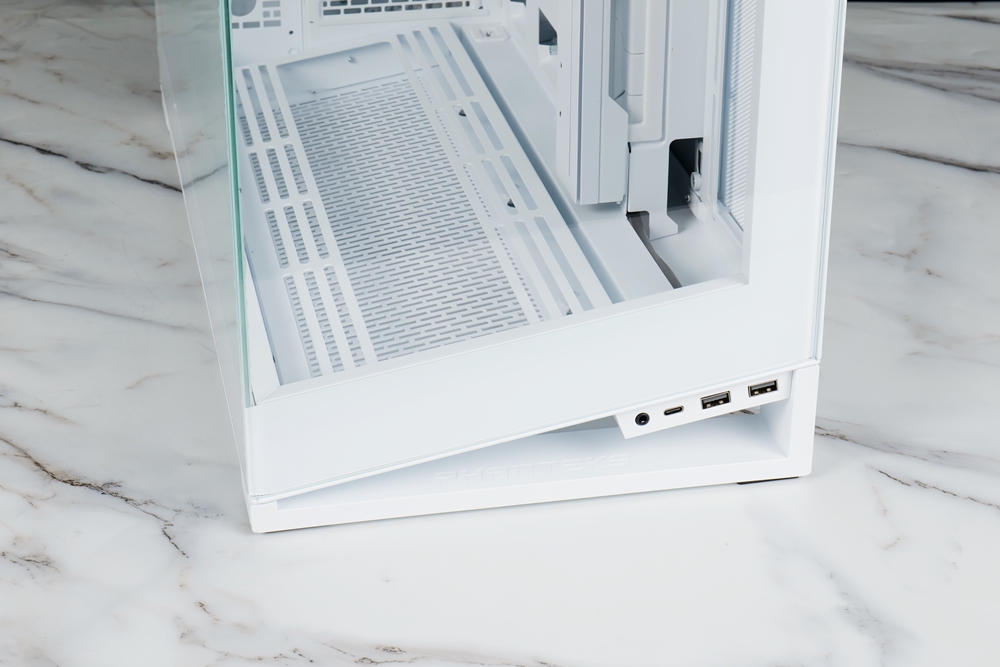
Front I/O ports: USB 3.0 Type-A x2, Type-C x1 (yjo4el USB 3.2 Gen2), HD Audio
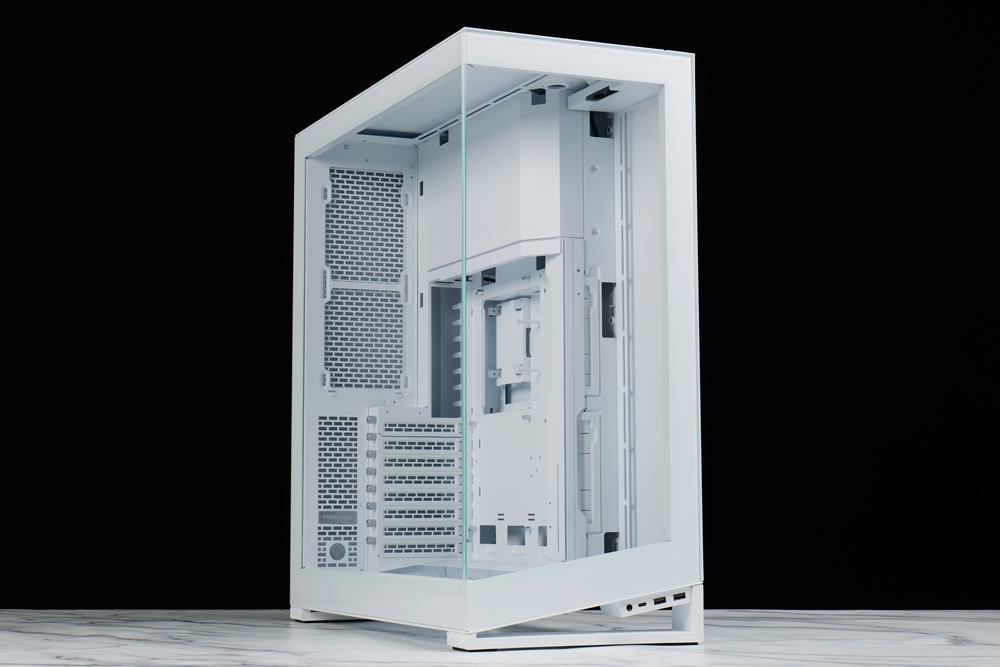
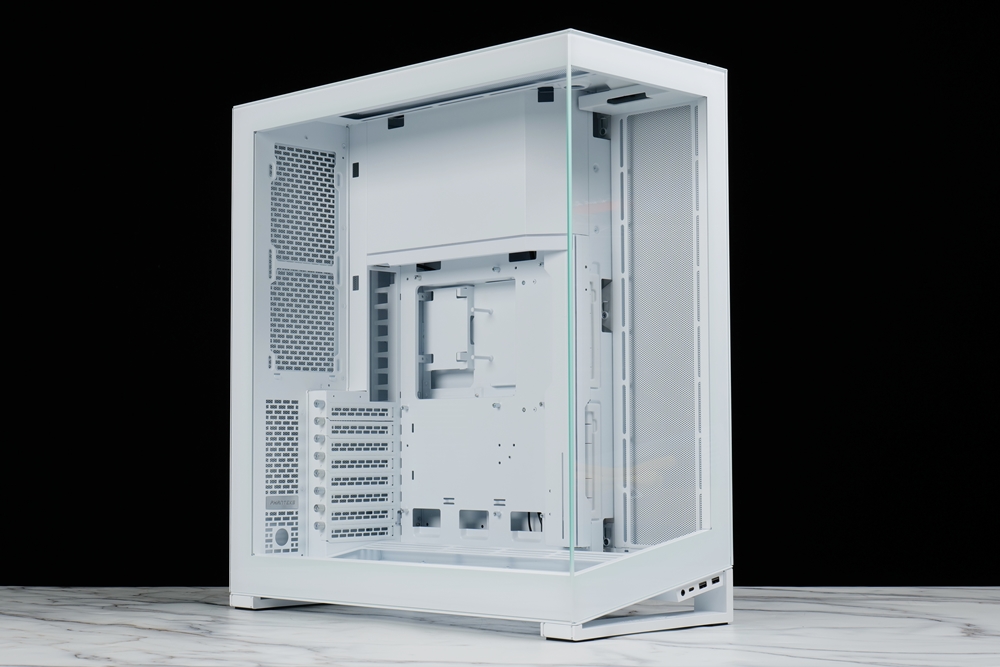
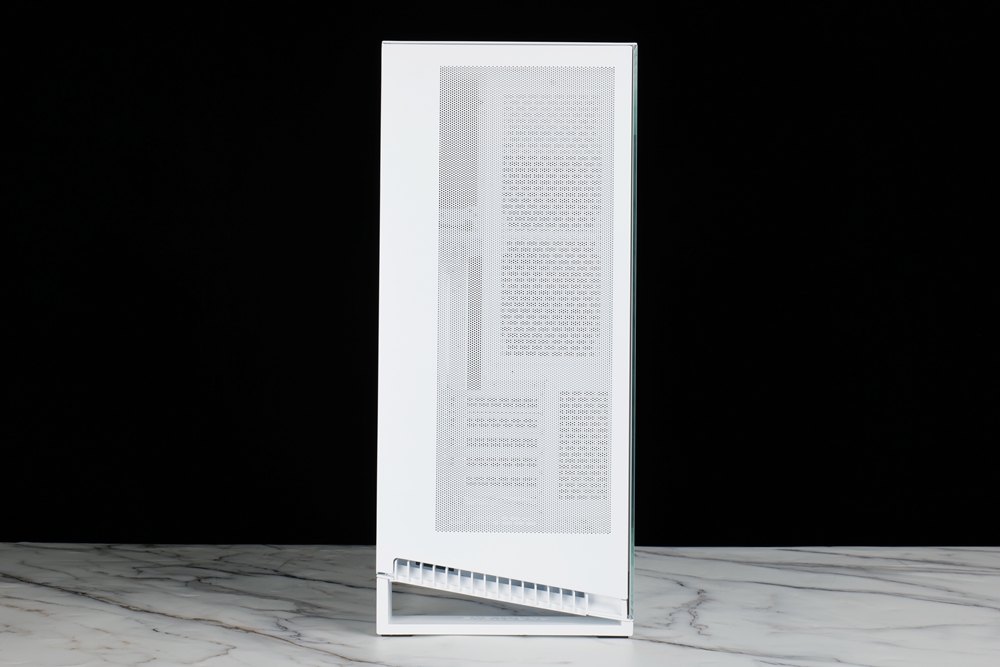
Panoramic tower double-sided glass excellent view
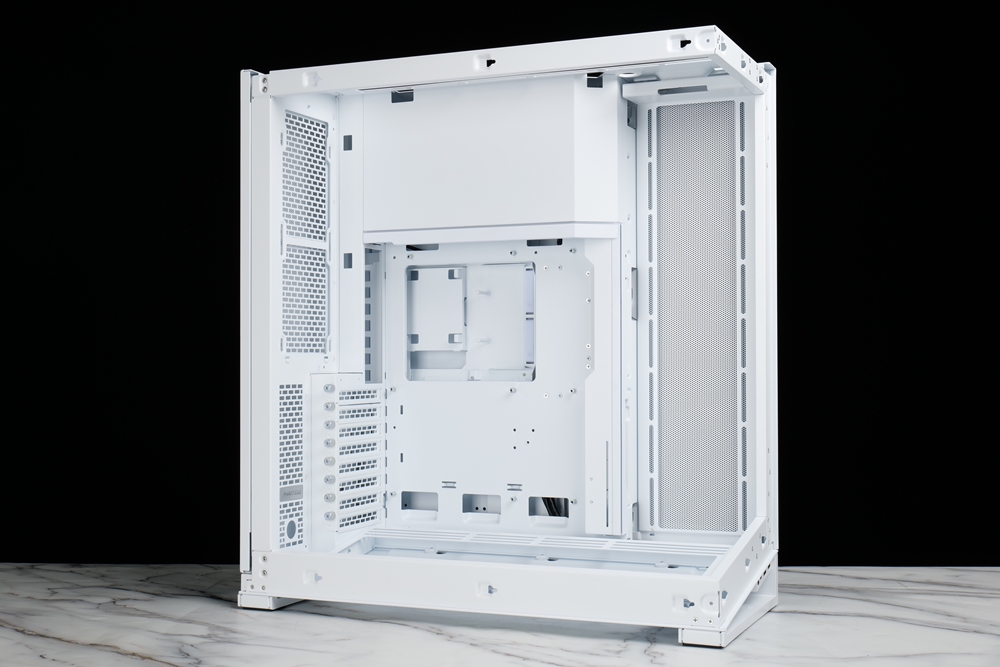
Phanteks is keeping up with the trends by introducing a panoramic case – the brand-new NV7. This full-tower case has a unique design where the power supply is installed above the motherboard. As a result, it has a smaller footprint compared to dual-compartment panoramic cases, although it is noticeably taller.
The roomy interior can accommodate the largest E-ATX motherboards, and the cooling system supports the installation of up to 12 fans and 3 360mm liquid-cooling radiators. Additionally, both the side and top support thick radiator installation.
Since there is no fan mounting positions in the front, there is virtually no limit on the size of the graphics card that can be installed. The included graphics card holder makes it even more convenient for users to install larger graphics cards. The 8 expansion slots support a variety of standard graphics card vertical adapters. Even without a dedicated vertical graphics card installation space, users can easily mount their graphics cards vertically using an adapter kit.
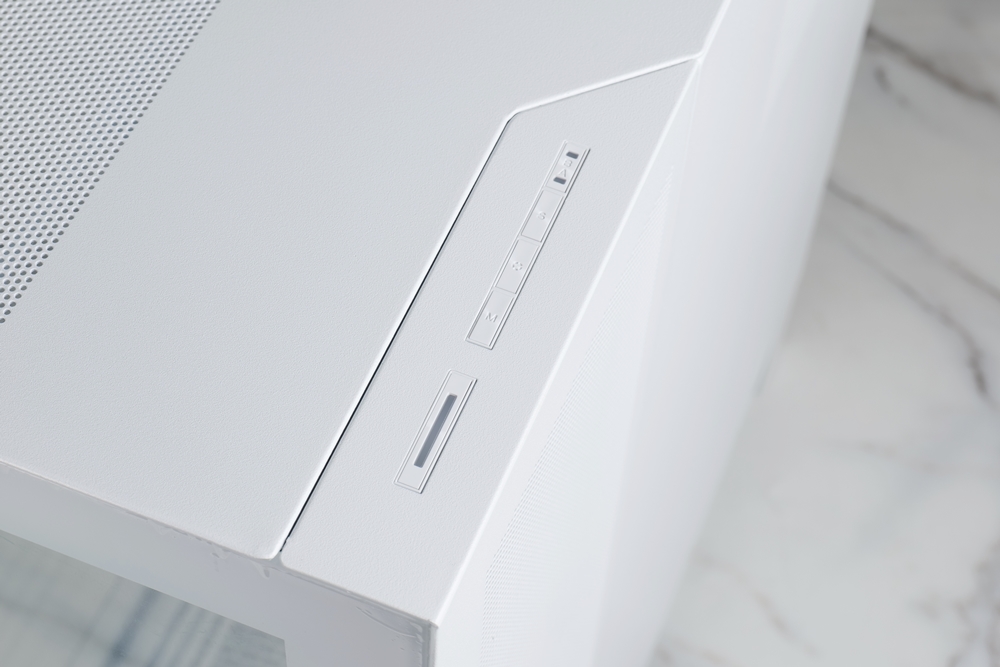
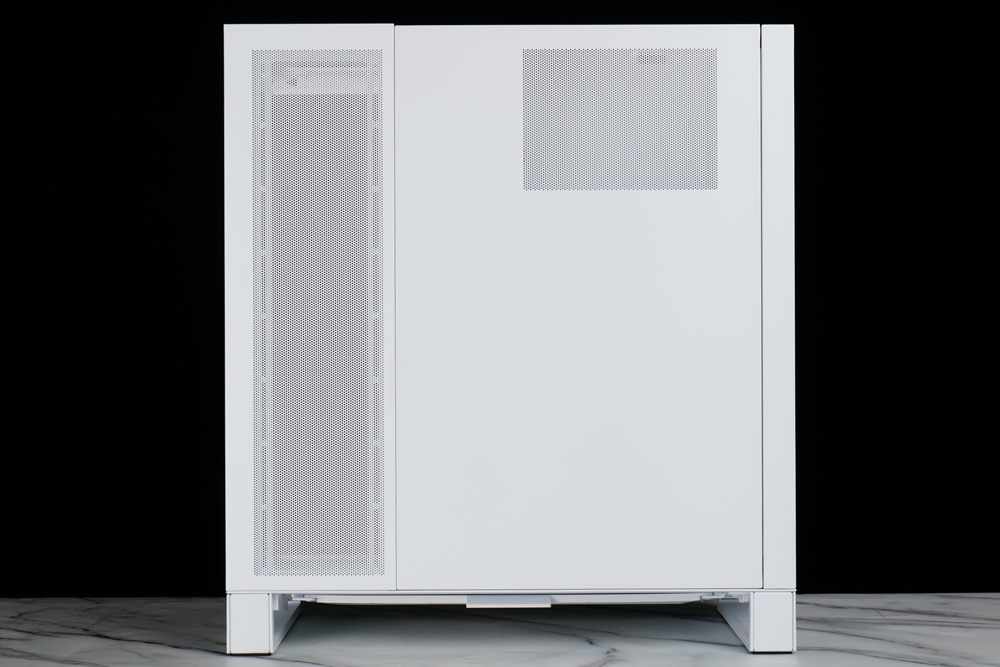
Upon first seeing the NV7, you will be immediately struck by the two large floor-to-ceiling windows. The fully transparent glass offers an outstanding view of the interior, and the front design reveals a 10-degree sloping bottom. This design allows the I/O ports to be positioned just outside the bottom while also showcasing the bottom fan. The slant at the bottom of the case provides improved airflow, allowing air to enter the case more effectively. The power switch and lighting effect control buttons are conveniently located on the top of the case, making internal cable management easier.
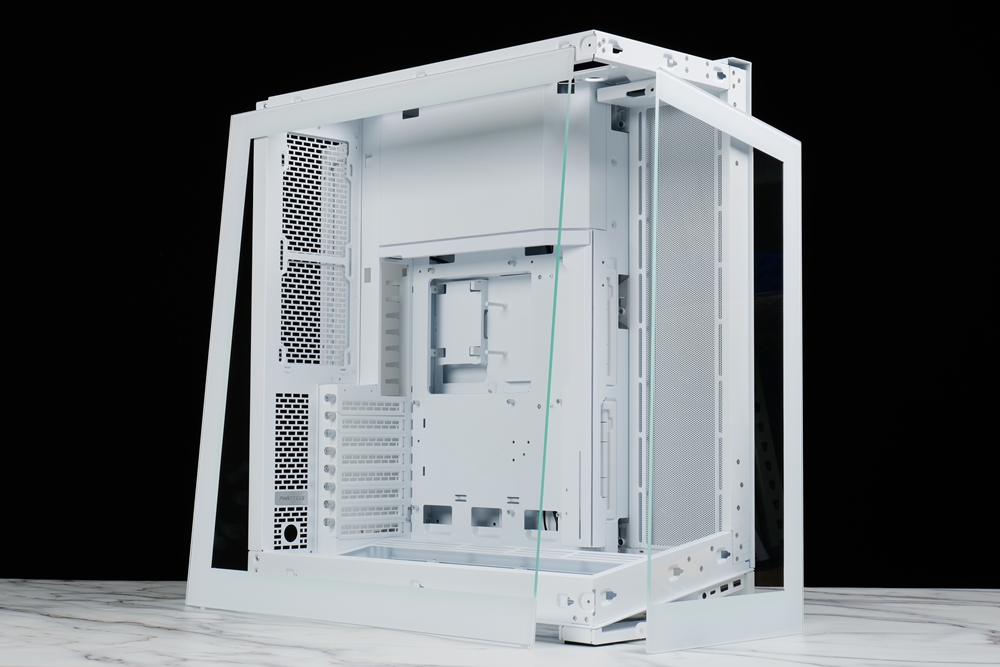
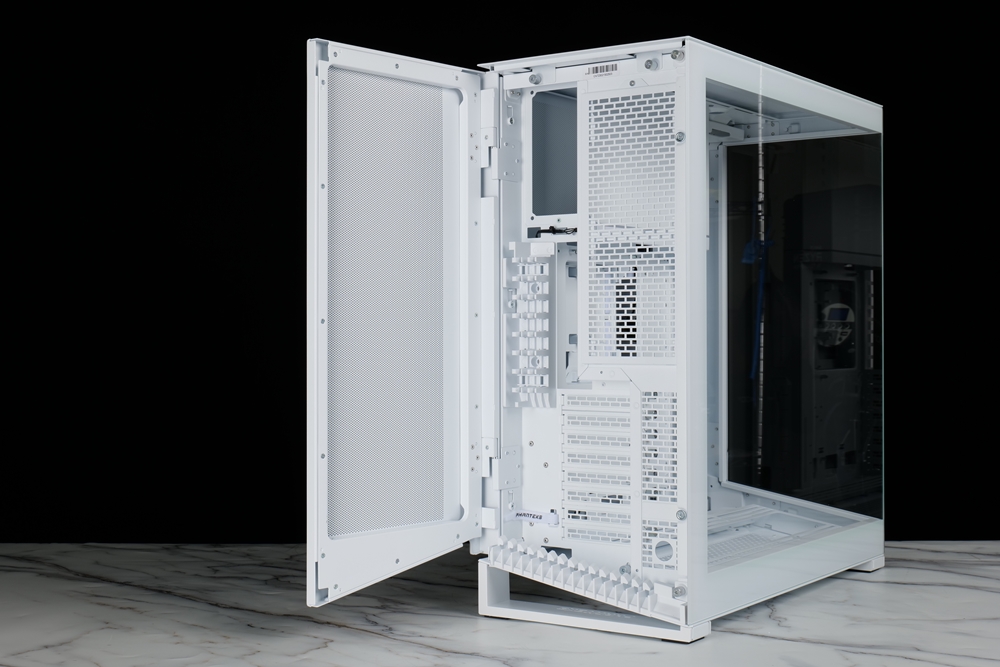
The NV7 is a panoramic case featuring full-screen tempered glass on the front and sides, with side strips in the same colour as the case to conceal the underlying metal clasps. Both panels are removable – to take off the side glass panel, open the back door and loosen two thumb screws, while the front glass panel requires the removal of two screws for disassembly. Since there is no support column between the two glass panels, L-shaped metal parts are present at the connection between the front panel frame and the backplane to reinforce structural strength. This ensures that the frame can support the glass and the installation of top cooling components.
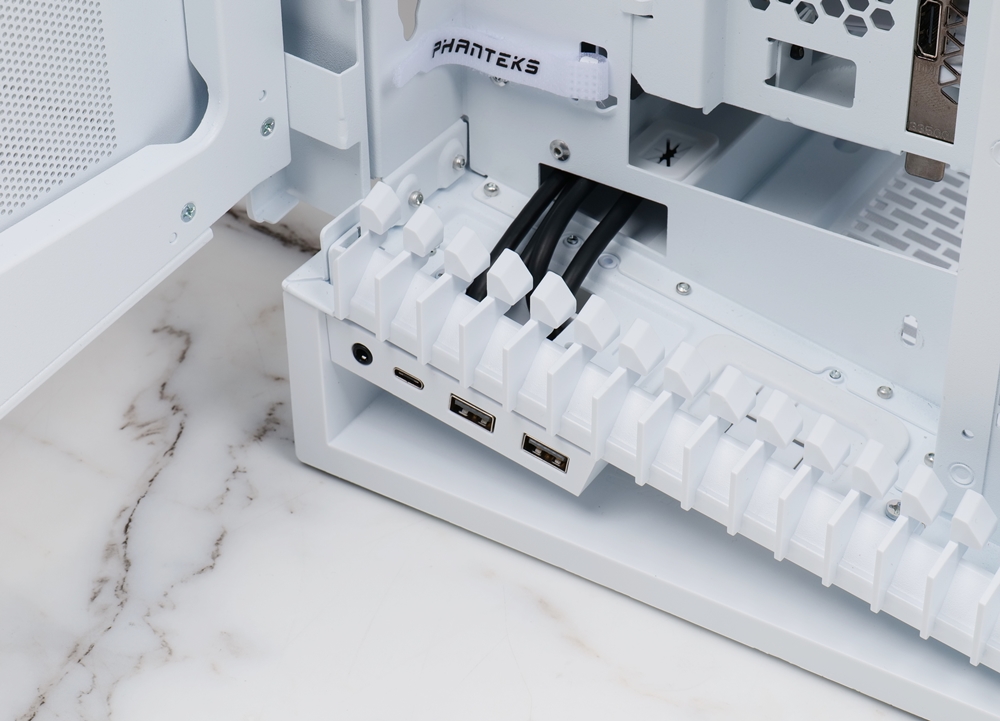
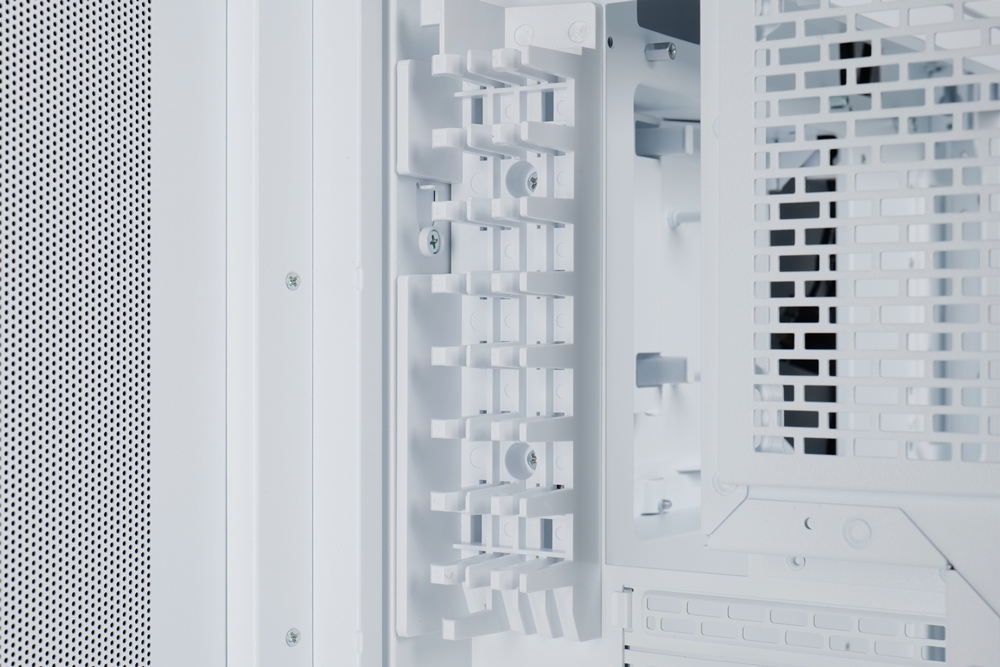
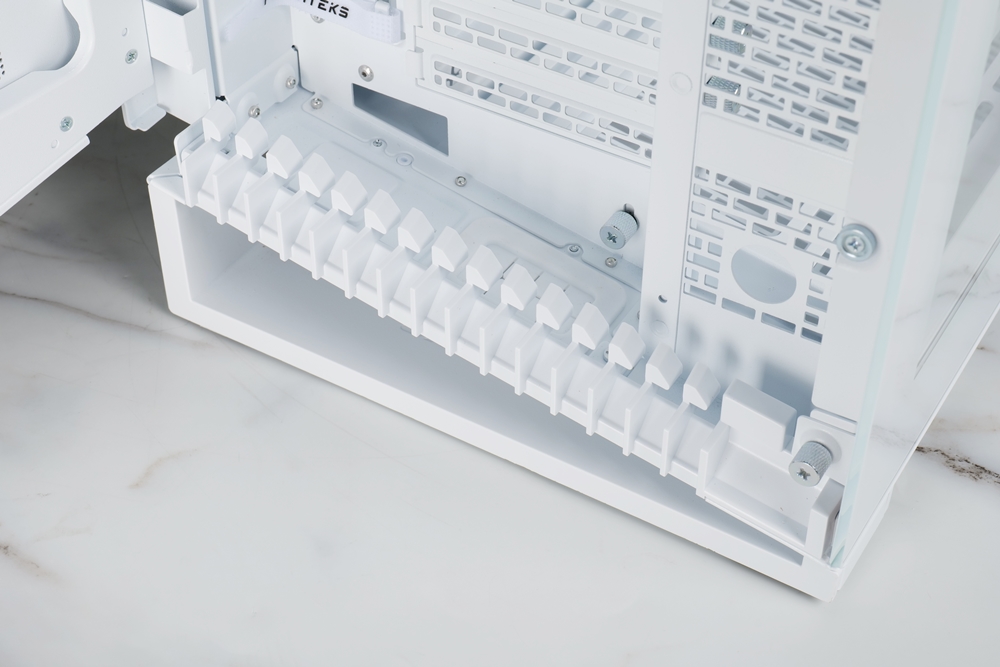
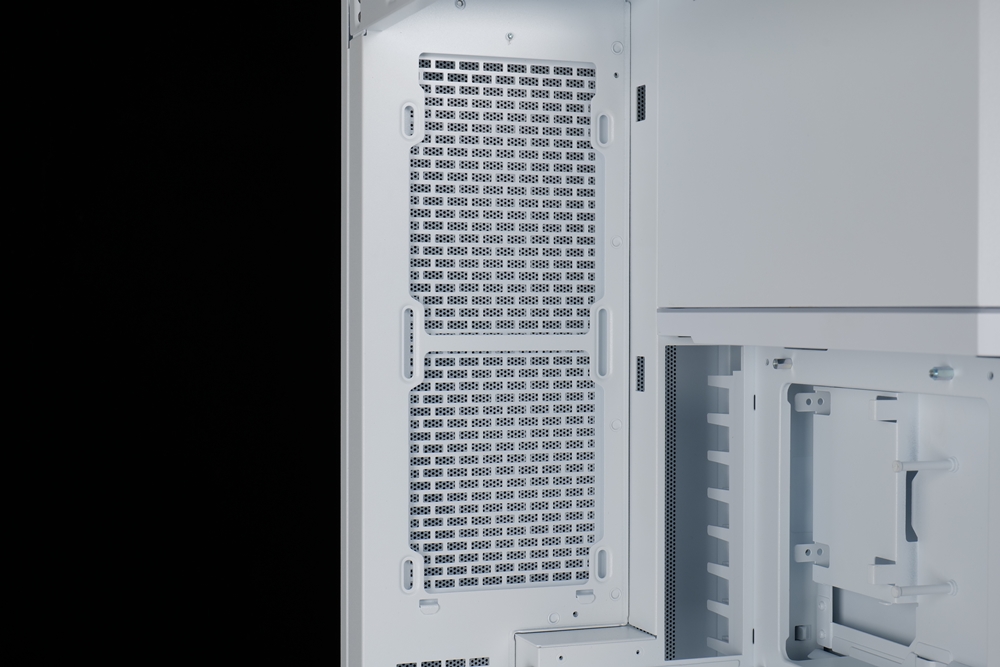
The case features a distinctive door panel design at the rear, utilizing Ultra-Fine Performance Mesh openings to ensure both ventilation and safety. This design might have been chosen with the consideration that users may place the case horizontally on the desktop beside their monitor. The rear design effectively conceals all cables, which can be secured using internal cable clamps. Cables exit through the lower cable groove, and there’s also an opening at the bottom to accommodate thicker cables that may not fit in the lower groove. These cables can be routed directly through the opening.
12 fan installation positions, DIY water-cooling-friendly configuration
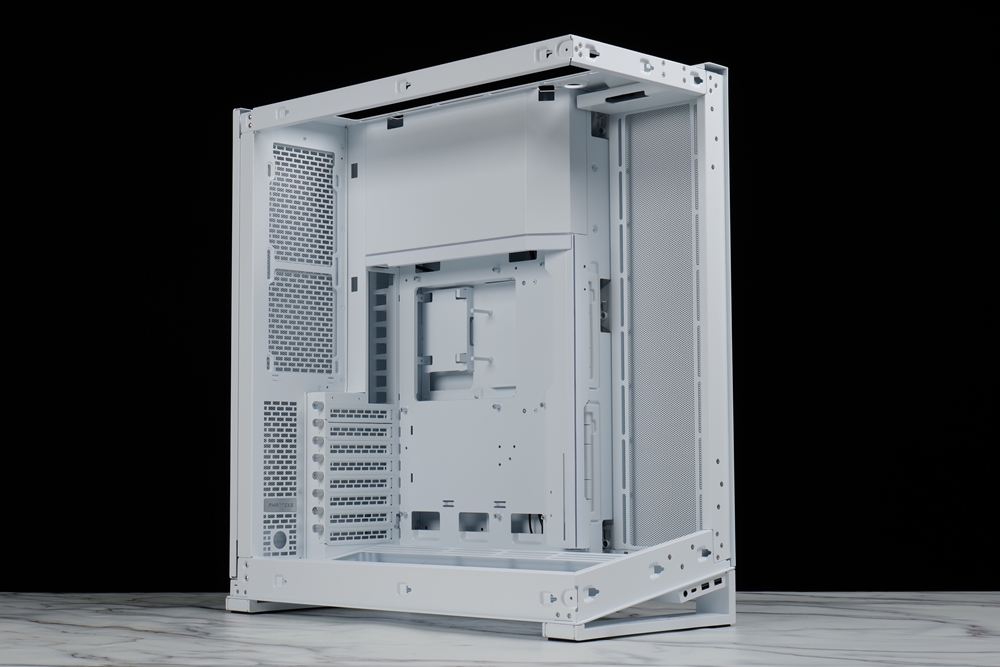
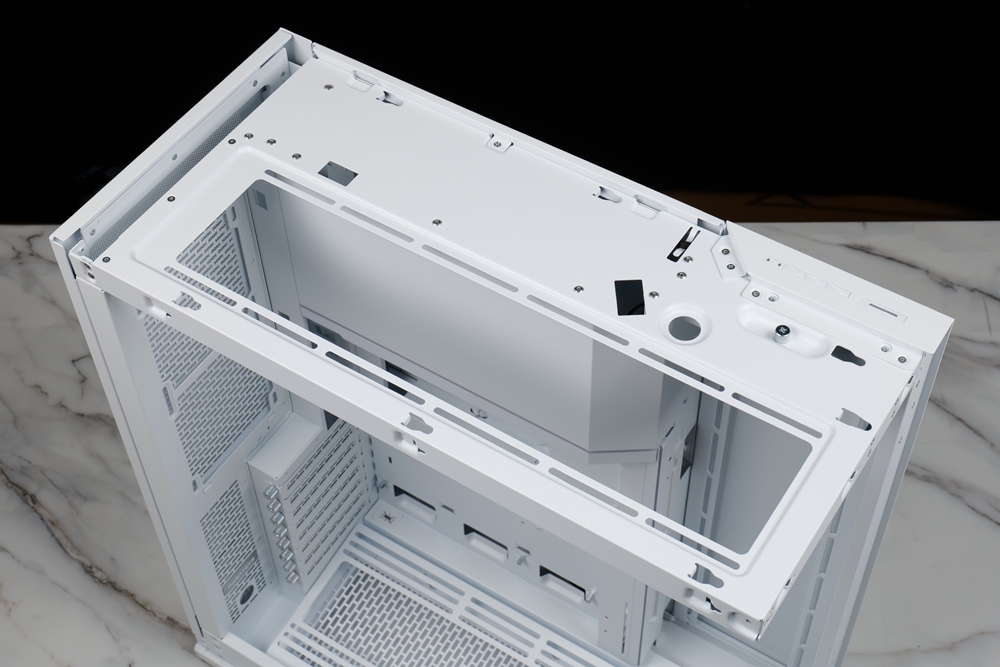
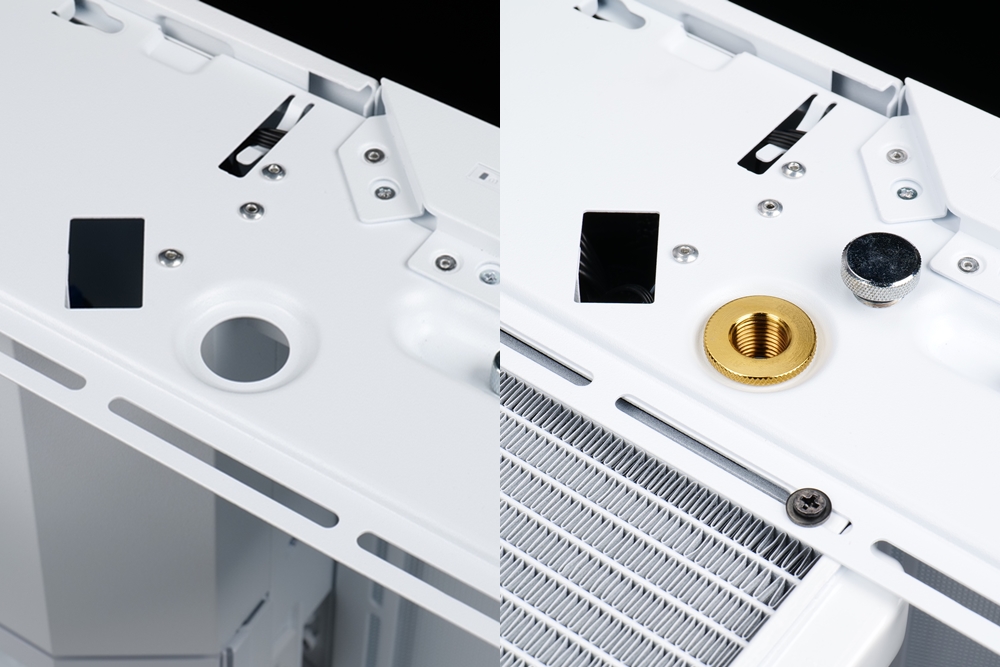
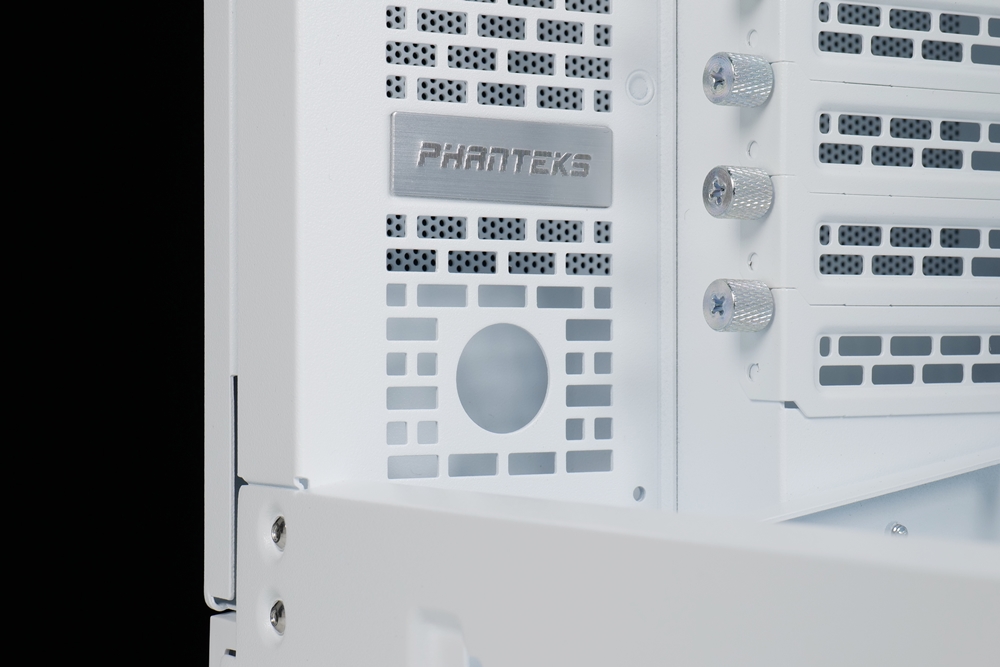
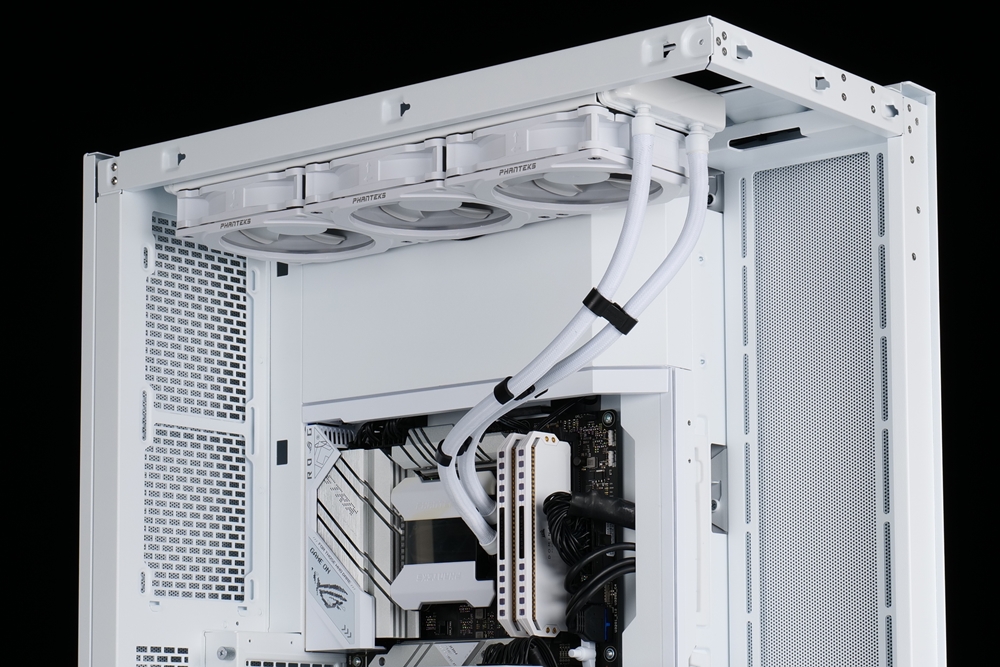
While many mid-to-high-end cases currently offer numerous fan installation positions, the NV7’s design, with its fully open bottom and fan mounting locations, maintains a chimney-style vertical airflow configuration. The top fan installation area provides space for three 120mm fans, along with an extra 6cm for adjusting the position based on water-cooling tubing configurations. Additionally, there is a 20mm opening at the upper front side for DIY water-cooling enthusiasts. This allows for the installation of a pass-through water-cooling fitting, creating a usable water inlet above it.
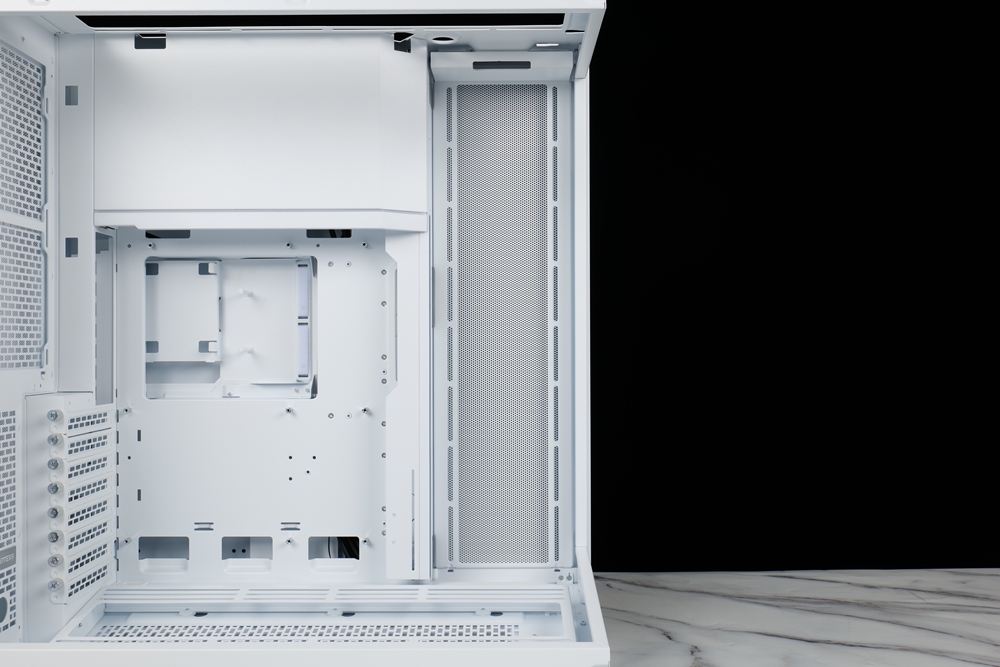
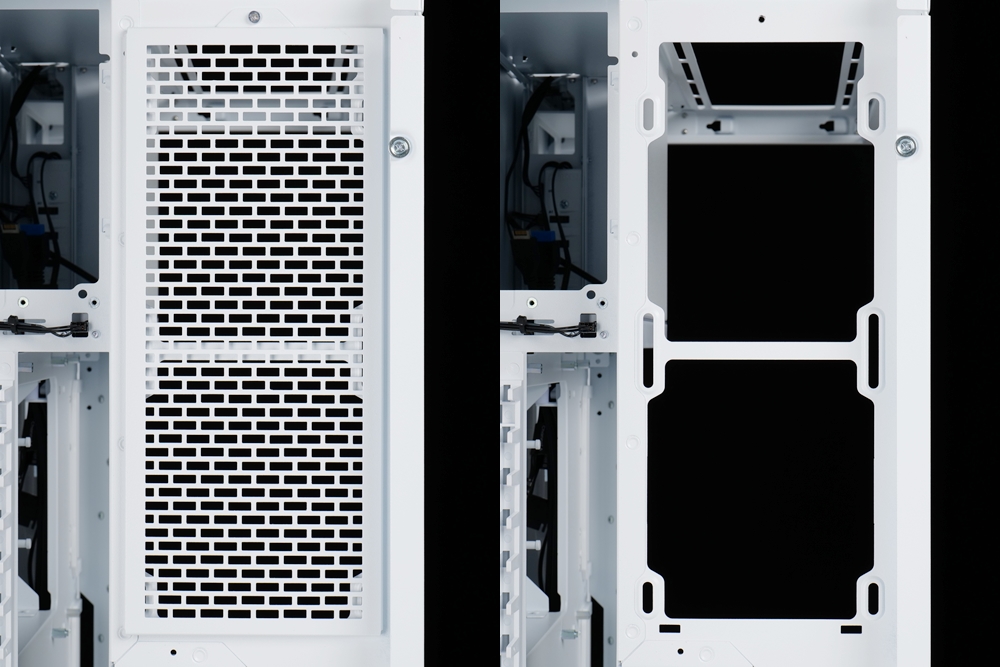
The fan mounting positions on the side and the bottom feature modular brackets. Firstly, the side fan mounting area can support up to 4 fan installations. However, due to the lack of extra space reserved, it does not accommodate 480mm liquid-cooling radiators. Users will need to choose between installing a full set of 4 fans and a 360mm liquid-cooling radiator.

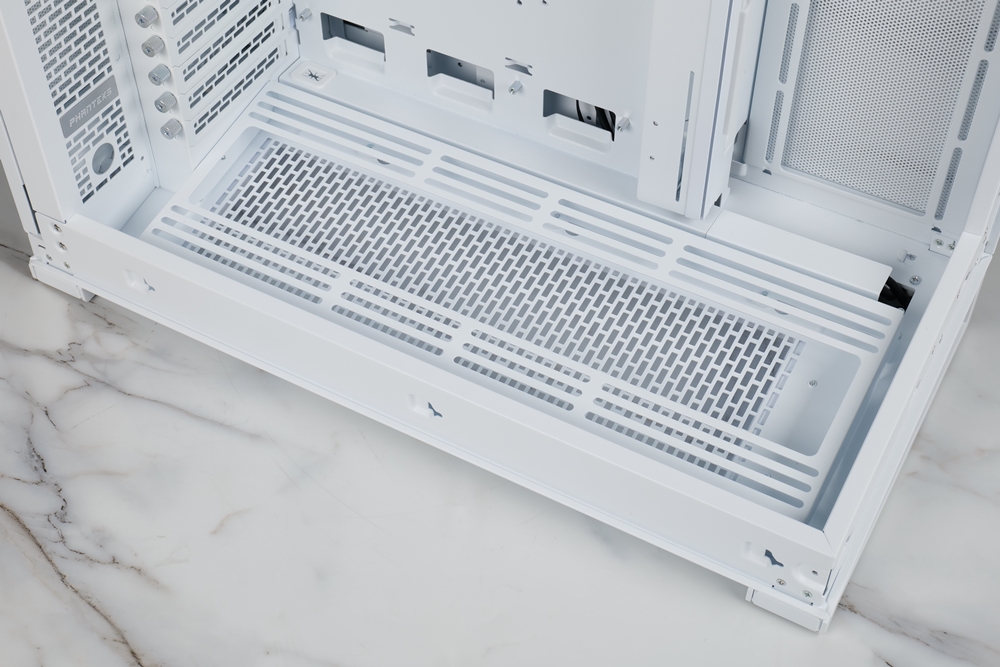
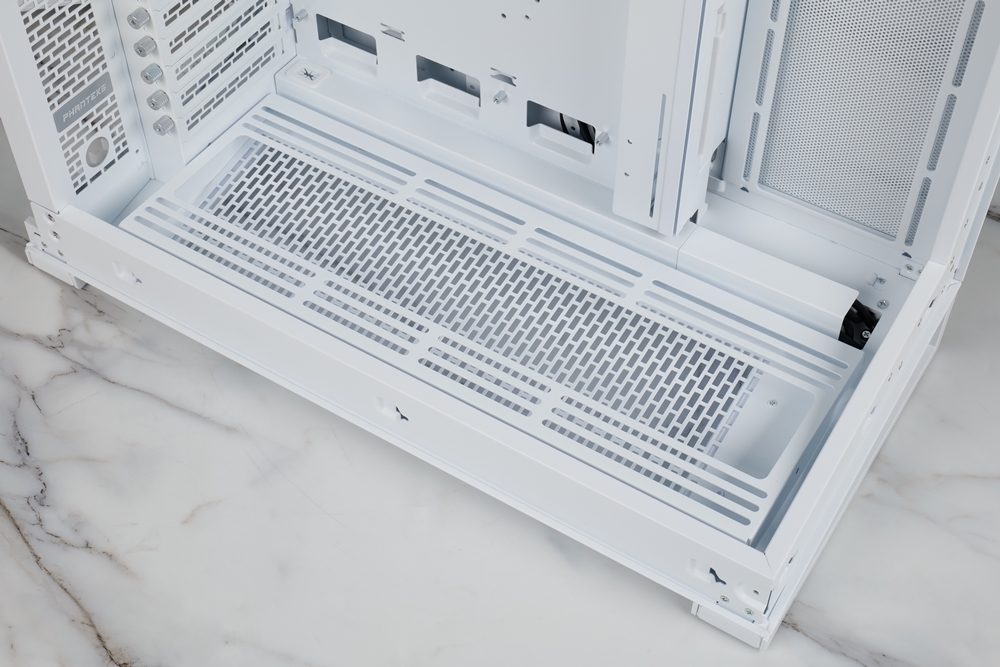
Next, you’ll notice the lower fan installation position, which features a 10-degree tilt to better showcase the fan lighting effect. However, if a user prefers to install the fan horizontally or needs to mount a liquid-cooling pump at the bottom, the bracket can be rotated horizontally, adjusting the installation angle accordingly. Additionally, there is a 20mm opening on the chassis behind the bracket where users can install a pass-through water-cooling fitting and use it as a drain hole.
Regarding the fan installation position behind the motherboard, there are two positions that support 120mm fans. In addition to fans that can be mounted here, users interested in DIY water cooling can use the 240mm standard water channel plate.
High and spacious
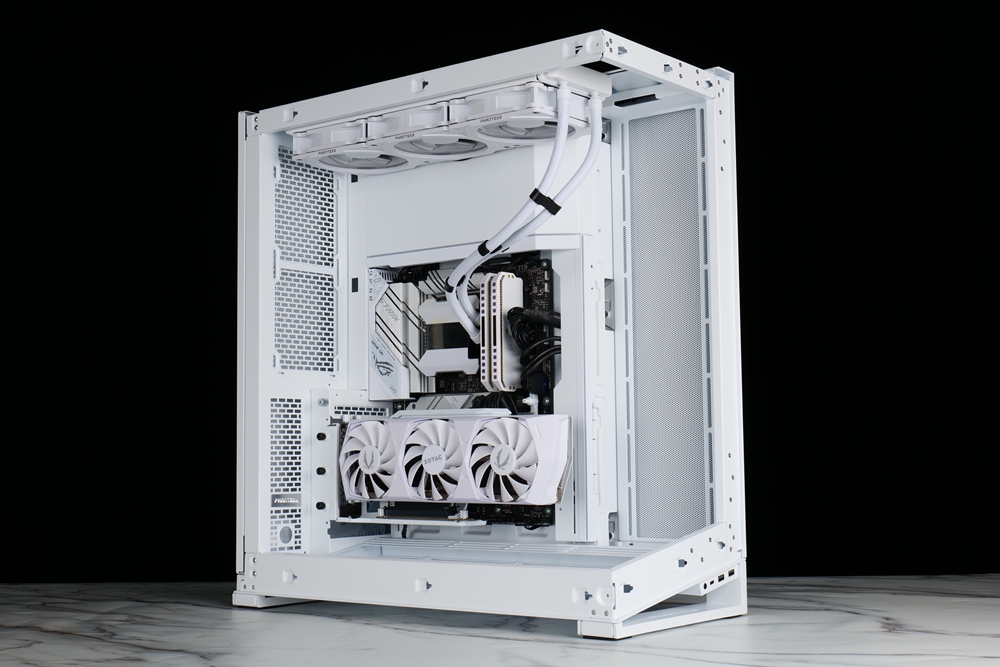
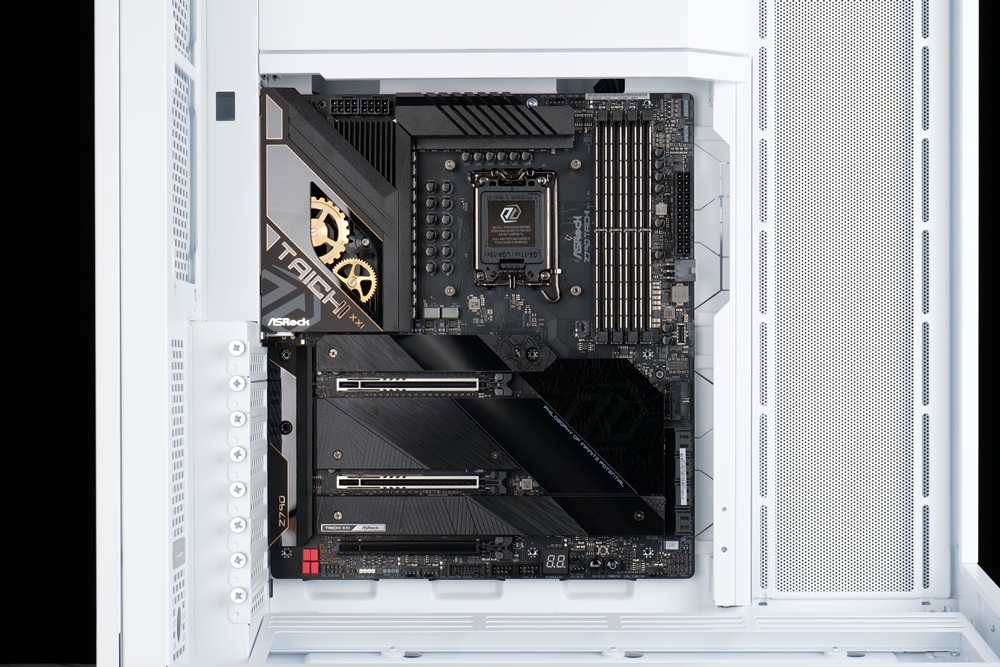
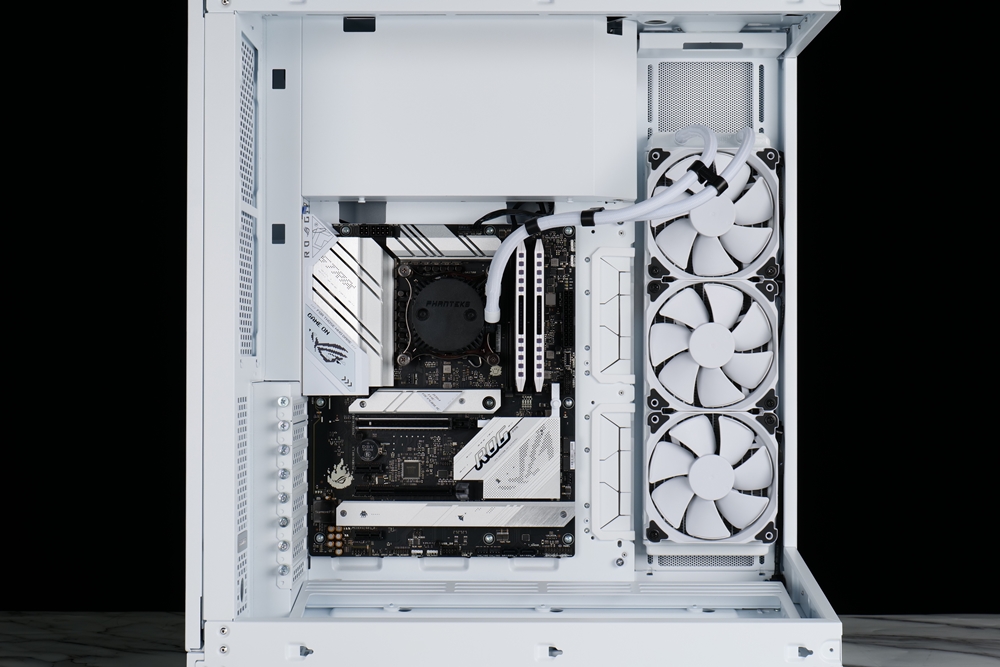
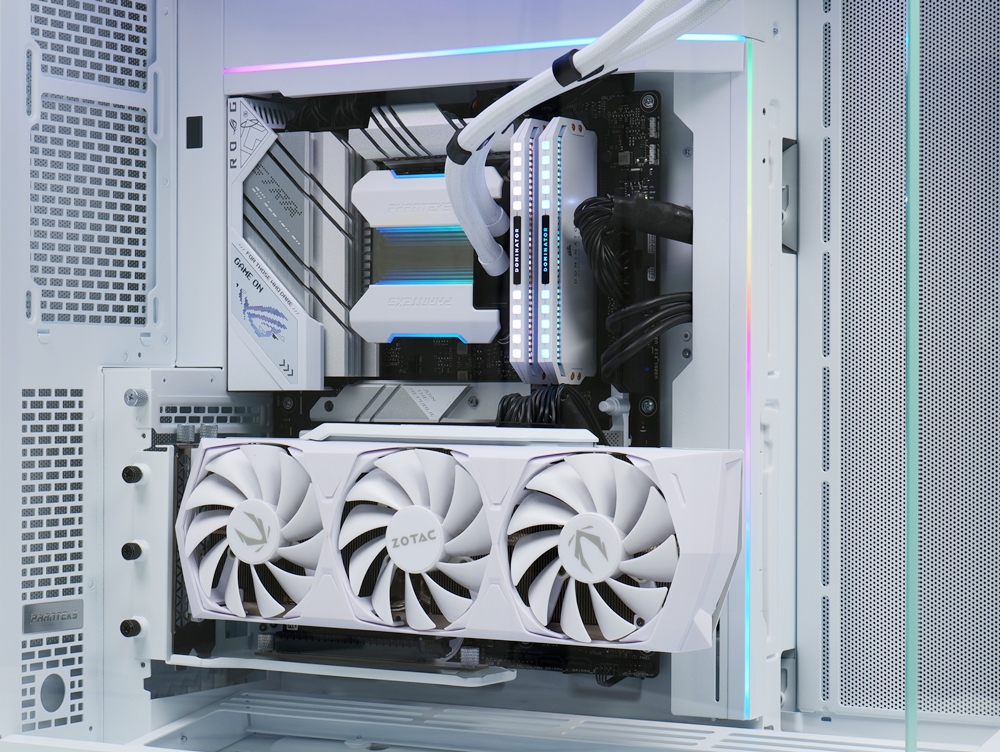
The power supply in the rear section is positioned vertically and positioned above the motherboard installation location, resulting in a visually striking interior design. The location where the motherboard is installed is equipped with a modular cable shield that features an integrated visual effect. Additionally, the shield on the upper side is designed to be installed in either direction, accommodating both ATX and E-ATX motherboards and enhancing the overall visual appeal.
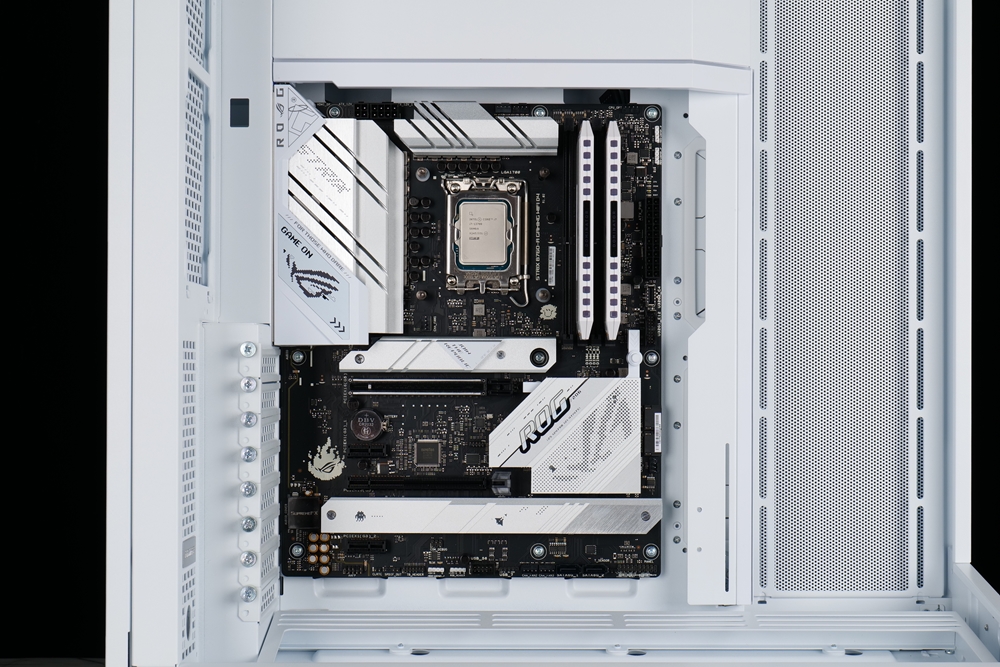
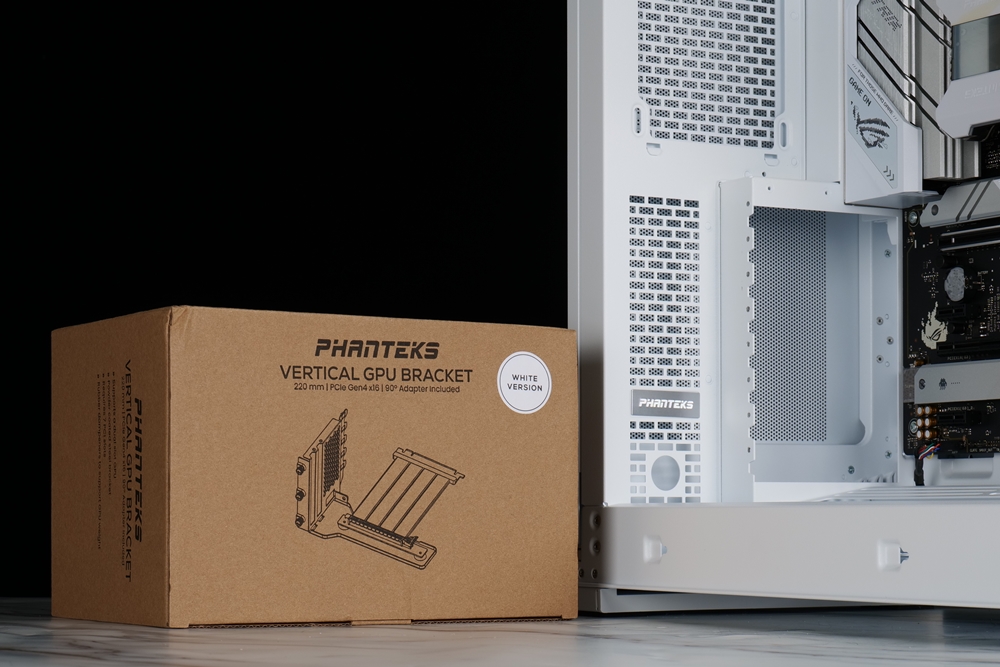
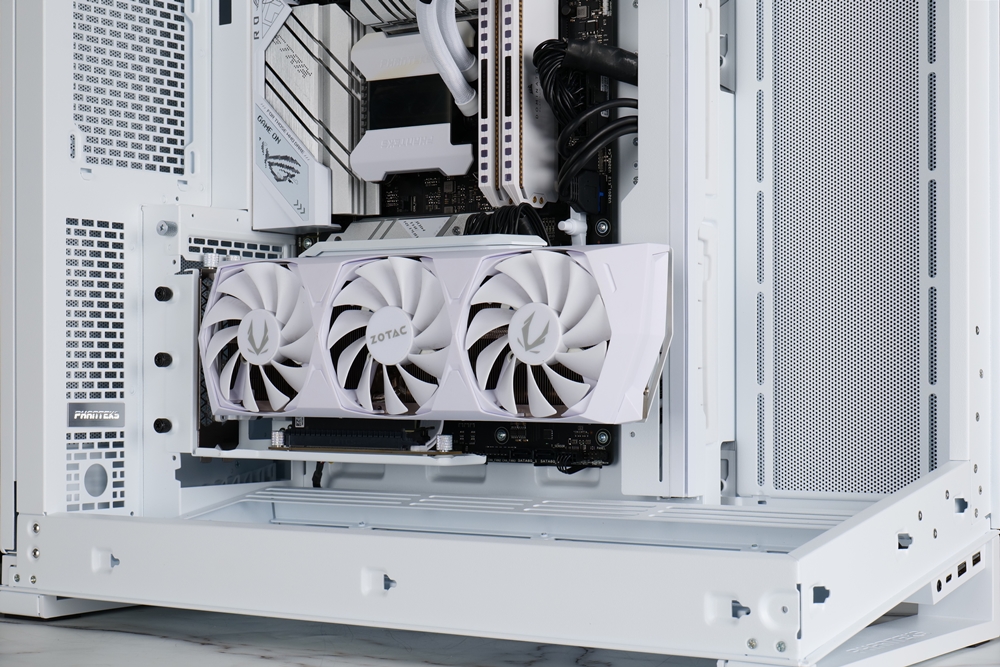
The expansion slot has an 8-slot configuration and comes with a graphics card bracket. However, upon installing the bracket, it was discovered that it is only compatible with high-end NVIDIA cards without a rear fan. While there is no vertical slot provided, installation is still achievable through the use of a vertical graphics kit. In this test, the newly released white version of the Phanteks PCIe Gen4 vertical graphics kit was used, offering a better fitting option for all-white builds.
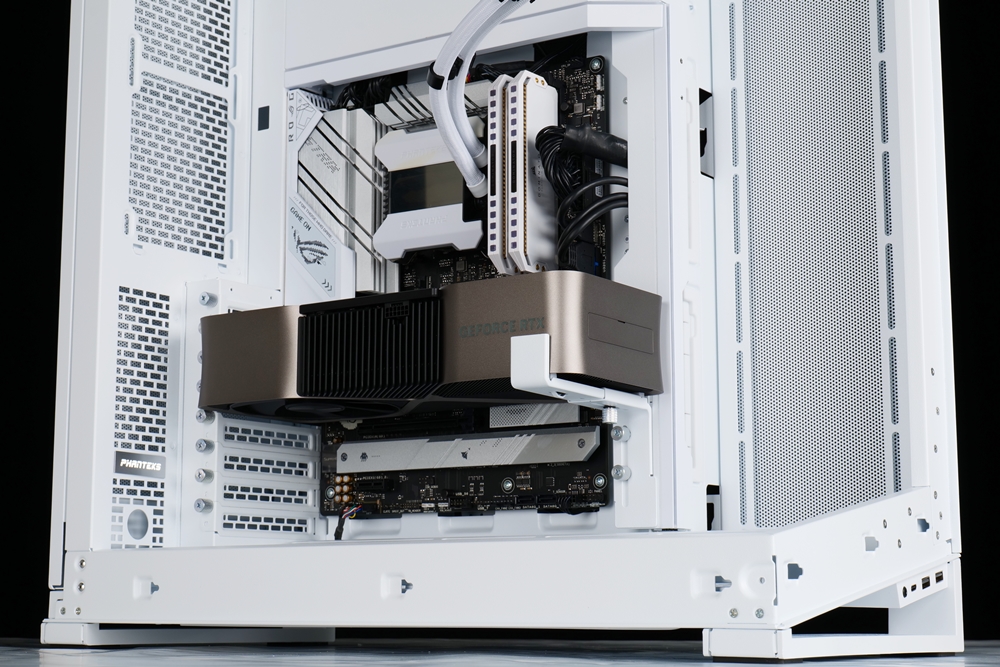
During the installation process, a 360-sized integrated water-cooled radiator was used. Given the ample interior space, it was also tested whether the length of the water-cooling tubes would be sufficient for side and upper installation. Upon actual measurement, it was found that the integrated water-cooled radiator with a 40cm tube length cannot be installed without causing issues. However, if the water-cooling radiator being installed is not from Phanteks’ own Glacier One series, which features tube clamps to secure the position of the water-cooling tubes, then a solution must be found to prevent the water-cooling tubes from obstructing the rear hardware.
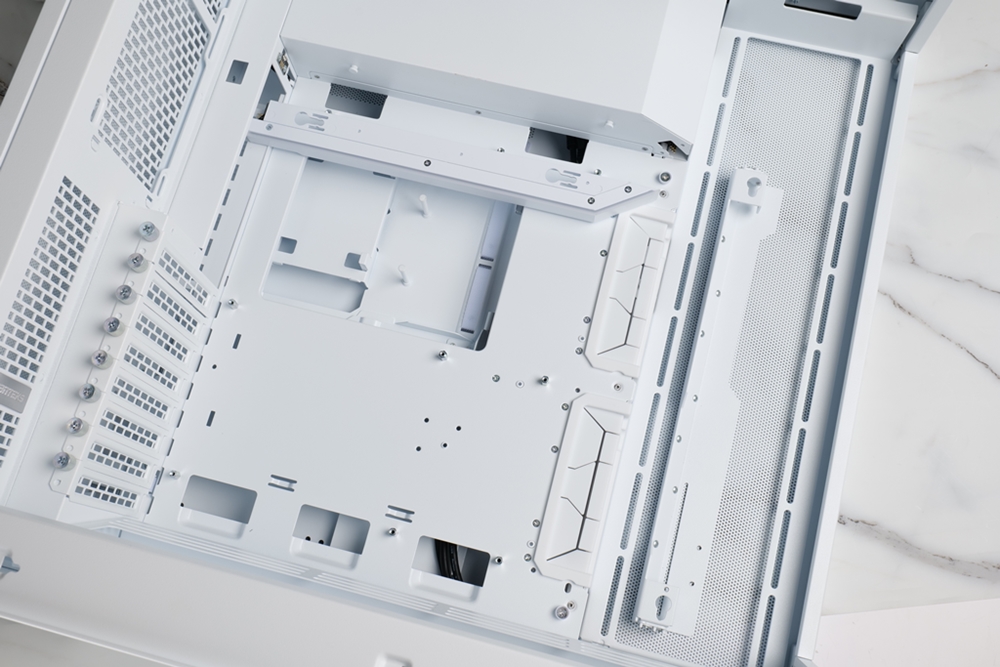
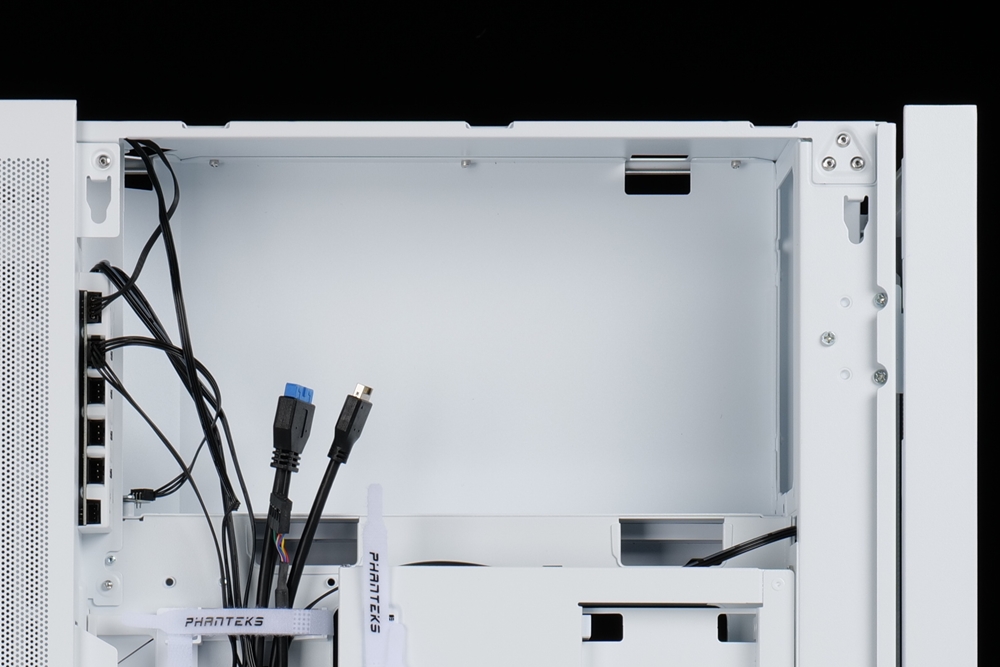
The rear space and cable management are measured
At the rear of the case, there are panels that cannot be removed. The Ultra-Fine Performance Mesh panel located in the fan area is separate from the side back panel and cannot be removed. However, it is visible after the back panel has been removed. The upper part of the interior is the power supply compartment, while the lower part features a wire strap pre-installed on the left side for cable management and two baffles on the right side. In addition to serving as wire covers, these two baffles provide six 2.5-inch storage device installation slots and two 3.5-inch storage device installation slots, including two 2.5-inch installation slots and one 3.5-inch public space. However, as the hard disk installation slot configuration of the version being tested is not the final commercial version, players are advised to refer to the commercially available version for the allocation of disk installation positions.
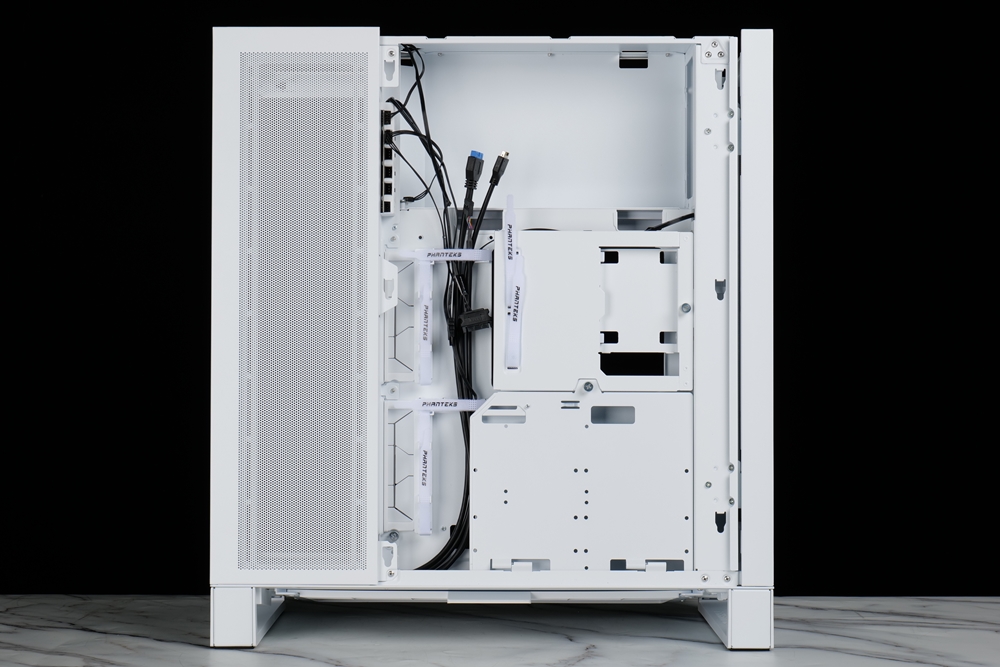
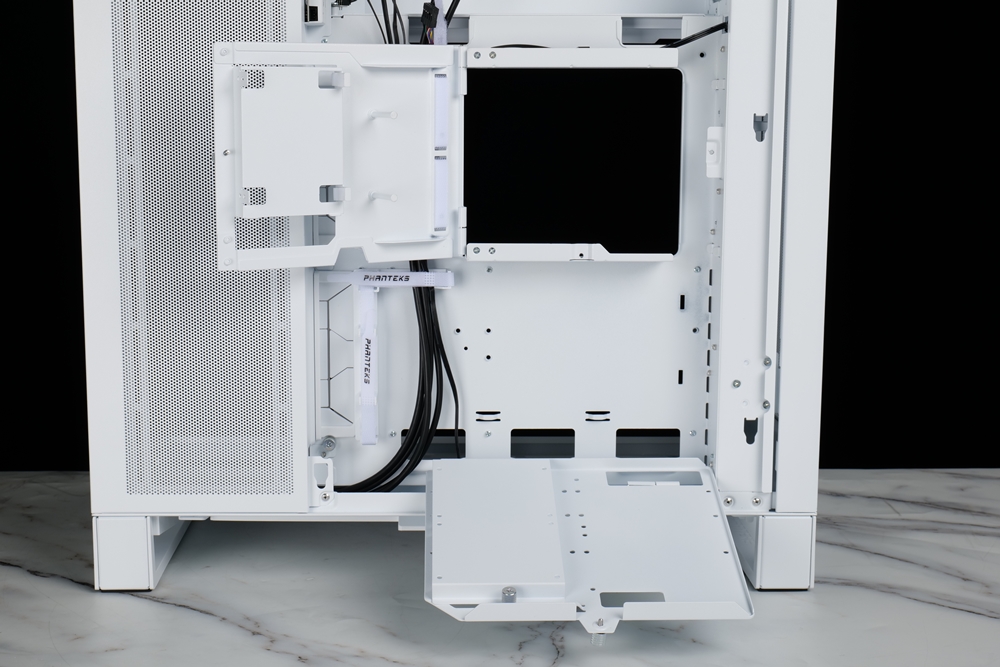
The upper part of the power supply compartment features a vertical installation design, allowing the chassis to maintain a narrow width. The power supply compartment itself is designed to be very spacious, thus providing ample room for large-sized and high-wattage power supplies, with extra space available for securing excess wires after installation.


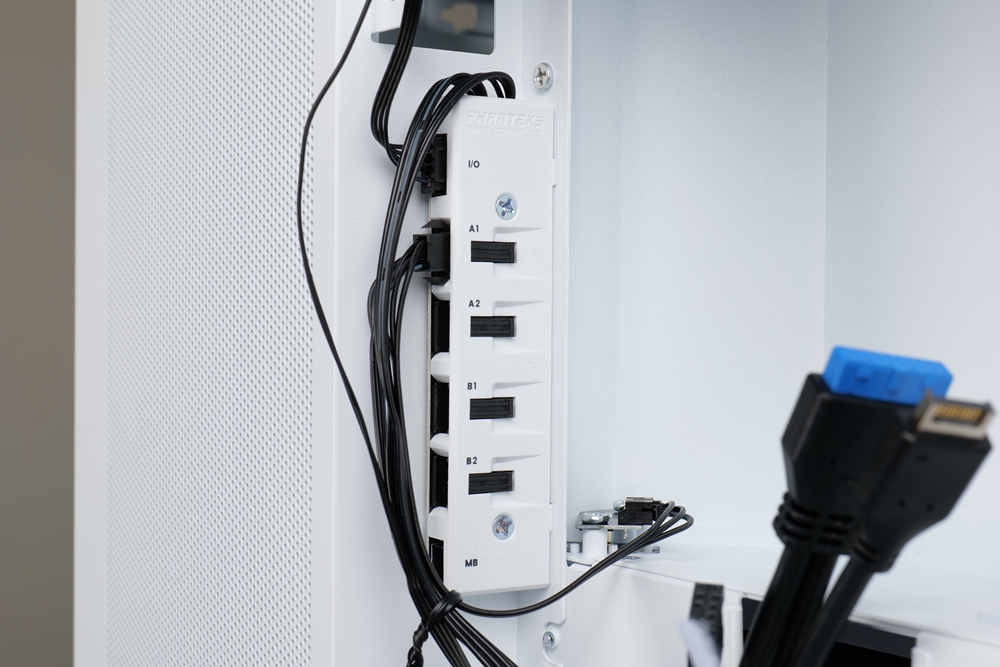
On the left side of the power supply compartment, there is a lighting controller visible. This lighting effect controller offers 2 channels that can control the lighting effects separately. Each channel provides 2 3-Pin sockets, allowing players to expand up to 4 channels of ARGB devices. Additionally, the controller provides a mainboard connection channel that enables players to connect to the mainboard through the (4-1)-Pin cable. This allows the mainboard to control the lighting effect of the entire system.
Summarize

Phanteks’ latest offering, the NV7, is a panoramic case designed with a greater focus on DIY water cooling. Its assembly reveals that the case may be too spacious for general air-cooled or integrated water-cooled machines, although it does provide extra space for players to decorate. Nevertheless, the case is best suited for DIY water cooling setups.
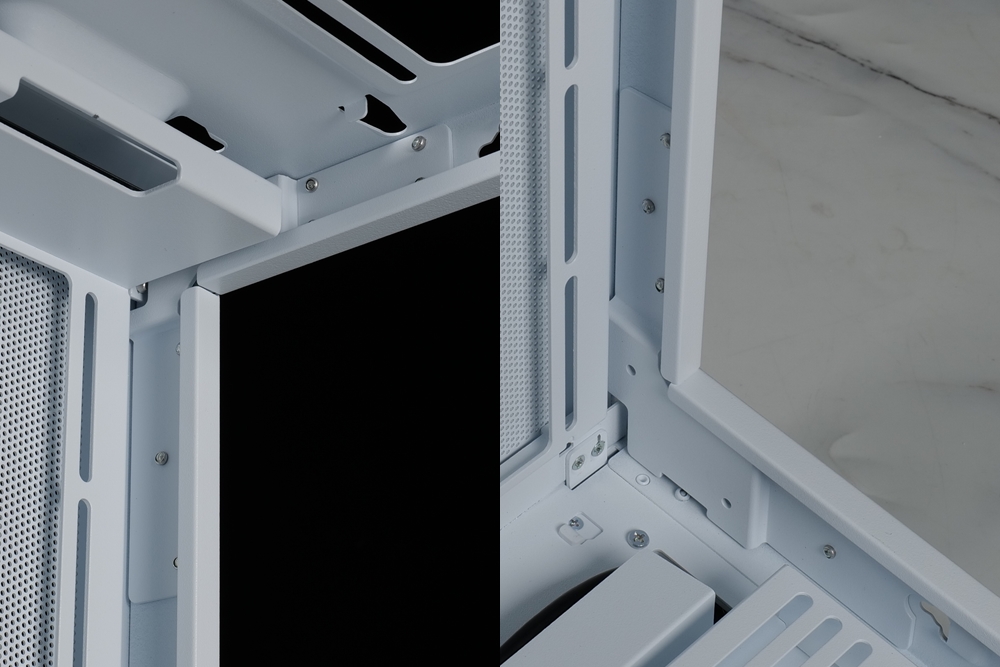
Due to the lack of a left A-pillar, it’s crucial to ensure that the upper part of the case can withstand the weight of heavy hardware such as water-cooled radiators and fans. To address this, the NV7 features internal structural reinforcement that provides excellent support for the upper side of the case, eliminating any concerns about structural deformation from excessive heat dissipation configuration.
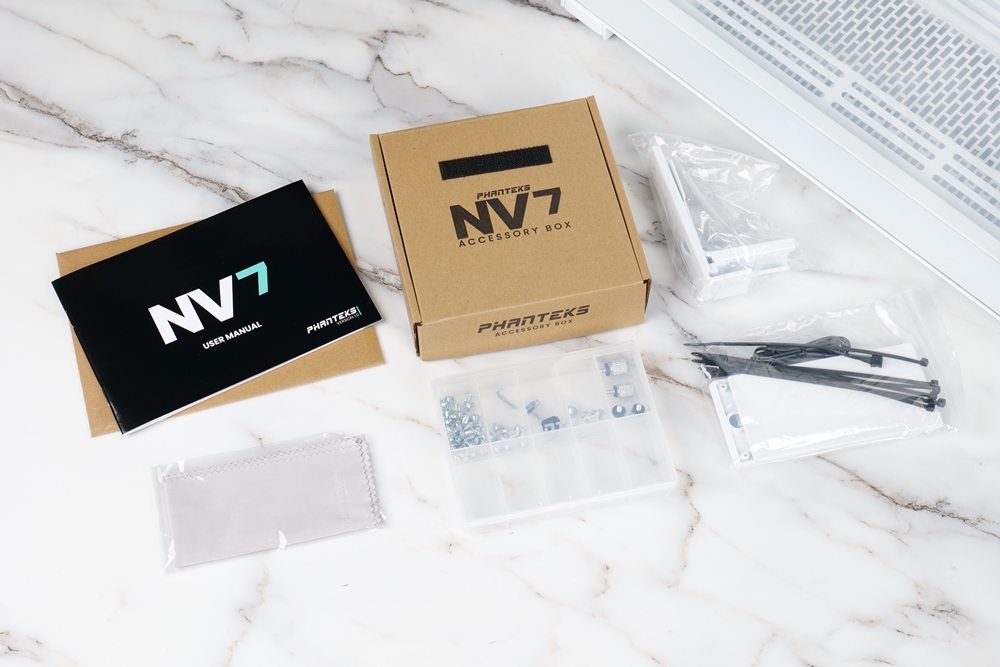
The NV7 maintains Phanteks’ excellent tradition of easy installation, with a well-designed cable management system on the back that makes cable routing hassle-free.
The Phanteks NV7 is a high-end case that excels in all aspects. Its pre-sales for the $300 kits in North America have already sold out prior to its official release. The estimated price in Taiwan dollars is around 10,000 yuan. If you’re interested in the Phanteks NV7, stay tuned for official news and updates.
If this article is helpful for you, please share this article with your friends on social media. Thank you!
This article is based on the personality of the reviews. You are responsible for fact-checking if the contents are not facts or accurate.
Title: Introducing the dual-sided glass panoramic tower! Presenting the Phanteks NV7 chassis